The process of installing a fence can be very costly, so it makes sense to get the best deal you can on materials. Fences should be built with quality, and the first step to building a quality fence is building a quality gate.
How hard is it to build a gate for your fence, how to build a gate for a chicken wire fence, how to build a gate for a welded wire fence? I’m making this tutorial primarily for wood wired gates. It’s easier to go from wood to wood. Plus when you are dealing with metal and rust you have other considerations. That’s why I believe the best option here is to build a gate from wood.

How to build a wire gate for a fence
In this post, we will show you how to build a gate for a welded wire fence. This is one of the best ways to make your property more secure and safe. We will also show you how to build a gate for your fence. You can use the same techniques for both types of gates. The only difference is that the second one is more complicated because it requires more work and materials.
If you want to know more about the materials used in this tutorial, please check out our article on how to build a gate for your fence.
Materials needed:
Welded wire
Nails or screws
Hammer or screwdriver
A wire gate is a type of fence gate that is made from wire. The most common type of wire gate is made from chicken wire, but it can also be made from metal mesh or chain link fence. A wire gate can be opened and closed by hand, but it often comes with a lock so that it can be secured when the yard needs to be closed off.
There are many different ways to build a wire gate for your fence. The first thing you need to do is decide whether you want a wooden or metal frame for your gate. A wooden frame will last longer than metal, but it will also take longer to build and cost more money. You should also decide whether you want your gate to open in or out when deciding on the size of your frame. If your fence has posts at the top and bottom of each panel, then you will want a double-sided frame with two hinges on each side so that the gates can swing both directions without hitting each other when opened simultaneously.
If you do not have posts at either end of each panel then you can build one single-sided frame with one hinge on each side, although this may cause problems if there are any large gaps between panels that need closing off with additional fencing materials like chicken wire
How to build a gate for your fence
Building a gate for your fence is something that you can do yourself. The first step is deciding on the type of gate that you want. You can choose between swinging, sliding and swinging gates. Sliding gates are great for small spaces while swinging gates tend to be better at keeping animals out. For an added touch of style, consider adding decorative hinges to your gate.
Once you’ve decided on the type of gate you want, it’s time to get started with building it. Here are five steps for building a gate for your fence:
Measure the opening where you want to install the gate. You will need this information when purchasing materials from a hardware store or lumber yard.
Purchase all necessary materials such as wood boards, screws and hinges from a hardware store or lumber yard. Make sure to get enough wood boards so that they overlap each other when laid flat on top of each other along their long sides (see image below).
How to Build a Gate for a Fence
Building a gate for your fence can be done in several ways. Some people prefer to build it themselves, but others would rather buy one that is already constructed and ready to go.
If you want to build your own gate, however, here are some tips:
Measure the opening of the fence and purchase the correct size of lumber for your gate. It should be about 1 inch wider than the opening so that it fits securely.
Cut two pieces of 2×4 lumber into 45-degree angles at one end of each piece (about 4 inches from the end). These are called “fence posts” or “gate posts.” Cut another piece of 2×4 lumber so that it fits inside both ends of each 45-degree angle (about 4 inches from either end). This will be used to attach the gate hinges later on in step 6. You will have four total pieces of 2×4 lumber when finished with this step**
A wire gate for a fence is a great way to add an extra layer of security to your property. They are also very easy to build, and can be customized for any size or style of fence.
A few tools you will need:
Wire cutter/stripper
Screwdriver
Drill/driver
Wire cutters (to cut the wire)
Hacksaw/saw (to cut the wood)
How to build a gate for a chicken wire fence
Fencing is not only used to keep animals in and out of the garden, but it can also be used as decoration. There are many different types of fencing available on the market today. However, if you need something that is easy to construct, then chicken wire fencing may be the right choice for you.
Chicken wire fencing is made from galvanized steel or aluminum that has been twisted into strands and then woven together with other strands in order to create a mesh that is strong enough for use as fencing material. Chicken wire fencing comes in both rolls and sheets, making it possible for you to use it for any type of project that requires fencing material such as animal containment or decorative purposes. This kind of fencing is typically used outdoors because it does not last long if left exposed to harsh weather conditions for an extended period of time without maintenance. Also, if you’re looking for privacy without spending too much money on expensive materials like vinyl or wood panels, then chicken wire can provide just what you need at an affordable cost
How to Build a Gate for a Chicken Wire Fence
If you’re trying to figure out how to build a gate for a chicken wire fence, there are many factors that can affect the outcome. You’ll want to take into account the size of the gate and its purpose. You may need to make adjustments based on how long you want it to be open and closed at any given time. If you’re just looking for something simple and easy, then this is the guide for you!
The first thing you need to do is measure the opening that needs to be covered by your new gate. Make sure that it fits inside of your fence by accounting for all of the materials used in construction. If it’s too large or small, then adjust accordingly until it fits perfectly.
Next, cut two pieces of wood that will span across both sides of your opening. These pieces should be longer than the distance from one side of your opening to the other so that they can overlap when placed on top of each other.*

How to Build a Gate for a Chicken Wire Fence
Step 1: Lay out the Gateframe
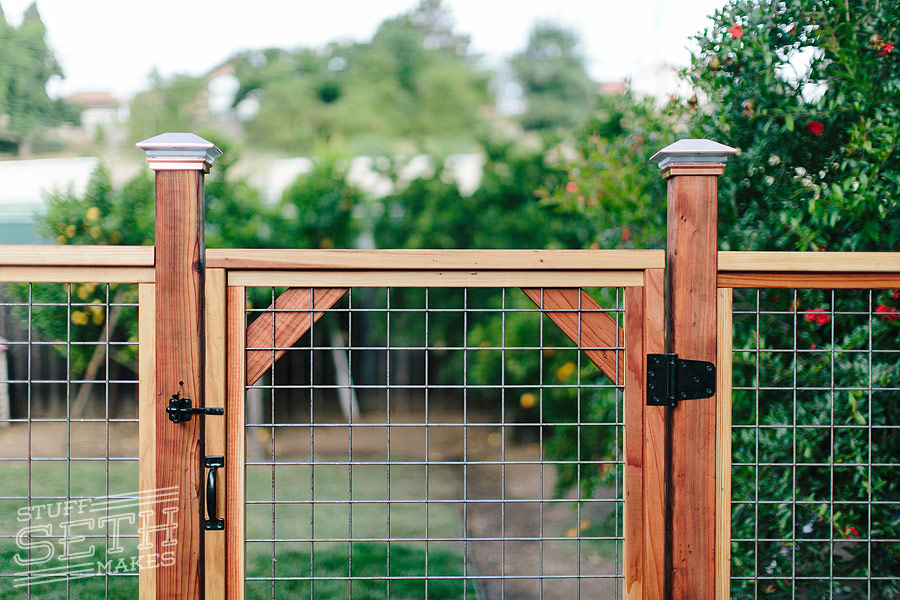
Lay out the gateframe and attach it to the fence. Use galvanized wire staples to secure it to the fence. The frame should be about 6 feet wide by 4 feet tall, with a diagonal brace near each corner.
Step 2: Attach the Top Bar
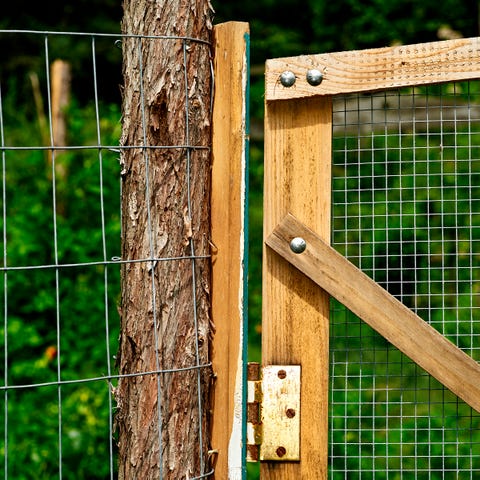
Attach one end of the top bar (1-by-2 inch lumber) to the top of one side of the gate frame with a metal strap hanger, then attach an eyebolt through it and into the top rail of your fence.
Step 3: Attach Lumber for Support
Measure down from this top piece, measuring from where it will hit the ground when installed, then cut 2-by-4 lumber pieces to go between them at this height. Attach these pieces with metal strap hangers as well; you’ll want them to be pretty close together so they don’t sag or bend under pressure from people pushing on them while going through your gate.
Gating is one of the most common fencing projects, and it’s easy to do. With a few tools and materials, you can build a gate for your fence.
The easiest type of gate to build is a non-latching gate. Non-latching gates open inward or outward by hand.
To build this type of gate:
Cut two 2x2s to the height of the fence rail that will support the gate. You can add extra support to these boards if needed by nailing them together with 2½” deck screws before attaching them to the fence posts.
Nail one side of each board to the top edge of each post, flush with its bottom edge. Then nail on a strip of 1×4 lumber horizontally between the two posts, about 4 inches from their tops and centered between them. The 1×4 should extend just below where the top edge of your horizontal slats will be installed later on this project. This helps lock everything together so it will hold up well over time.
Steel is a good choice for gates because it’s durable, sturdy and requires little maintenance. To build your own steel gate, you’ll need to buy some metal hardware and make some cuts with a saw. It’s also possible to buy a gate that’s already made if you don’t feel confident enough to build one yourself.
If you’re not comfortable making cuts with a saw or welding metal together, you can hire someone else to do those parts of the project for you. You can find companies that specialize in building fences online or through local directories like Yelp or Angie’s List.