I’m going to teach you how to build a shoe cabinet. Are you a shoe lover? Can’t find a place to store all the shoes in your house? What if we could turn them into toys for kids with autism and other developmental disabilities. Here’s how… You’ve just finished the ultimate shoe cabinet. Utilizing all new and shiny tools, techniques and skills you have assembled this thing of beauty. It’s time to nail (pun may or may not have been intended). Now, what are you going to do with that – it’s time for a blog post! Spending hours typing out a full blown tutorial is not your scene, but filling in the gap for an epic Facebook post just won’t cut it either.
Whether you’re selling shoes, or storing shoes, or just putting some shoes on display, a shoe cabinet can be a great addition to your retail store. However, that doesn’t mean that every shoe cabinet is created equal. Although shoe cabinets come in various shapes and sizes, it’s important to note that they all share similar features like: compartmental organization, affordability, and durability.

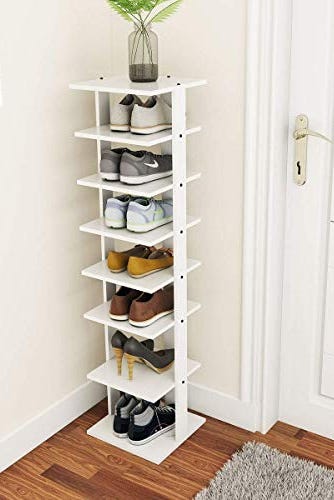
How to build a shoe rack bench
If you’re looking for a stylish, functional and affordable way to store your shoes, then this post is for you. In this DIY shoe cabinet tutorial, we’ll show you how to build a shoe cabinet that can be customized to fit your needs.
We’ll cover three different styles of shoe cabinets: a traditional open-shelf cabinet, a tilt-out cabinet with drawers and doors, and a wall-mounted shoe rack. But first…
What is a Shoe Cabinet
A shoe cabinet is essentially an attractive storage unit that holds multiple pairs of shoes in an organized manner. They come in many varieties and sizes so they can fit virtually any space in your home or apartment. They are typically made from wood or metal but can also be made with plastic or glass.
Why Build Your Own Shoe Cabinet
Building your own shoe cabinet is a great way to save money while still creating something unique that fits your needs perfectly! You can customize the size and shape to make sure it fits exactly where you need it most — whether that’s in the entryway or tucked away in the corner of your bedroom closet. You can even add doors or drawers if needed (see below).
:max_bytes(150000):strip_icc()/realitydaydream-ae1ddb59dcb544c6ae7013bc6a89c28a.jpg)
How to Build a Shoe Cabinet
If you love shoes, it’s hard to find a place for them all. And if you’re like most of us, you don’t have the space for a dedicated closet just for your footwear. Thankfully, there are plenty of ways to shoe-ify other parts of your home.
To get started, here are some different ways that you can use shoe cabinets in your home:
Shoe Storage Cabinet: A shoe storage cabinet is exactly what it sounds like — a cabinet designed specifically to store shoes. These come in all shapes and sizes and can be positioned anywhere in your home where there is room for them. If you don’t have enough space in an existing closet or room, consider building an extra closet or shelving unit with shelves specifically designed for storing shoes.
Tilt-Out Storage Cabinet: A tilt-out storage cabinet is built into the wall at an angle so that when opened, it provides easy access to stored items without taking up much floor space (or even appearing on the floor). For example, if you have a small entryway or mudroom area where you want to store coats, bags and other items that need quick access when entering or leaving the house but not
If you love to wear heels and have a lot of shoes, then a shoe cabinet is the best way to store your footwear. If you do not have space, then this idea will help you. You can make your own shoe cabinet in an hour or two.
If you want to build your own shoe cabinet, then follow these steps:
Measure the area where you want to put your cabinet. Make sure that it has enough space for all of your shoes. You can also use an old piece of furniture or a discarded one like an antique table or dresser.
Now measure the wall where you want to hang or place it on top of it. The back must be at least 10 inches from the wall so that the door will open easily and not hit against the wall when opened fully. Also ensure that there is enough clearance for arranging and removing shoes from inside the cabinet without hitting them against each other while doing so. Once done, cut out a piece of plywood or MDF (medium density fiberboard) according to these measurements with a jigsaw or circular saw depending on what type of material you have chosen; if using plywood make sure that it’s not warped as well as cut perfectly square corners as well as smooth edges so that no
I have here a step by step tutorial on how to build a shoe cabinet. I used pine for my project but you can use any type of wood you like. The dimensions are for the top and bottom shelves and the sides are 2×4’s. I built my shoe storage cabinet with 2 doors but there is no reason you couldn’t make it without doors. This is an easy woodworking project that anyone can do!
1. Cut all your pieces first then assemble
2. Attach the side panels to their respective sides with 2-1/2″ screws (or dowels) through the inside of each panel into the side rails
3. Attach the back panel to its respective side using 2-1/2″ screws (or dowels) as well
4. Attach the bottom shelf using 1-1/4″ screws (or dowels) through from behind into each corner of the bottom shelf and into each side rail as shown in figure 5 below
5. Attach your hinges to the top of your cabinet back panel so that when you open it up it folds down flat against the back of your shoe cabinet (see figure 6 below for more details)
6. Attach your hinges to one
How to Build a Shoe Cabinet
A simple, open-fronted cabinet is the perfect solution for your shoes. This design is ideal for families with lots of shoes and limited floor space.
If you have a small area to work with, or just want something that looks nice, this basic shoe rack design is an easy way to keep your shoes organized and accessible. You can build this shoe cabinet with just a few power tools and materials from your local home center or lumberyard.
Build a Shoe Cabinet
1. Cut two pieces of 1×6 lumber (1-3/4 x 5-1/2 in.) to the length of the base of the cabinet. These will serve as side pieces and will be attached to both ends of the bottom piece using pocket screws. Use glue and 2-in.-long screws in addition to pocket holes drilled through each end of each side piece into the bottom piece and predrilled holes in each end of each side piece into the top piece if desired (photo 1). If using pocket screws, drill 3/16-in.-deep pilot holes spaced every 8 in., then drive countersink screws in from
How to Build a Shoe Cabinet with Doors
A shoe cabinet can be a great addition to your living room or bedroom. It is not only functional but also looks amazing in any space. You can use the cabinet to store your shoes and other accessories. This will help you save some space, as well as keep your shoes organized and clean. You can even build one yourself if you have some woodworking skills. In this article, we will show you how to build a shoe cabinet with doors to store your shoes in style.
Planning Your Shoe Cabinet
To build a shoe cabinet, you will need some basic tools and materials such as plywood sheets, screws, sandpaper and paint brushes. First, you need to measure the space where you want to place the cabinet. Then take measurements of each drawer size so that all drawers are uniform in size. Make sure that the height of each drawer is uniform too so that they fit perfectly into the cabinet later on. Once all these measurements are done, cut out plywood sheets according to these measurements using a saw or jigsaw machine.
How To Build A Shoe Cabinet: 10 Steps (with Pictures)
Shoe racks, cabinets and displays are useful for organizing your shoes. They can also be used as decorative items that add style and beauty to your home decor. Here is how you can make one at home:
Step 1: Gather all the tools and materials required to build the cabinet
Step 2: Measure the size of the door frame and cut plywood sheets accordingly. Make sure that it fits inside the door frame when assembled. Cut one side vertically so as to get two pieces of identical length. Make cuts at appropriate distances depending on how many shelves you want in the shoe rack cabinet. Use glue and screws to join them together.
The first step in building a shoe rack cabinet is to select the wood for the project. If you are using pine or another softwood, then you can use 2 x 4s and 1 x 4s to build the cabinet. If you are using oak or other hardwood, then it’s best to use 2 x 4s and 1 x 6s.
To build a T-shaped shoe cabinet, use two 2 x 4s as supports and one 2 x 4 as the back support. Then cut two 1 x 6s into two equal lengths. Use these two pieces of board as the sides of your shoe cabinet. Attach these boards to each side of your support boards with hinges so that they can swing open when it’s time to add new shoes.
Cut the top piece of wood into an L shape so that it fits overtop of your boxes when they are folded up on top of each other. Use hinges to attach this piece in place so that it folds down when not being used and allows easy access to your shoes inside the box compartments.
How to build a shoe cabinet
The process of building a shoe cabinet is quite simple. You need to follow these steps:
Cut the plywood sheets, if necessary.
Assemble the frame and the top of the shoe rack with 2 1/2-inch corner brackets. The legs should be placed on the bottom part of the unit.
Attach the horizontal slats to the sides of your cabinet using 1 1/4-inch nails.
Attach doors to both sides of your cabinet using 1 1/4- inch nails and hinges.
How to Build a Shoe Cabinet
To build a shoe cabinet for your closet, you will need to know a few basic carpentry techniques and tools. You can make this project with just hand tools or you may want to use power tools for certain steps. The type of wood used depends upon the quality of finish you desire and whether you plan to paint or stain the shoe cabinet.
Tools and Materials:
Hammer
Drill with bits in both small and large sizes
Clamps
Wood glue
Sandpaper (100-grit)
Caulking gun and caulk (for finishing)