A vent hood is a really useful kitchen appliance when using gas and electric stovetops. It’s propduct codenamed “chimney” is a necessity in most cooking gourmet fanatics’ possession. There are many types of vent hoods on the market today with something for every budget and situation. They come in a variety of colors to coordinate with your kitchen decor: white, black, red, stainless steel, etc. In this article, we’ll discuss the advantages of owning such an appliance and how to choose the perfect one for your residence or business.
There are many benefits to having a vent-hood in your kitchen over your range. First, it looks better than having a hose hanging out of your window. Second, the hood doesn’t leak grease on your walls or cabinets. Third, there is not odor in you home when you are cooking. These are just some reasons why you want one, how to install a range hood vent through ceiling, range hood cover kit.

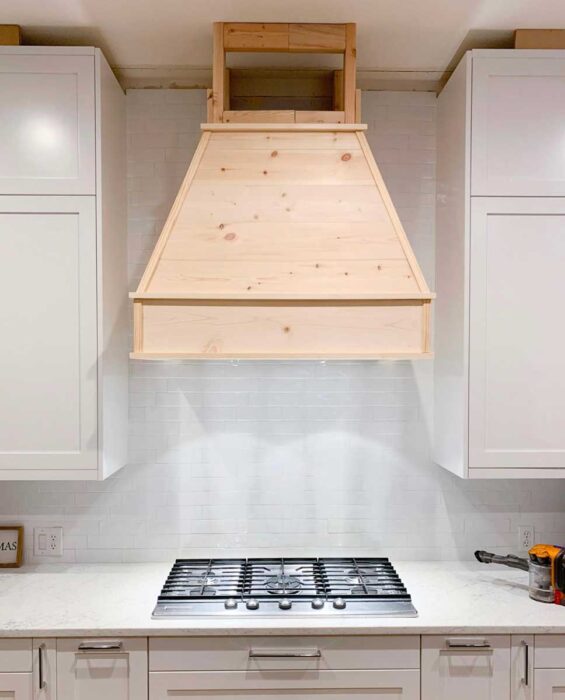
How to build a vent hood
I’m going to show you how to build a vent hood. Now this is for our kitchen. We have an electric stove and there’s no way that I can put an exhaust fan over it because of all the water and steam that would come out of it. So instead, I’m going to use this ducting that I’ve got here. It’s flexible aluminum. So I can bend it around any obstacle that’s in my way.
Now we need something on the other side of this wall so that we can connect these two pieces together before they go up into the ceiling. So what I’ve done is, I’ve taken some galvanized steel wire mesh and just wrapped it around here like so, just so we can attach these two pieces together so that they won’t move as much when we try to get them through the wall over here on the other side of our kitchen island here.
Installing a range hood vent through the ceiling is a good way to hide the duct work and make your kitchen more attractive.
The first step is to cut a hole in the ceiling for the duct. You can use a circular saw, but if you have access to an reciprocating saw, it will make the job easier and faster. In either case, wear eye protection and ear protection because metal blades can throw sparks and fly out of the hole as you cut through it.
Once you’ve made your hole, measure from the outer edge of the hole to the center of where you want your range hood vent to be located on the wall below it. Cut another piece of sheet metal that size with tin snips or with a handsaw if necessary (you can also use scissors). Attach this piece of sheet metal by using screws to fasten it securely in place inside your existing opening.
Now attach an elbow connector
Step 1: Find a location for the new range hood. The location should be at least three feet away from any combustible materials, such as cabinets and walls.
Step 2: Identify the ceiling joist locations with a stud finder. They are often 16 inches on center, but check with your local building code.
Step 3: Drill holes through the sides of the box where you want to attach it to the ceiling joists. Use 3/16-inch bit and drill into each joist at least twice, making sure that your bits don’t slip out of the hole when you are drilling through them (use a scrap piece of wood as backing). You can also use 1 1/2-inch screws instead of nails if you prefer.
Step 4: Attach the box to one of your joists using four nails or screws per side (eight total). Make sure that it is securely attached before proceeding with installation.
Step 5: Measure from your ceiling down to just above where you want your vent hood to hang from, then cut two pieces of drywall or other material (such as plywood) to fit this space exactly between two joists. Cut each piece approximately 4 inches longer than what is needed so that when
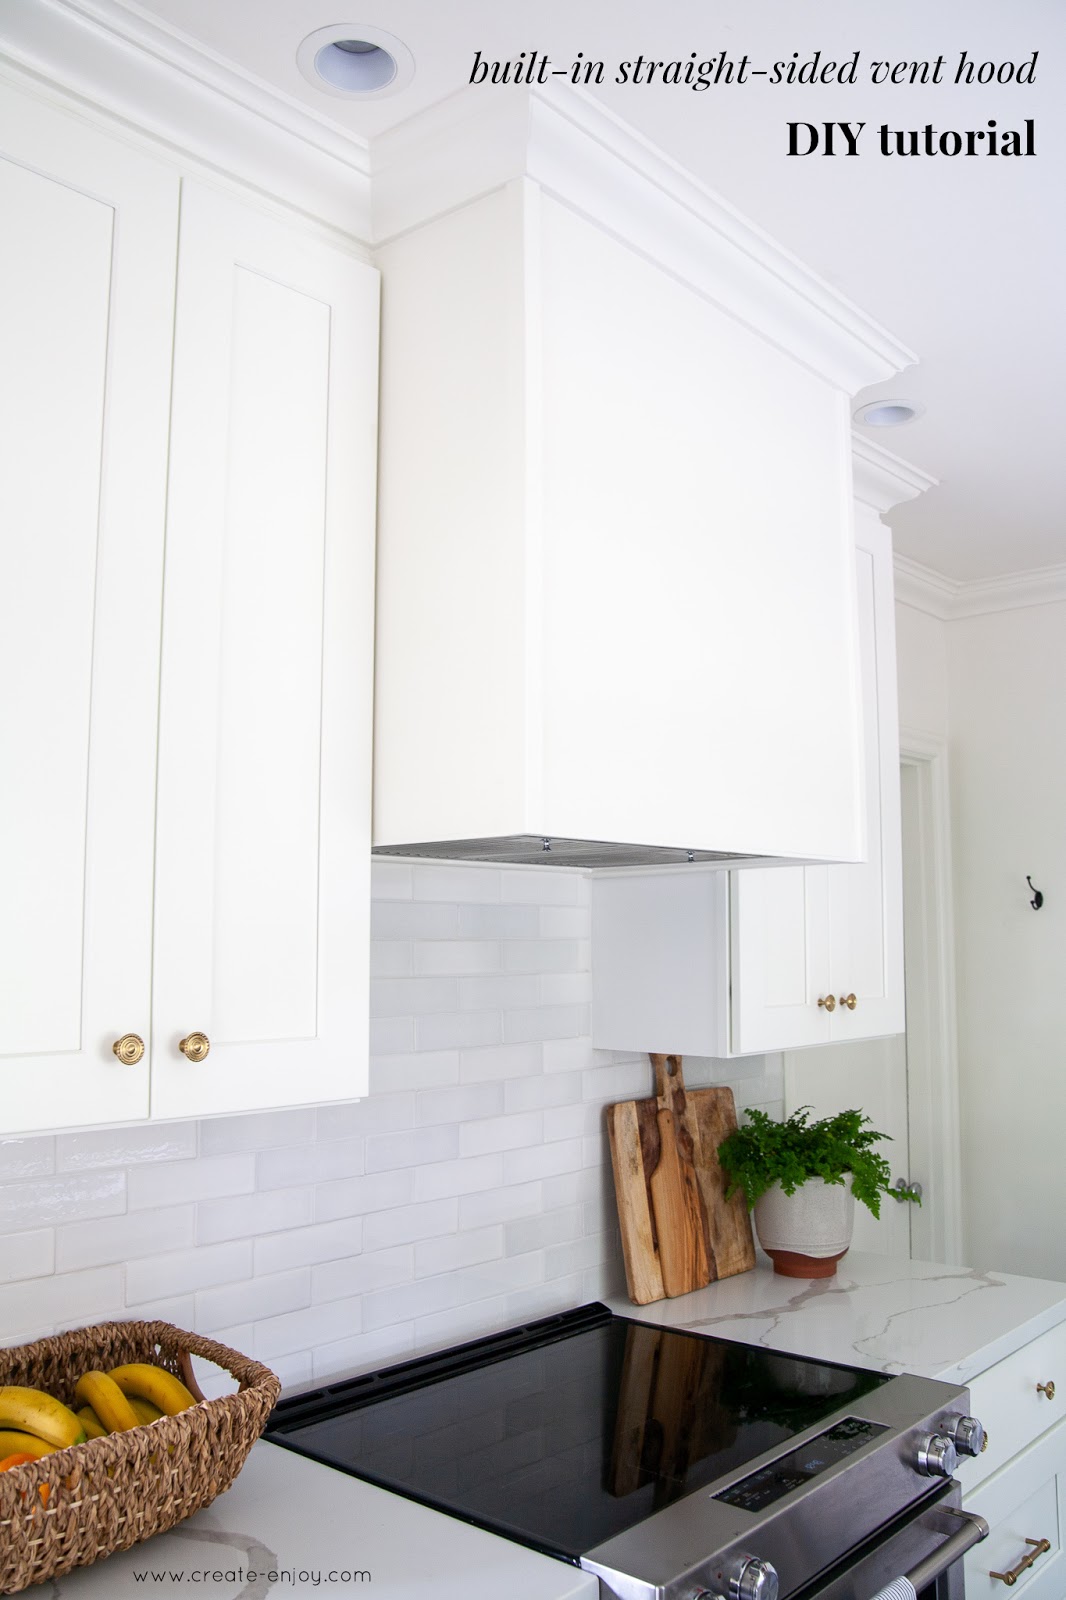
How to Build a Vent Hood
A vent hood is a system that pulls the heat and moisture out of your cooking area. You can install a range hood yourself, but you will need to buy some parts and materials from your local hardware store or home improvement center. You may also need to hire an HVAC contractor if you don’t have experience with mechanical systems.
Before installing your new vent hood, make sure that it’s appropriate for your kitchen. The best type of hood for your home depends on its size, layout and other factors. If you’re not sure which model is right for you, talk to a professional who can help determine what kind of range hood is best for your kitchen.
Step 1: Measure Your Kitchen Space
The first step in building a vent hood is measuring the space where you want to install it. Take measurements of the width and height of the space at eye level so you know how big of an opening you need in order to fit the new vent hood overtop of the stovetop and sink area. Use these measurements when shopping for parts at home improvement stores or online retailers like Amazon or Home Depot so you know what sizes are available for each part that makes up your kitchen ventilation system.
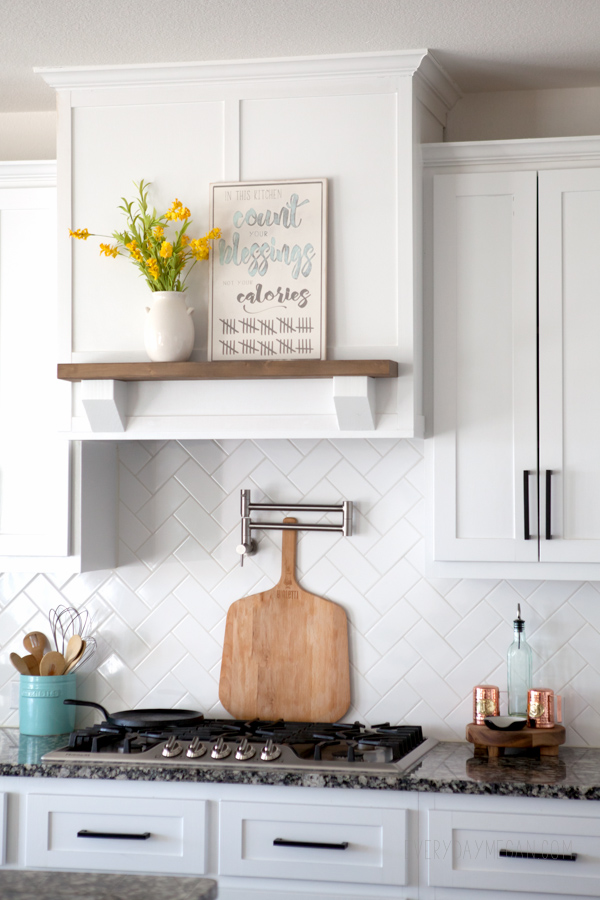
The range hood is a very important part of your kitchen. It’s the one thing that keeps your kitchen from smelling like burnt food.
Range hoods are also great for improving the look of your kitchen. They’re not just for looks, though. They also have other functions that may not be as obvious.
If you don’t have a range hood in your kitchen and you’re thinking about installing one, there are many things you need to know before buying a range hood. There are also many different types of range hoods available on the market today.
The most common type of range hood is called an under-cabinet mounted range hood or UCRH for short. These are small units that sit below a cabinet on top of an existing stovetop and they do not require any major construction work or special installation tools or skills to install them correctly.
You can buy these at any home improvement store or online store like Amazon or eBay. The price will vary depending on how many options you want included with them such as LED lights, remote controls and even Bluetooth connectivity so you can control it from your phone!
How to install a range hood vent through ceiling
Range hoods are a must-have in any kitchen, but they’re not always easy to install. The solution? A range hood cover kit that makes it easy to install a range hood vent through the ceiling.
The range hood cover kit is a simple DIY project that allows you to easily cut through your ceiling and put the vent where you want it without making any permanent changes to your home’s structure.
Here’s how:
Step 1: Measure Your Ceiling Height
The first step is measuring the height of your ceiling. You need this measurement so that when you cut through the drywall with your saw blade, you know exactly where the top of the vent should be positioned over the stovetop opening.
Step 2: Mark Out Where You Want Your Range Hood Vent
Next, mark out where you want your range hood vent on each side of your stovetop opening. Make sure there’s enough room around each opening for an elbow pipe connection (if there isn’t already).
How to Install a Range Hood Vent through Ceiling
Installing a range hood vent in the ceiling is not difficult. The first step is to determine where the outlet will be located. A range hood vent should be installed at least 30 inches above the cooking surface. You also need to make sure that your range hood venting system is sized properly for the amount of air being pushed out by your hood. This can be determined by measuring the height and width of your kitchen and multiplying them together. If this number is less than 400, then you can use a 4 inch round duct for your venting system. If it’s between 400 and 450, then use 5 inch round duct, etc..
Next, cut a hole in your ceiling using a circular saw with a sharp blade or drywall saw. Make sure to wear eye protection and dust mask while cutting through the drywall because there will be dust flying everywhere! Once you have made it through the drywall, measure the size of your duct and cut it down to size if necessary (if you bought 4 inch round duct). Then apply some adhesive caulking around all sides of the duct where it will overlap with framing members such as 2x2s or 2x4s that support your ceiling joists
Installation of the range hood is fairly easy and simple. The first step is to cut the hole in the ceiling and install the ducting for the exhaust system. You can use a jig saw or reciprocating saw for this job. The next step is to mount the fan to the wall, connect it with ducting and then connect it with an electrical outlet. The last step involves connecting your new range hood with power source and testing it for functionality.
If you need help installing your new range hood, please watch our installation guide video above or call us at 800-398-0240 for assistance
How to install a range hood vent through ceiling?
To install a range hood vent through ceiling, you will need:
-a drill with bits and driver bits;
-screwdrivers;
-a tape measure;
-a level;
-a pencil and marker;
The first step is to mark the location of the new duct on the drywall. To do this, first measure and mark the exact location of the existing duct opening on the ceiling by using a level as a guide. Then, use a chalk line or similar tool to draw a straight line between these marks and make sure it intersects with the centerline of your new duct’s location. Next, use your drill and appropriate bit to create holes into drywall where your new duct will go. These holes should be just large enough for screws to fit through easily without damaging them.
The first step to installing a range hood vent is to measure the hole in your ceiling and cut a hole in it. You do not need to cut a square hole, but you should make sure that the hole is big enough for the hood to fit through.
Next, measure and cut the ducting for the range hood vent. The ducting should be long enough so that it can reach from the top of your wall all the way up into your attic space where it will terminate at a vent cap.
Place the ducting onto the outside of your house and screw it into place using self tapping screws.
Now, lay out some masking tape on the floor and mark off where your new range hood will be sitting on top of this tape line. This will tell you how far back from this line you need to cut away from your existing walls so that they don’t interfere with your range hood installation process later on down the road.