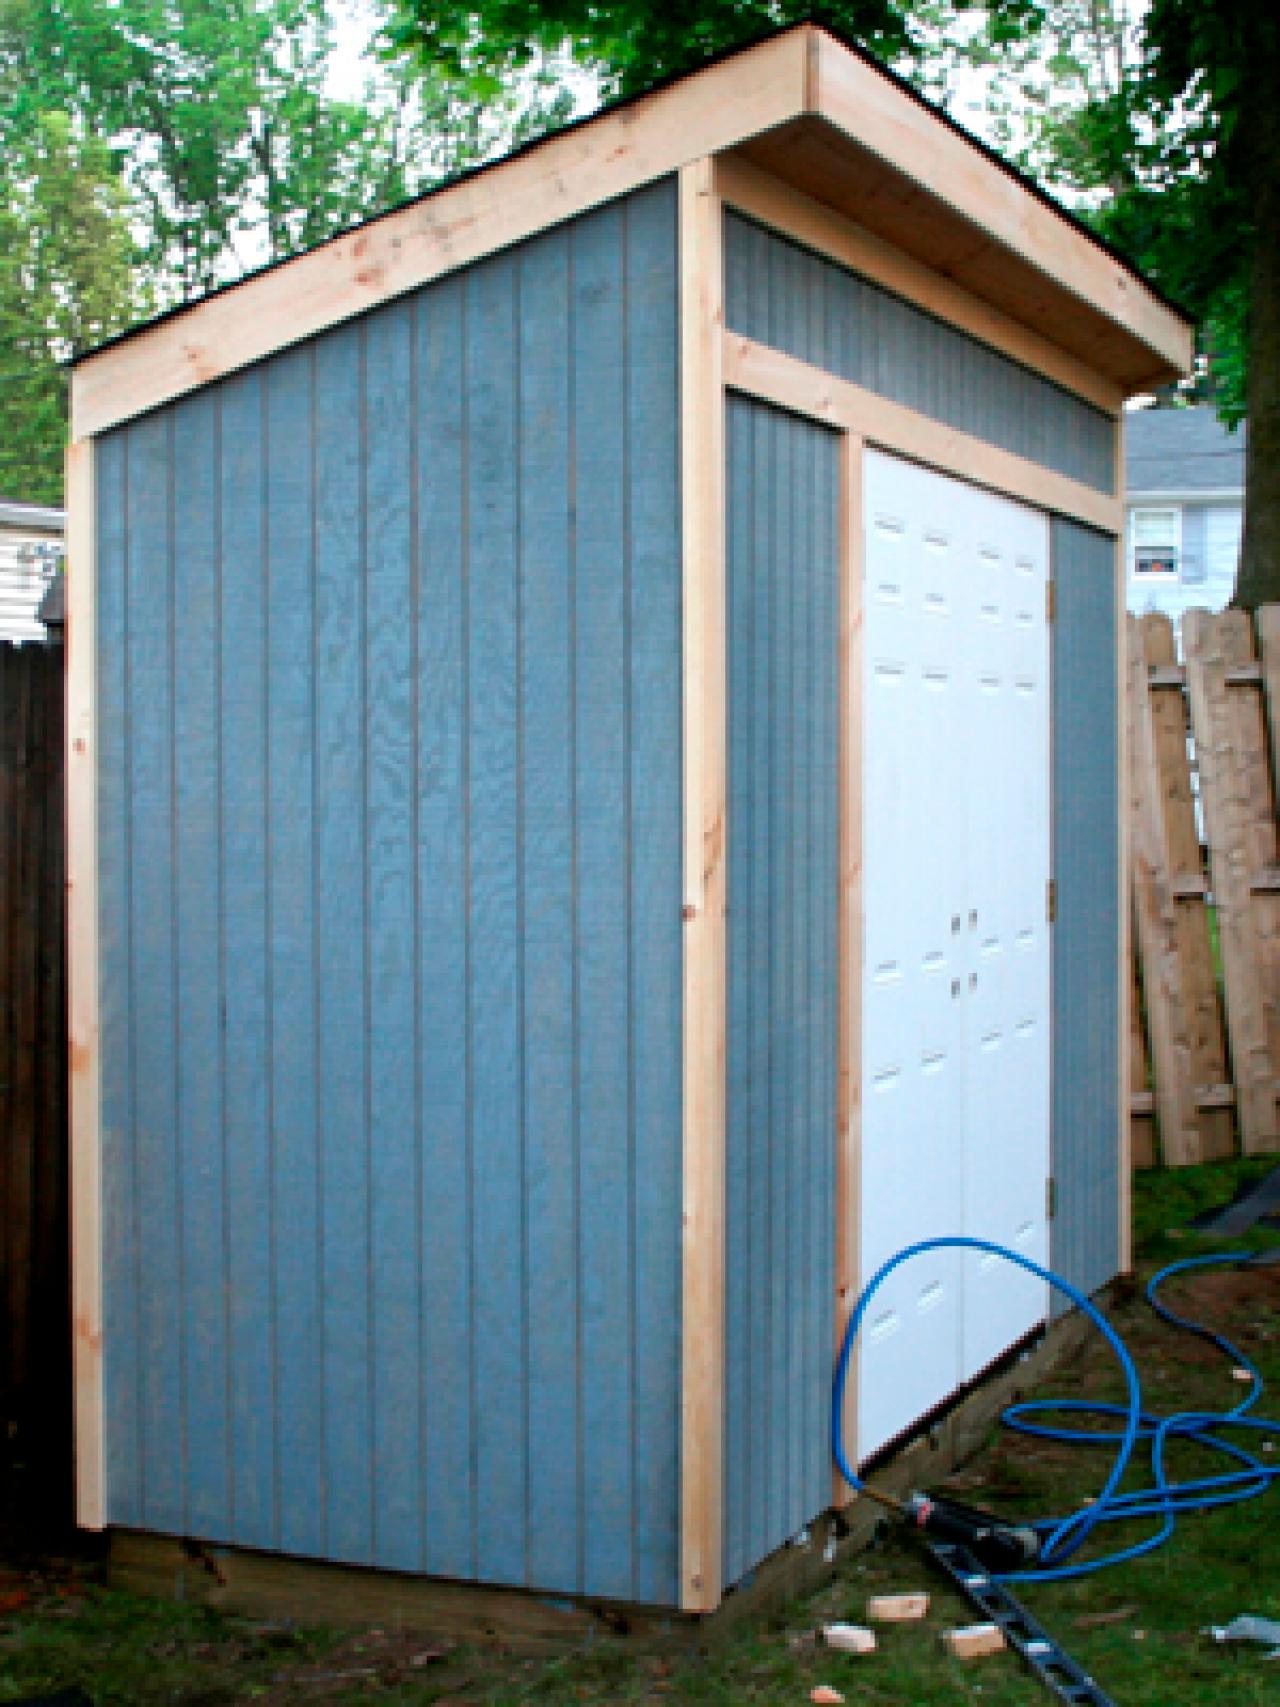
Building a shed is a great DIY, backyard project for the home handyman. Sheds are useful storage spaces that can be used for a variety of purposes–gardening tools, sporting goods, household storage and so on.
How to build a utility shed, how to build a ramp for a utility shed, how to build a small utility shed: Get the right size shed to suit your needs Carve out sufficient space for all your equipment How to easily build walls and a roof without paying a cent

How to build a utility shed
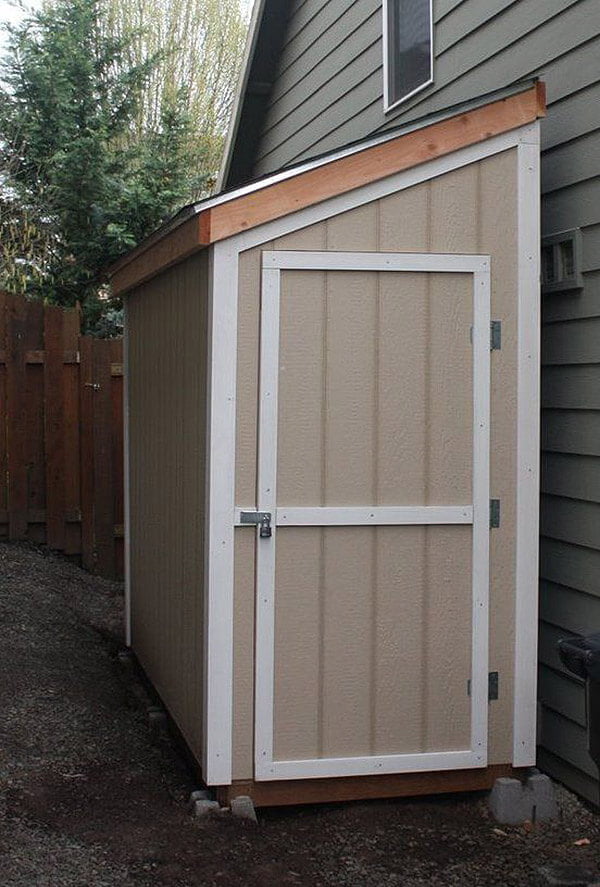
A utility shed is a small, detached structure that provides extra storage space for lawn and garden tools, bicycles and other items. Utility sheds are made from wood or metal, and come in a variety of sizes and styles. While it’s possible to purchase a pre-made shed, building your own utility shed will save you money, allow you to customize the size and shape of the shed to suit your needs and provide you with an additional project that can be completed over several weekends.
Step 1: Choose a Location
Choose a location for your utility shed based on how much space you need and how much light gets into the area. Utility sheds should be located in full sun for at least six hours each day for maximum ventilation (full sun exposure helps prevent mold growth). If you plan to store flammable materials in your utility shed, such as rags or oil-based paints, place it away from any trees or shrubs that could catch fire if ignited by sparks from power tools during use.
Step 2: Build a Foundation
Build a foundation for your utility shed before installing walls or framing up the roof. A concrete slab will provide better insulation than any other material used for foundations because it provides direct contact between the ground below
If you’ve decided to build a utility shed, you’re probably wondering how to go about doing it. This guide will walk you through the process, from planning and design to construction and completion.
Building a shed from scratch can be a great way to save money and have exactly what you need for your tools and equipment. You can even turn your shed into a guesthouse or small cottage on your property!
Step 1: Planning and Design
The first step in building a utility shed is to decide what you want it for. Do you want just enough space for your lawn mower, or do you want a large space for storing all of your gardening tools? Will it be attached to your house or freestanding? Will it be larger than 10 feet wide by 12 feet long? These factors will determine whether or not it needs an additional foundation built under it.
Another important factor is whether or not there is enough room on your property for a shed in the first place. If there isn’t, then you may need to consider building one on another part of land that you own (or renting) instead so that there is enough space for all of the items that need storing inside it.

Here are some of the best things to consider when building a shed.
1. Location
The first thing to consider is where you want to place your shed. You need to make sure that it’s in a location where it won’t be disturbed by the elements or people and animals. If you plan on using it for storage, then you should place it close to your house as well as other items like lawn mowers, garden tools and other things that may need some extra room for storage.
2. Size
The next thing you should consider is the size of your shed. We recommend going with at least 8’x8′ for an average sized shed or 10’x10′ for larger ones. The larger the size of your shed, the more space it will have available and the more items you can store inside of it!
3. Appearance
When choosing how to build a utility shed, one thing that is often overlooked is appearance! While this isn’t an important factor when choosing where and how big your shed should be, but having a beautiful looking building in your backyard can make all the difference!
Utility sheds are a great way to create storage space in your backyard. You can use them to store lawn mowers, bikes, sports equipment, or other items that you don’t have room for in the garage. This article will show you how to build a shed from scratch.
The first step is to determine what size shed you need. If you want to build a small shed that will fit just one car, then it needs to be at least 10 feet wide by 12 feet long. For a larger shed that can fit two cars, it should be 12 feet wide by 16 feet long.
The second step is to buy the lumber and materials needed for construction. You’ll need lumber for framing and other parts of the shed such as siding, roofing material and flooring. You’ll also need tools like hammers and screwdrivers as well as nails and screws for putting everything together once your project is underway.
The third step is to assemble all of your materials in one place so that they’re ready for use when needed during construction of your new utility shed.
The fourth step is to assemble all of your materials in one place so that they’re ready for use when needed during construction of your new utility
There are several ways to build a shed and all of them are relatively simple. The most basic way is to simply purchase a kit from your local hardware store, which will include all the materials you need. You can also purchase the materials separately and put it together yourself.
If you want to get a little more creative with your utility shed design, there are many ways to do so. For example, if you want more space inside, you can add on an extra room or two onto your shed. You can also make it look like a barn by adding on a loft above the main part of the building or transforming it into a playhouse for children by adding windows and doors in front of the door that leads into the main part of the building.
How to build a ramp for a utility shed
A ramp is an excellent addition to your shed, especially if you are planning on using it for storage. The ramp will allow you to easily get heavier items into the shed without having to step up onto the deck. This can be especially handy if you have bad knees or other joint issues that make it difficult to lift heavy objects.
The first thing you need to do is decide what type of material you want your ramp to be made from. You can choose between concrete, wood or metal. Concrete is the most expensive option; however, it will last longer than any other type of material and it won’t warp like wood can. Wood is less expensive than concrete but still lasts longer than metal, which can rust over time. Metal is also quite heavy and hard to work with compared with wood or concrete.
If you’re going to use concrete for your ramp then you’ll need some help from an expert contractor who knows how much concrete mix will be needed for your project and how much gravel will be needed as well.
When you’re designing your shed, you may want to include a ramp for access.
A ramp is a great solution for utility sheds because it provides easy access for lawn mowers and other large items. Plus, it makes it easier to get on and off the lawnmower without having to step off the side of the lawnmower and onto uneven ground.
You can build a ramp on any shed that doesn’t have one already. And if you’re building a new shed from scratch, consider adding a ramp from the beginning. A simple shed with an attached slide-out room will work best for this project because you can use the same frame that supports the rest of your structure for support in building your ramp.
Here are some tips for building a ramp on your new or existing shed:
Measurements
Use wood 2×6s cut into lengths that give at least 6″ of vertical clearance when installed (more than 6″ is better). This will ensure there’s enough space between each step so users can comfortably walk up or down without tripping over each other while they move around their property.
You can use either pressure-treated lumber or cedar if you don’t mind having green stairs rather than
How to Build a Shed Ramp
If you have a shed that’s not accessible, you’ll need to build an exterior ramp. You can make the ramp as simple or as elaborate as you want. The materials and tools required are relatively inexpensive, and it will take less than half a day to complete.
Step 1: Stake Out the Path
Measure down from the ground to where you want your ramp to end. Mark this point with stakes and string. Use a shovel to dig out the area where the ramp will go. Keep the edges of the path at least 6 inches higher than the surrounding soil so that water flows away from it.
Step 2: Create a Strong Foundation
Dig out an area in front of your shed door that is just large enough for two 4×4 posts set on their sides and buried 3 feet deep into the ground on either side of your door opening. Cut two 4×4 posts for each corner of your shed’s door opening and nail them in place so they’re flush against each corner of your door opening with their tops even with each other’s tops and buried deep enough into the ground (about 3 feet) so that when set on their sides they’re about 6 inches above ground level when viewed from outside
If you’re looking for a way to make your shed more accessible, a wooden ramp is a good choice. Ramps can be designed for any type of shed and don’t take much time to build. They’re also easy to disassemble when not in use.
A ramp can be constructed from any material that’s strong enough to support the weight of a person or object. Wood is the most common choice because it’s easy to work with and is relatively inexpensive.
The design of your ramp will depend on the size and shape of your shed, but there are some basic principles that apply across all projects:
Make sure there’s enough room between the ground and the bottom edge of your door so that users can comfortably reach it without bending over too far.
Make sure it slopes gently — no more than 1-2% — so that it’s easy to get up and down safely.
What you will need:
2x4s
2x6s
Treated lumber
Door hardware and lock set
Fence post material
Concrete mix and concrete forms (optional)
Step 1: Lay the Foundation
You’ll want to build a foundation for your shed, especially if it is going to be on a slope. If you are planning to mount it on a flat surface, skip this step. For sloping ground, set your posts into concrete footings that have been poured in place. For a level surface, use pressure-treated or rot-resistant lumber as your posts instead of concrete. Step 2: Build the Walls and Roof Frame
Use 2x4s to frame the walls with the 2x6s running along each side as headers. Cut notches into these headers so you can fit them together easily without having nails protruding through both sides of the wall. Use treated lumber for all other framing components except for the door frame. The door frame is made using 2x6s because they are stronger than 2x4s. Frame out all four walls first before you move on to adding siding or roofing materials.