With so many of you to love, how do you choose which pieces to bring home and make a part of your family? I’m sure you’re looking for items that will stand the test of time, but also complement your existing collection. Believe me, it’s a challenge (but don’t tell my husband). Today, we’re going to talk about how to build a side table with drawers and how to build a side table out of wood
Building furniture can be an extremely rewarding activity, especially when you finish your masterpiece and are able to use it in your home. Many people get their start in woodworking by taking classes at craft schools or community colleges. While there may not be specific courses on building specifically a side table, there will be courses on different types of furniture such as tables, chairs and cabinets. There are also many guide books that can assist you with the basics of getting started in furniture making. I’ve done roughly a dozen side tables, and although each one is different and I’ve changed up the plans in each case, here is one way you might consider making a simple side table with drawers./cdn.vox-cdn.com/uploads/chorus_asset/file/19494700/00_side_table_x.jpg "How to build a side table")
How to build a side table
In this article, we are going to learn how to build a side table with drawers. This is an easy project and can be completed in just one day. Let’s get started!
The first step is measuring and marking the wood. You will need to mark out the measurements on your wood using the tape measure and pencil. Once you have marked all of your pieces, you can start cutting them with the jigsaw or other appropriate saw.
Next, you will need to sand down each piece so that they are smooth to touch and also have a nice finish on them. This will ensure that they look good when they are finished and also make them easier to handle when painting or staining them later on down the road.
The steps below will help you build a side table with drawers. This project is a great option for beginners and intermediate woodworkers alike. The simple design makes it easy to build and the result is a beautiful piece of furniture that will last for years to come.
Step 1: Make the Legs
Step 2: Assemble the Legs
Step 3: Attach the Top
Step 4: Cut Out the Drawer Sides
Step 5: Cut Out the Drawer Tops
/cdn.vox-cdn.com/uploads/chorus_asset/file/19494616/2010_11_09_20345.jpg)
Building a side table is a great way to add extra storage space and style to your home. You can build a simple side table with just four pieces of wood and some screws.
Step 1: Cut the Legs
Measure the length and width of your table top, then cut two legs to match each dimension. Use 3/4-inch thick lumber for the legs, which will give you enough space in the center of each leg for an angled hole that will hold your tabletop. Cut one leg at a 45-degree angle on one end so it fits into the corner of your table frame like an L-shaped bracket. Make sure both measurements are equal; otherwise, one leg will be shorter than the other when you put them together.
Step 2: Drill Holes in Your Legs
Using your jigsaw, cut out a notch about halfway up each leg so it fits around the edge of your tabletop. Next, drill holes through both ends of each leg about 4 inches from the bottom (for stability) and about 2 inches from either side (for attaching). Make sure these holes are centered vertically between the notches on each end.
This is a simple side table that has drawers. It is made from pine wood, which is an inexpensive material to use for the project. The total cost of the project was around $45 and it took less than 3 hours to build.
Materials:
– 2x4s (8)
– 1x3s (6)
– 1x2s (1)
– plywood (1/4″ thick) – enough to cover all sides, top, bottom and back panel of the table plus 1/2″ extra on each edge for finishing
Tools required:
– circular saw or table saw (#1) and miter gauge (#2)
– jigsaw or coping saw (#3)
A side table is a great addition to any home, and it’s easy to build. Our side table plan shows you how to make a simple, inexpensive piece of furniture in just a few hours. You can build this project with just a circular saw, drill/driver and an inexpensive router kit.
1 Cut the Side Table Top Pieces
First, cut the tabletop pieces from 3/4-in.-thick plywood with your circular saw. Use the dimensions shown in our plans as a guide. Next, cut two pieces of 1×3 wood to length for the legs (ours were 36 in.). Mark the legs 3/2-in.-thick x 14-in.-long) and attach them to each end of the tabletop with 2-in. screws or nails.
2 Attach the Legs
Flip over the tabletop and position it on top of two sawhorses so that it’s level front to back and side to side. Then attach the legs by driving screws through them from underneath into either end of each leg (photo 2).
3 Cut Out the Lower Shelf
If you want to know how to build a side table out of wood, then this article is for you. A side table can be a great addition to your living room, bedroom or dining room. The table can be used as a place to put your beverages or snacks while you sit on the couch or enjoy your meal at the dining table. Side tables are also great for putting magazines and other reading materials on so that they are within easy reach.
When building a side table it is important that you choose the right wood and have all of your tools ready before beginning the project. You will need some 2x4s and some plywood sheets as well as screws, nails and glue. You will also need some paint if you want to make your table look nice and bright!
You may wish to build this table from scratch (which isn’t too difficult) or buy one from a store instead of making one yourself but if you do want to make one it would be ideal for children who are learning about construction techniques in school or for adults who want to improve their skills in carpentry!
How to Build a Side Table Out of Wood
Side tables are commonly used as extra surfaces to hold objects or serve things on. They’re also often used as a place to sit down and rest your feet. If you have a nice piece of wood and want to make yourself one, this article will show you how to build a side table out of wood.
Step 1: Measure the Legs
The legs should be about 28” long for this project, so measure them out and cut them off at 26 inches with your miter saw or jigsaw. Then, measure in from the top of each leg at 8” on each end and draw lines from there down to the bottom of the leg. This will give you an angle that is about 30 degrees for each leg. Cut along these lines with your jigsaw or circular saw (if you have one). Then put on safety goggles, because it’s time to cut through all four sides of each leg with your jigsaw! You’ll want the blade set at 2-3/8″ high so it can fit through all four sides without hitting any screws or nails inside the wood. Don’t worry if you don’t get it perfect because we’ll be sanding off any rough edges later anyway!
I have a lot of spare time on my hands, and as such I have been building a lot of things. One of the things I’ve made is a side table with drawers.
The table is built out of pine and has three drawers. The top drawer is locked, while the other two are not.
It’s not exactly the most complicated piece of furniture, but it was fun to make and it looks good in my living room.
Here’s how I did it:
A side table is a great addition to any living room. The perfect place to put your drink while you relax, they can also be used as the perfect spot to put your feet up.
Side tables are easy to make and if you follow the steps outlined below, you will have a beautiful piece of furniture in no time.
Materials:
– Plywood or MDF board ( 1/8″ thickness) – 2 pieces (one for the top and one for the bottom)
– 2×4 wooden beams (for legs) – 4 pieces
– Wood glue
– Wood screws – 2-inch long screws
– Small hinges (optional)
The table is a simple project, but it requires precision and patience. The most important thing to remember is that you need to cut your parts exactly to size. If they are even slightly too large, they won’t fit together properly. I suggest using a table saw and a circular saw for this project.
The legs can be made from any wood that is strong enough to support the weight of the table. Since the legs will be visible from all sides, it’s best to use a light-colored wood like pine or poplar so that you can see the grain pattern in the wood (and avoid knots).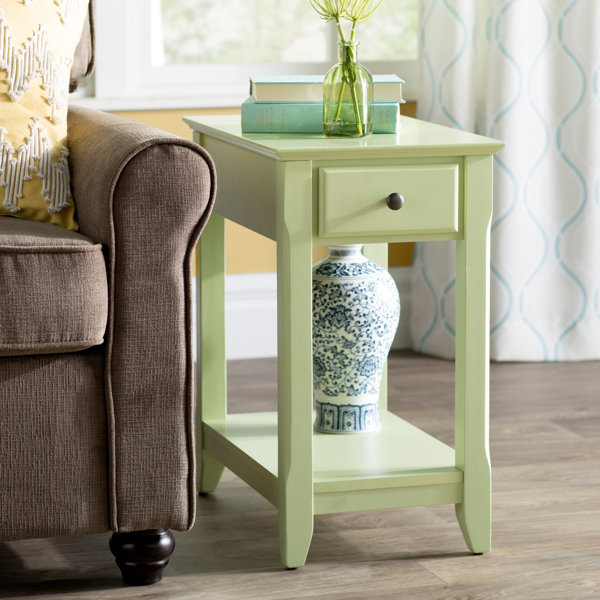
The top can be made from any kind of wood that looks good with your choice of leg material. I used cherry because it has reddish tones that look good when paired with pine legs, but you could use almost any kind of hardwood for this part of the project.
The drawer slides are sized to fit 1/2″ thick plywood, which is why I chose plywood for this part of the build. You could also use 1/2″ thick MDF if you have access to an expensive cabinet saw at home or at school—just make sure it’s high quality MDF if you go that route!