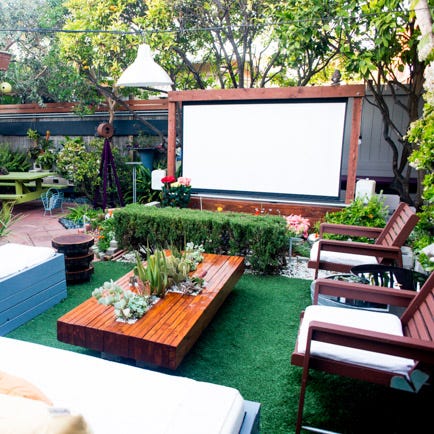
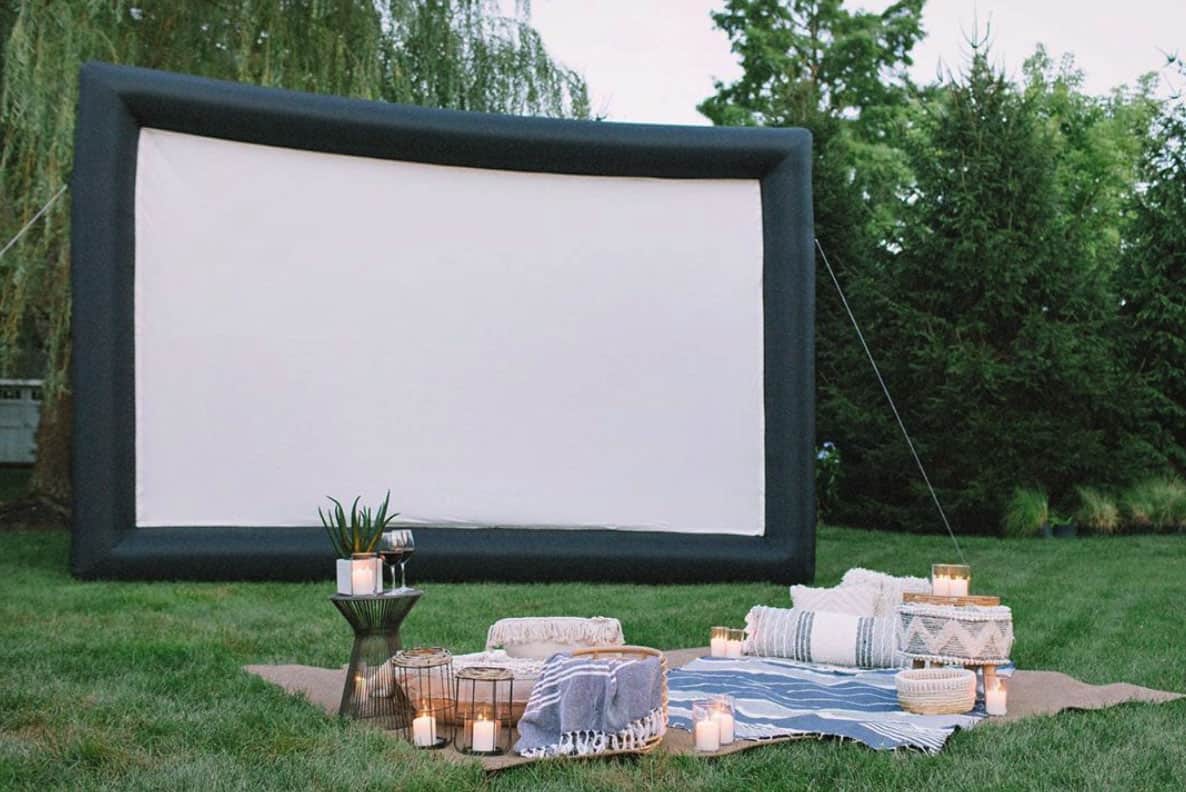
Outdoor movie screens are perfect for that backyard party, graduation or just to hang out with friends and family. Step-by-step instructions will teach you how to build a backyard movie screen with minimal tools and how to place your speakers to ensure the best audio quality.
How to build an outdoor movie screen is something you can easily turn into profit, how to build a frame for an outdoor movie screen, how to build a stand for outdoor movie screen. Total costs for my 120″ movie screen were about $50.

How to build a outdoor movie screen
If you want to build a screen for outdoor movies, you will need the following materials:
– 2×4’s or 2×3’s in lengths of 4 feet and 6 feet long.
– Plywood in 2×8 sheets, 1/2″ thick.
– Screws and wood glue (for the frame).
– Hand saw or power saw.
This is a guide on how to build a frame for an outdoor movie screen. The materials you will need are:
• Wood, preferably 2x4s or 2x6s. You can use plywood or OSB, but it will cost more and be heavier.
• Screening fabric. This can be bought at any fabric store, or you can make your own by sewing together sheets of outdoor fabric or felt and cutting them into squares.
• A cordless drill with a Phillips head bit and a 5/16 drill bit (for the eyehooks)
• A jigsaw with a blade made for cutting wood and plastic (or a circular saw if you have one).
• A level
Outdoor movie nights are a great way to bring the family together. They are also a great way to get your kids out of the house and away from their electronics.
I have built several outdoor movie screens for my family, and I will share with you how I did it. If you have been thinking about building one, let me help you get started!
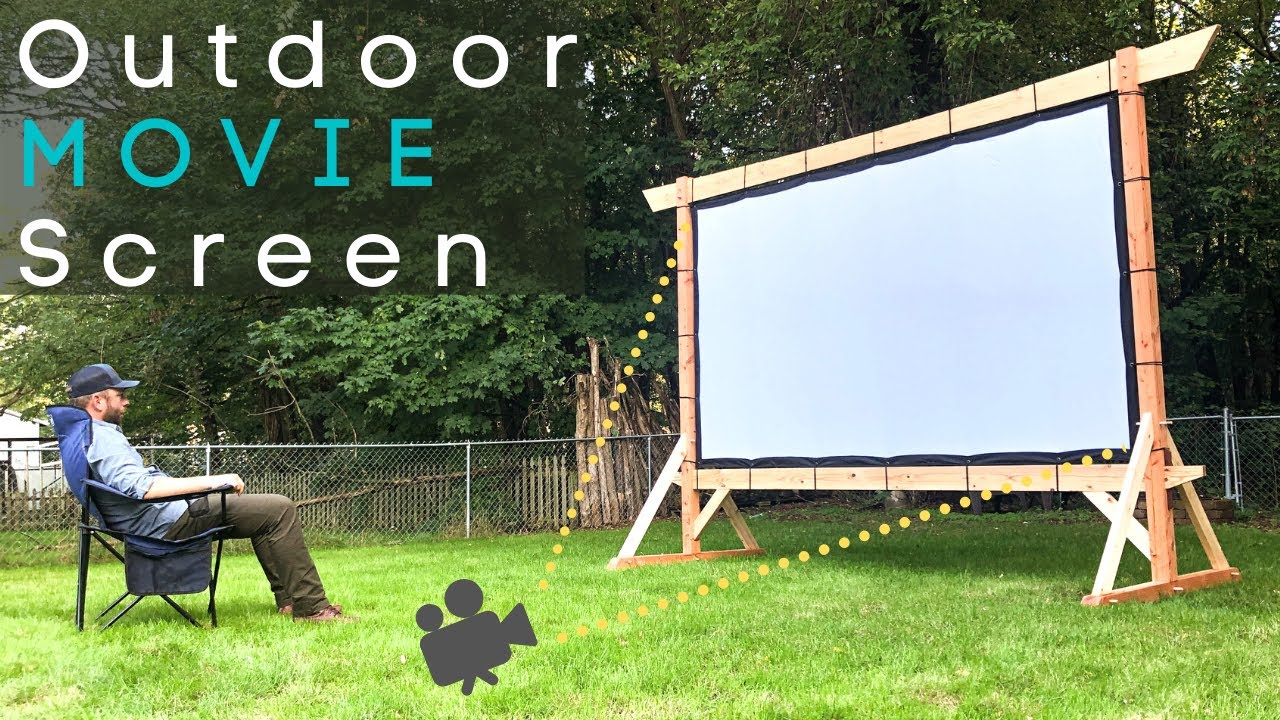
Step 1 – Measure and cut the wood for your frame. The best thing about this project is that it’s completely customizable! The length of my frame was 6 feet long, but feel free to make it whatever size fits your needs. The width of my frame was 4 feet wide, but again this can be customized as well by adjusting where the cross pieces are placed in relation to each other.
Step 2 – Secure all four corners together using either nails or screws (preferably screws).
Step 3 – Place two more pieces of wood across the top of your frame so they are perpendicular to each other and secure them with either nails or screws (again preferably screws). These two pieces should be approximately 3 feet apart on center; however, if you want your screen taller than 6 feet tall then adjust these measurements accordingly as well as adding additional supports between them every 3 feet
If you have a backyard for your home, you should consider building an outdoor movie screen. You can use it to watch movies with your family and friends. It is also a great way to entertain guests during the summer months.
You can build your own outdoor movie screen using simple materials that are readily available in your local hardware store. The following steps will show you how to build an outdoor movie screen:
Step 1: Measurements
Measure the size of the desired screen area and then mark it on the ground using stakes or flags. If you have a large area, you can use rope or string to mark out the desired shape so it will be easier for you to cut out later on.
Step 2: Cut Out Wood Pieces
Cut out wood pieces from plywood based on the measurements taken earlier in step 1. Lay out all wood pieces on top of each other so that they match up perfectly; this will make it easier for you when installing them later on. Make sure that all pieces are facing the same direction as well so they do not get mixed up during installation
Step 3: Install Support Posts
Install support posts along the edges of your wooden frame by hammering in nails or screws into each post at regular intervals along its length
The first step in building a movie screen is to find the right material for your frame.
The frame can be made from wood or PVC pipe. Wood is more durable, but PVC pipe is lighter and easier to work with. Whichever material you choose, make sure that it is rated for outdoor use.
The next step is to decide how big you want your screen to be. You will have to take into account the size of the room where you plan on using it as well as how much room you have available for storage when not in use.
Once you have decided on the size, cut out all of your pieces according to the diagram below:
Next, drill holes into each piece that will allow them to slide together easily (but not too loose).
You should now have two long pieces and two short pieces per side of your frame. Place these on top of one another so that they are offset by half an inch or so (this will give them more stability). Once placed together, drill through all four pieces at once so that they stay in alignment as you connect them together using screws or nails from behind (this will also help prevent warping over time).
How to build a frame for an outdoor movie screen
With this DIY outdoor movie screen, you can enjoy your favorite movies with friends and family in the comfort of your own backyard. This project is easy enough for anyone with basic carpentry skills, and it’s cheaper than renting one from a professional screen company!
Materials:
1 1/2″ x 6′ x 8′ cedar fence boards
2″ x 2″ x 8′ cedar fence boards (or any other size you prefer)
2″ deck screws (quantity varies depending on how sturdy you want your frame)
You can use a projector or a large TV to show your movies on a big screen, but it’s more fun to set up a projector and screen outside. You can even rent a projector from some companies if you’re not interested in buying one. When you’re ready to get started, here are some tips for building your own frame for an outdoor movie screen.
Building an Outdoor Movie Screen Frame
The first step is to build the frame for your screen. You’ll need four 8-foot 2x4s for this project, so cut them down to size with your saw before starting. The next step is to measure out where to place the boards and mark them accordingly with tape or painter’s tape. Next, drill holes through each board using a drill bit that matches the diameter of your screws; this will make it easier to attach them together securely.
Once all four boards have been drilled through, use wood glue on all sides of each board and place them together so they line up evenly with one another. Use clamps or weights to hold them together tightly while they dry overnight; otherwise, they may come apart when you try attaching them together with screws later on in the process!
You can build a frame for your outdoor movie screen in just a few steps. The frame should be sturdy and stable enough to support the weight of the screen. You may need to add additional supports if you’re going to be using your screen outside.
Here are some tips for building an outdoor movie screen frame:
It’s best to use wood that is designed for outdoor use, such as cedar or redwood. This will help prevent the wood from rotting or becoming infested with insects.
Choose lumber that is free of knots and other defects, which can cause problems when you’re trying to nail or screw it together. Cedar or redwood lumber is often available at home improvement stores and lumber yards, but you can also find it online at sites like Amazon.com or HomeDepot.com .
You’ll also need some tools, including a miter saw or circular saw , drill/driver , hammer , nails , screws , level , measuring tape and pencil .
The screen is the most important part of your outdoor movie set-up. You can buy pre-made screens, but they are expensive, and you are better off making your own. The good news is that it’s easy to build a frame for an outdoor movie screen.
The first thing you need is a sturdy frame. The best material for this is plywood or masonite (a hardboard made from layers of paper). You want something that will not warp or break down over time. It should be at least three inches thick so it can support the weight of the fabric.
You’ll also need some sort of fastener system to hold the fabric in place on the outside of the frame. If you don’t want to spend money on hardware store materials, use screws and nails instead — these will work just fine for most applications.
To make sure everything stays together, paint or stain all sides of each piece before assembling them together with their fasteners. This will help keep moisture from getting into any gaps between pieces during assembly (if there are any).
Leave a Reply