Raised planter beds are a simple and cost-effective way of adding ground cover to your backyard. Beds are constructed from a base layer of gravel and then filled with a mix of potting soil and compost to create the best growing environment. Pots or trays are positioned in the bed where they can access the plentiful drainage beneath but they also receive some nutrient-rich support. It’s important to construct beds correctly using materials that match the natural environment around your home.
Raised planter beds are the perfect solution for people who want to grow vegetables and flowers, but don’t have a lot of space in their garden. They are also really great for growing vegetables on balconies, patios, and decks. Raised planter beds can be as simple or as fancy as you want. Before we get started with our raised planter bed tutorial, let’s talk about exactly what a raised planter is and how it is used.

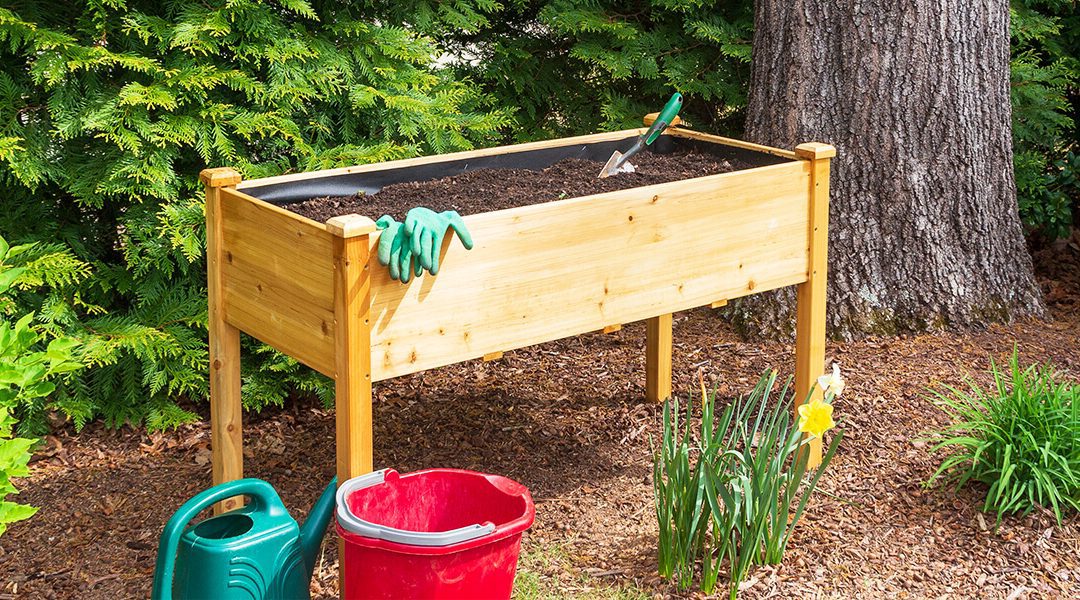
How to build a raised planter bed
Raised garden beds are a great way to add extra space to your garden. They can be used for growing vegetables, fruit and flowers. They can also provide a place to plant perennials or shrubs.
Raised planter beds are made from different types of materials, including wood or metal. When building your own raised bed, you have the freedom to use any material you like, as long as it is sturdy enough to support the weight of the soil and plants that will be placed in it.
The easiest way to build a wooden raised bed planter box is with pressure-treated pine lumber. Pressure-treated pine is more expensive than regular pine lumber but it does not require any additional treatment before being used in outdoor projects such as raised planter boxes that will be exposed to moisture and weathering.
Pine lumber can easily be cut using a circular saw with either a carbide tip blade or an abrasive steel blade depending on how thick the material is and whether you want to leave a natural finish or paint or stain it afterwards.

how to build a wooden raised bed planter box
A raised planter bed is an excellent way to add some greenery and color to your yard. It’s also an ideal way to grow vegetables and other plants, especially if you don’t have a garden or don’t want to spend time maintaining it. There are many different types of homemade planters you can make, but here are some simple instructions for making a basic raised planter box from wood.
Step 1 – Measure the Length and Width
The first step in building a raised planter box is measuring the length and width of your garden area where you want to place it. Use these measurements to cut two pieces of 2×4 lumber that are as long as your yard space, plus 6 inches (8 inches if you want extra support). Cut one piece into two pieces that are as wide as your yard space plus 6 inches each; these will be the sides for your box.
Step 2 – Attach Sides Together
Next, screw together your four pieces using wood glue and a hammer; use screws that are 1/2 inch longer than their depth into the wood so they will not come out when you attach them together tightly. Make sure all four corners line up perfectly before screwing them together.

how to build a raised garden bed planter
The garden bed is one of the easiest gardening projects that you can start in your yard. The raised bed garden makes it easy to grow vegetables, herbs and flowers without having to worry about weeds or pests. It’s also a great way to use empty space in your yard that may be hard to get to otherwise. You can make a planter out of any material you want, but using wood makes it easier to build than other materials.
Step 1: Measure the area where your planter will go and mark off the dimensions on the ground with stakes or rope. If necessary, dig out any rocks or roots that are in the way.
Step 2: Cut four pieces of 2-by-4 lumber at 45 degree angles so they fit together like a trapezoid when stacked on top of each other. These will form the sides of your planter box and provide support for your frame once it is assembled.
Step 3: Cut three pieces of 2-by-4 lumber into lengths that are long enough to reach from one side piece all the way across the bottom panel and up against its corresponding side piece on the opposite side of the box; these will form struts inside each corner that will hold
Building a raised garden bed is easy, and it’s a great way to get your garden started. The best part? Once it’s built, the raised garden bed can be used for years to come.
Build your raised garden bed using pressure-treated lumber and cedar boards. These materials are durable and long-lasting.
Measure the length and width of your garden area and add at least 3 inches to each side for clearance. Measure the depth as well — you want your raised bed to be at least 8 inches deep so that plant roots have plenty of room to grow without being constricted by rocks or soil.
Cut the lumber into lengths equal to the measurements you took earlier (the length times 2, plus an additional 6 inches). You’ll need one piece of each length (longer sides will be longer than shorter sides).
Place one long side on top of another long side, aligning ends at corners where they meet. Secure them together with nails or screws every 6 inches along both sides.
Repeat this step for other two long sides. You should now have two frames which are identical except for their orientation; one frame should face up while other faces down when viewed from above (see illustration).