In this guide, we’ll walk you through creating a smooth, long-lasting concrete ramp for wheelchairs, for sheds and for driveways. I’ve always been a big fan of concrete ramps so I decided to build one in my garage to transport my bikes and kayak into the house. It doesn’t matter if you have a shed, garage, driveway or boat dock — this project will work for you.
Concrete ramps are a great solution for anyone who owns a wheelchair or other motorized scooter, and wants to get into their backyard shed or garage. Concrete ramps are often used as temporary or permanent solutions for many different types of activities. There are also times where individuals need to use concrete ramps for safety reasons-and this is what most people will be looking for (for example, those who want to preserve the beauty of their home). For others, concrete ramps are perfect when it comes to improving one’s quality of life.

How to build a concrete wheelchair ramp
Concrete ramps are a cost-effective and durable way to create a smooth transition between the ground and an elevated surface. Concrete ramps can be used for many different applications, such as:
Concrete ramps are easy to make and can be used in many different applications. The most common use for concrete ramps is to allow wheelchairs or other mobility devices to access a raised area of a home or building.
Build a frame using 2×6 lumber. This frame will support the weight of the concrete as it cures. The frame should be strong enough to support the weight of the concrete and all equipment used while pouring, but not so heavy that it’s difficult to move around once the concrete has set up.
Lay down plastic sheeting over the ground where you plan on pouring your ramp. This will help keep dirt out of your freshly poured concrete, which will make it easier to clean up later on when you’re finished with your project.
Pour cement into your frame and spread it around evenly with a trowel or shovel until it covers all areas within your frame’s boundaries. You can also add decorative elements like pebbles or stones if you want them visible in your final product.
Wait for your cement to set up completely before moving or removing any equipment from its surface
1. Preparing the surface
The first step is to prepare the surface you want your concrete ramp to sit on. In this case, we’re going to use a small shed foundation that’s made of cinder blocks. You’ll want to remove any debris and make sure the surface is clean.
2. Pour the concrete
Next, you’ll need to pour the concrete base for your ramp. This will serve two purposes: It’ll give you a level surface on which to build your ramp, and it’ll provide a hard base that will support heavy traffic while also protecting against moisture damage in wet weather conditions.
3. Build the formwork
After pouring your base, it’s time to build your formwork for pouring the concrete ramp itself. You can use wood or plastic lumber for this purpose — just make sure whatever material you choose isn’t going to rot in wet weather conditions before using it for this purpose! It’s better if you can use something that isn’t susceptible to moisture damage like pressure-treated lumber or plastic lumber (as pictured above).
A concrete ramp is a very durable form of wheelchair access, and it’s also one of the least expensive. You can build a simple concrete ramp yourself with just a few tools and some basic construction skills.
Concrete ramps can be built in any length or width, though they’re usually 2 to 4 feet wide and 18 to 30 inches in height. The length will depend on the distance between the point where the ramp ends and the ground level at its starting point.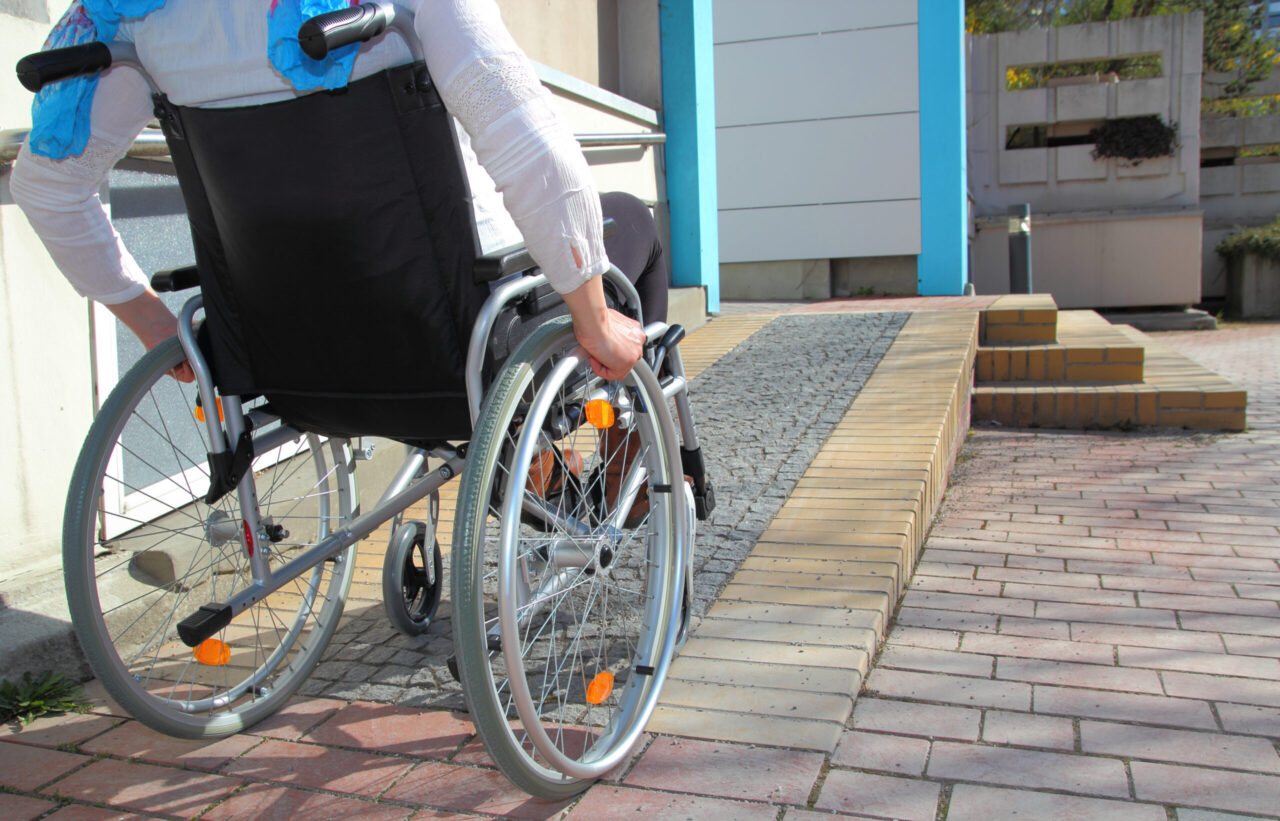
To build a wheelchair ramp of this size, you’ll need: Concrete mix (available at most home improvement stores)
Mixing tubs or wheelbarrows for mixing concrete (or buckets with holes drilled in them)
How to Build a Concrete Ramp
Ramps are ideal for wheelchairs and other types of mobility aids. They’re also appropriate for wheelbarrows, bicycles, or any other object that needs to be transported up a steep incline. Concrete ramps are sturdy and durable, but they must be built properly to last for years.
The following instructions describe how to build a concrete wheelchair ramp that meets ADA (American with Disabilities Act) standards. These specifications ensure that the ramp is wide enough and slopes at the proper angle (not too steeply) so that people in wheelchairs can use it safely.
Step 1 – Preparing Your Site
Before you begin building your ramp, check your local building codes to ensure that they allow sloped surfaces on private property. If they do not permit such surfaces, you will need to find an alternative location for your ramp such as at an off-site facility.
If your local codes permit sloped surfaces on private property, then you can proceed with building your ramp. The first step is to prepare the site where you plan to build it. You will need about 20 feet of space along one side of your garage or shed so that when someone uses the ramp they have room behind them as well as in front of them
This post will show you how to make a concrete ramp for shed, and it will also teach you how to make a concrete ramp for driveway.
A concrete ramp is made of cement, sand and gravel. It’s perfect for heavy-duty applications like loading docks, driveways, sidewalks and more.
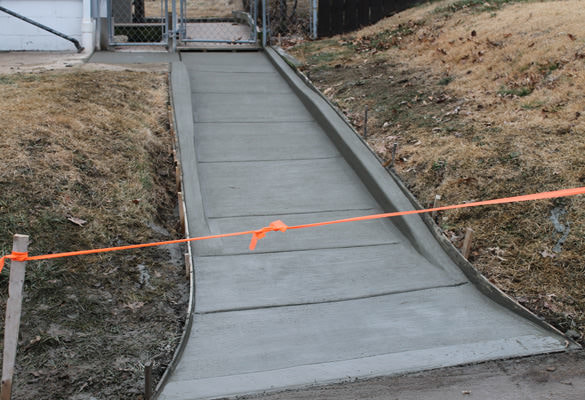
Concrete ramps are strong enough to handle vehicles with heavy loads and can support even the heaviest snowplows in winter time. You can use them as part of a larger project or as a standalone item like this one:
This is an example of how to make a concrete ramp for shed. The owner didn’t want to pay someone else to do this job so he decided to take matters into his own hands instead!
The first step was digging out the ground around where we wanted the ramp to be built. We used our excavator for this job and it wasn’t difficult at all! Once we had dug out enough space for our project we were ready for phase two!
Phase two involved pouring some concrete into place so that we could start building our ramp from scratch! We used some formwork boards so that our forms would fit perfectly together once they were
Making a concrete ramp for a shed can be a little challenging. The best way to make this ramp is with a concrete form. The form consists of two pieces, one that goes on the ground and one that goes on top of the other piece.
The first step in making your own concrete ramp is to lay down the form on your driveway or in another level area where you want to build your ramp. Measure the length and width of your shed and cut two pieces of plywood so they will fit together perfectly inside the form without any gaps between them.
Next, lay down two sheets of plastic on top of each other and place them over the plywood so they are completely covered by it. This will help protect your plywood from getting wet during mixing and pouring processes.
Now it’s time to mix up some concrete! You will need some water along with cement powder, sand and rocks or gravel depending on what kind of texture you’d like for your ramp. For example if you want a smooth surface then use only cement powder; for more texture use just rocks or gravel mixed with cement powder; if you want coarse texture then mix all three materials together at once!
Concrete is a strong, durable material that can be used for a variety of projects. A concrete ramp for a shed or driveway requires some careful planning and careful workmanship, but it’s an easy project if you know what to do.
Here are some tips for building a concrete ramp:
1. Create the foundation
The first step in building any concrete project is to create the foundation. For an outdoor concrete ramp, that means digging down into the ground.
2. Prepare the surface
Once your foundation has been created, you’ll need to prepare it by cleaning off any dirt and debris from the surface of the soil underneath it. Then, you’ll need to smooth out any bumps or dips in the ground so that your concrete will lay flat on top of it when you pour it later on. If you’re using sandbags or other weights to stabilize your foundation during construction (as many do), make sure they’re evenly distributed across their surface so that they don’t leave any uneven spots behind after they’ve been removed later on.
3. Pour your base
Once your foundation has been prepared and leveled out, it’s time to pour your base layer of concrete into place over top of it using a wheelbar
The first step in making a concrete ramp is to prepare the ground where it will be built. It should be level, with no large bumps or depressions.
Using chalk and stakes, draw a line along the path of the driveway where you want your ramp to go. This will help you place the forms correctly so that they are level and parallel with each other.
When building a concrete ramp, it’s important that all of the forms are placed at exactly the same height and angle relative to one another so that they all match up evenly when filled with concrete. You can purchase forms specifically designed for this purpose at any home improvement store or online retailer (see Resources below).
Step 4: Fill each form with concrete mix according to package instructions and tamp down with a tamping tool until there are no holes remaining in the mixture. The holes indicate where air pockets exist in the concrete, which will cause cracks later on down the road if left alone over time due to shifting soil conditions around your home or other such factors that affect mortar joints such as temperature changes during seasons
How to Make a Ramp for Your Shed
If you want to make your shed more accessible, or if you just want to make your life easier, building a ramp is the way to go. It can be as simple or as complicated as you want it to be. You can build a single-ramp system that leads up to the door or two parallel ramps on either side of the door. You can even build an incline that lets you drive right into the shed. Whatever you choose, there are some basic steps that will help you get started: