Some people have barns, and others have sheds. I happen to have both. Finding shed plans online was the easy part, but having to decipher all the terms and measurements (feet vs. inches) combined with unclear diagrams made the process more difficult than I had hoped. In this article, I’ll guide you through my shed building experience and provide tips learned along the way to help you avoid any pitfalls that may otherwise hinder your future shed construction endeavors.
There are some people who assume they can build a barn shed with nothing but a hammer and tap dancing shoes, because they can fix stuff. There are others who assume they can build a barn shed out of laughter. That’s all it takes. And these two groups of people do get more done than the other people without the hammer and tap shoes, but guess what – you need to be prepared with both tools and tools of the mind if want annual barn sheds coming at you from various directions.

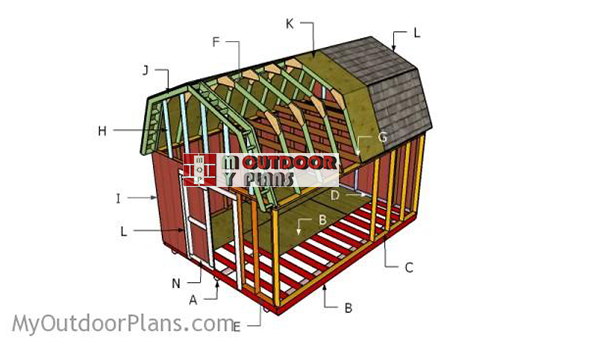
How to build a barn shed
Building a barn shed is a great way to add additional space to your home. Not only is it an excellent storage solution, but it can also be used as an extra room for entertaining guests or as a man cave for the husband.
Building your own building can be very rewarding, especially if you use this guide. It will show you how to build a barn shed from start to finish. You will learn how to build trusses for a barn and how to construct the walls and roof of your new shed. Building your own building will allow you to customize it with any style or size that you want.
How to Build a Shed: Tips, Materials and More
How to build a shed is a question we often get. In this guide, we’ll walk you through the process of building a shed including what materials you need and how much it costs to build one.
By following these steps and tips on how to build a shed, you can build your own structure that doesn’t cost a fortune.
Barn sheds are very popular for a variety of reasons. They provide extra storage space for all of your tools, equipment and other items that can clutter up your garage or home. They also look great with the rest of your property, so if you want a shed that gives your property a rustic feel, then you should consider building one.
Building a shed is not as difficult as you think it might be. You just need to follow some simple steps and have the right tools available before starting construction. Here are some tips on how to build a shed:
Measure the area where you want to build the shed. Make sure it has enough room for all of your needs and that there are no trees or other obstacles within range of where you plan on putting it up. If there is any doubt about where this should go, take time to measure out the area thoroughly before proceeding further with construction.
Get together at least three people who will be helping with construction because this is an extremely heavy tool and requires several men or women to lift it into place once it’s built up high enough off the ground for them to reach easily into its center section with their hands inside when needed for
How to Build a Shed. A shed is an ideal way to store tools, equipment and supplies. It’s also a great place for the kids to play if you have a large yard. If you’ve never built anything before, starting with a small shed is the best way to get your feet wet. You can build your own shed from scratch or buy one already assembled.
Either way, it’s important to understand how much work goes into building one before you begin.
Step 1 – Plan Your Shed
Step 2 – Determine Size and Shape of Your Building
Step 3 – Lay Out Footings and Foundation Walls
Step 4 – Install Beams and Trusses
Step 5 – Install Roof Sheathing
Step 6 – Attach Roof Trusses
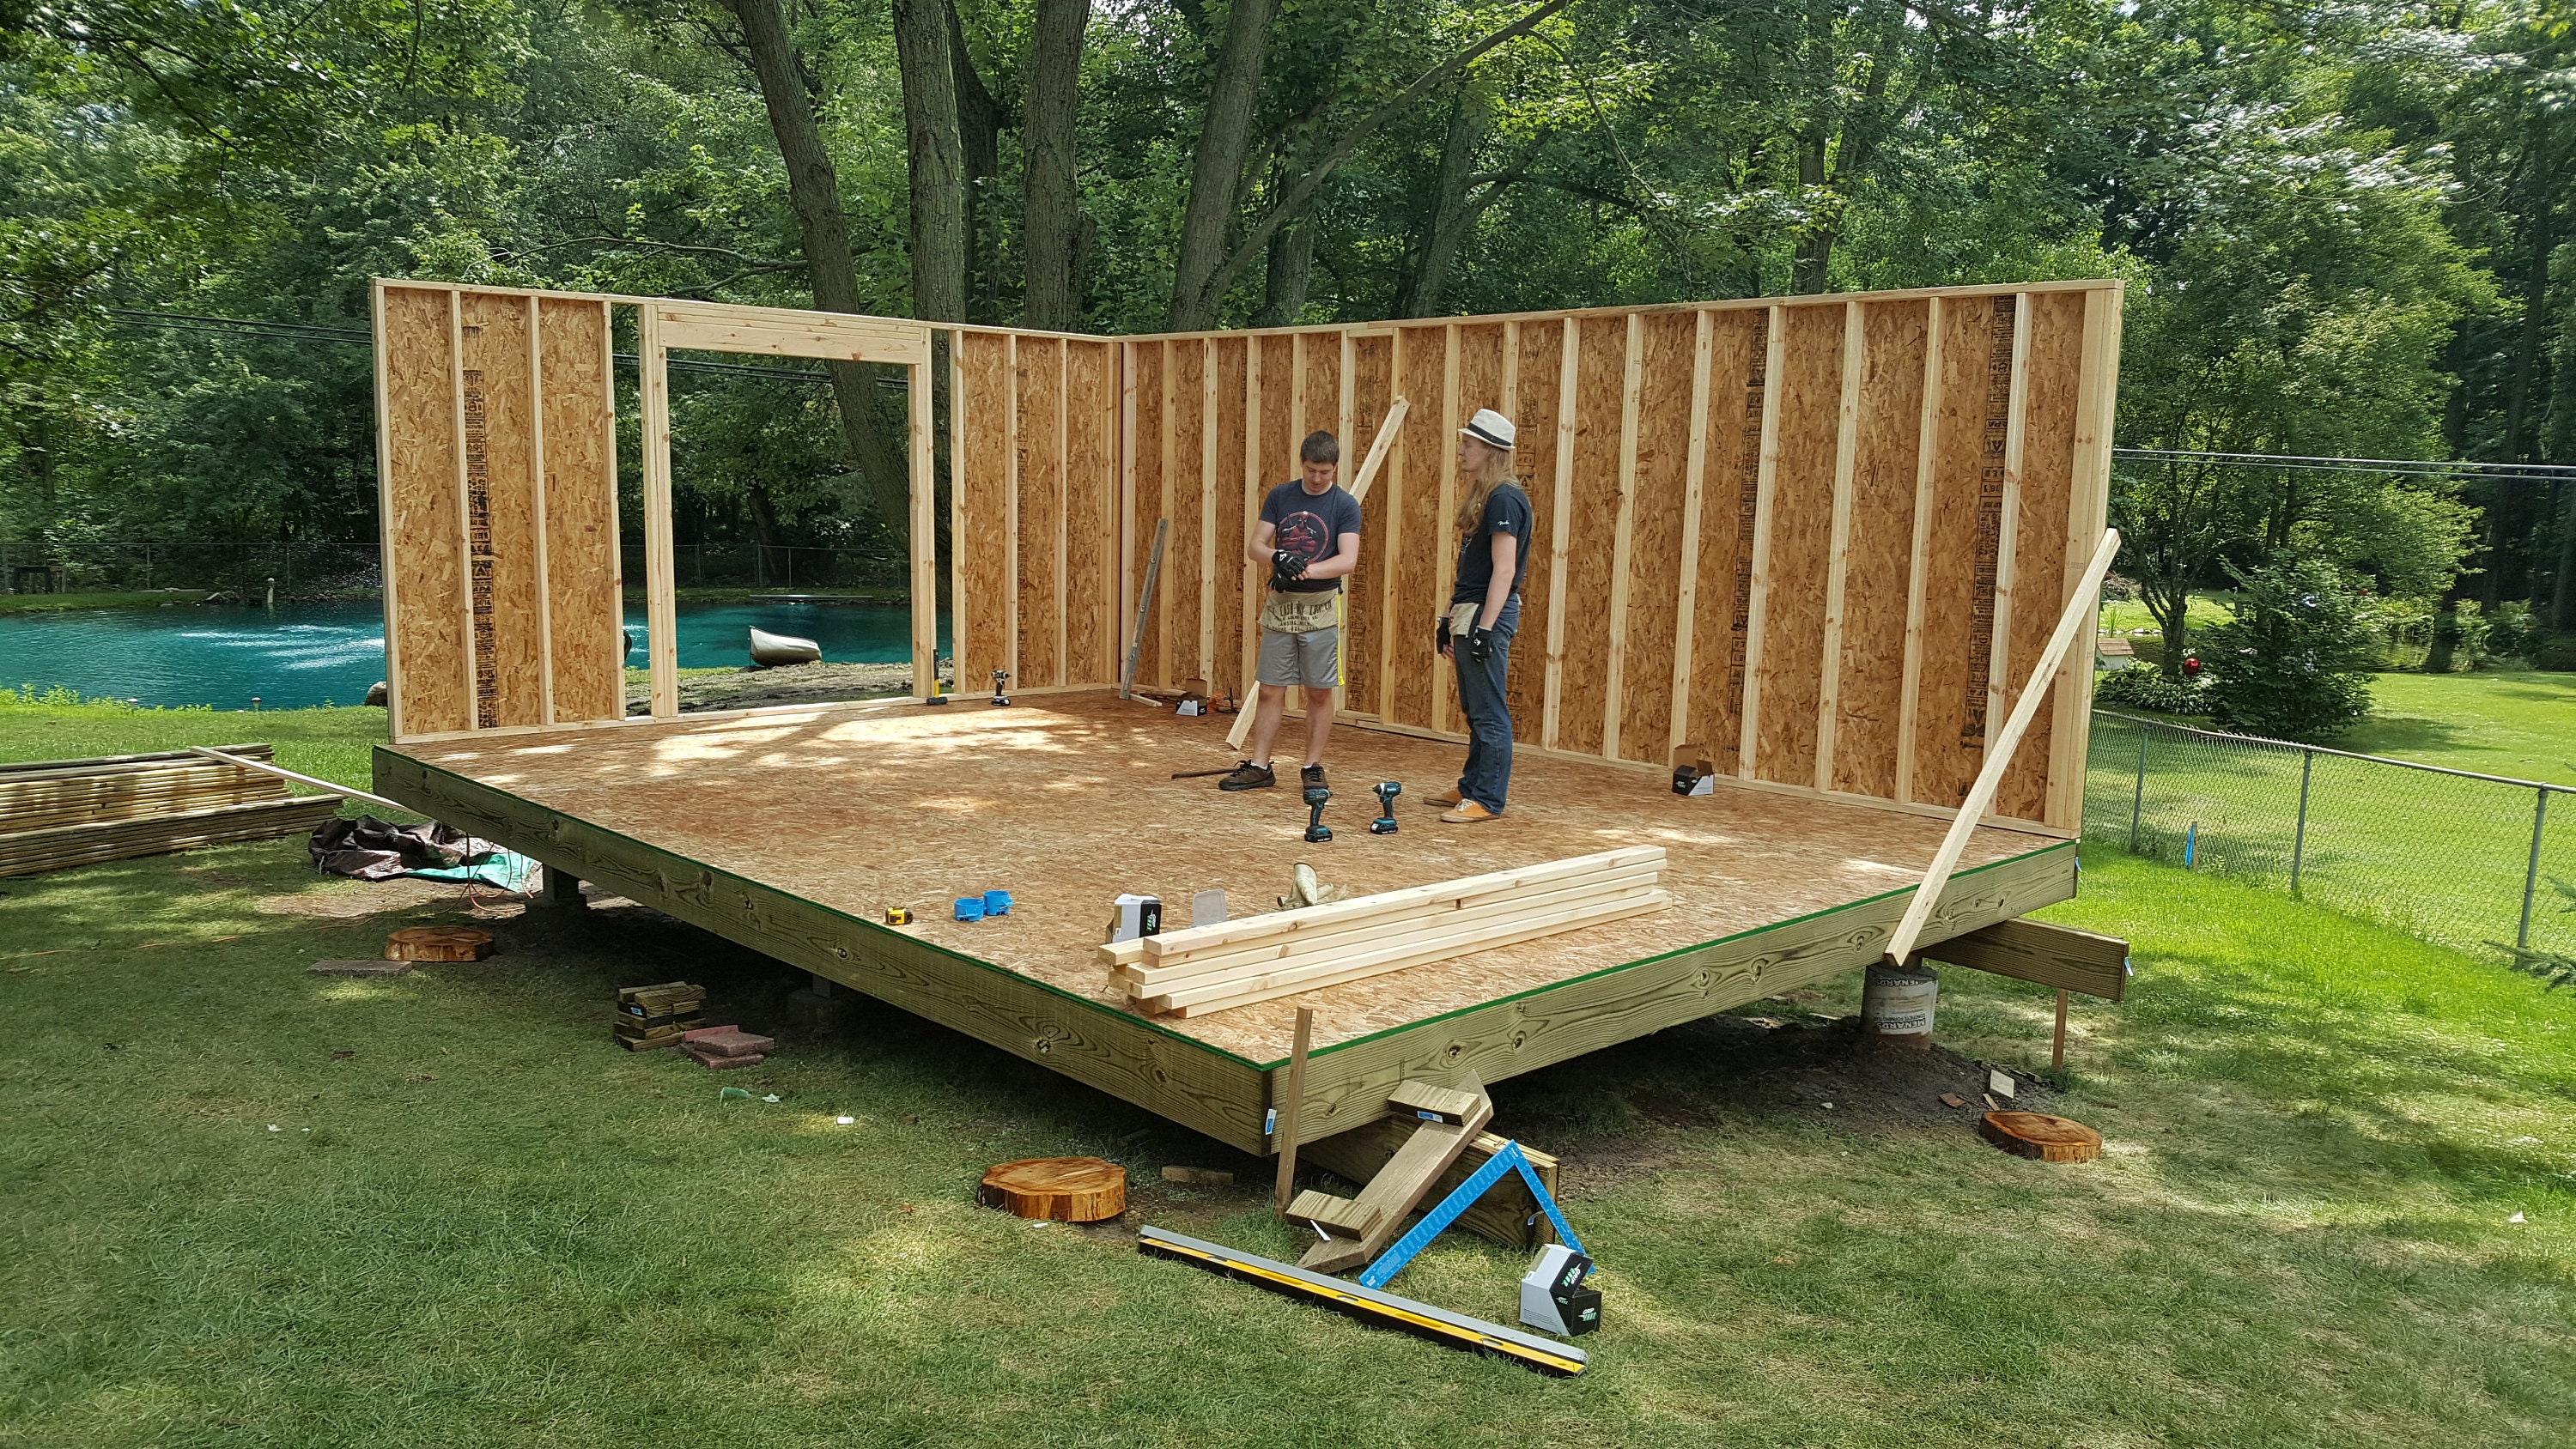
Step 7 – Install Walls and Clapboards on Shed Walls
Step 8 – Install Windows in Your Shed Wall Panels
In this video, we will walk you through the step-by-step process of building an 8’x12′ shed. We’ll cover everything from how to frame the walls and roof, how to install insulation and drywall, how to install trim and doors, and how to paint your new shed. So grab some tools and get started!
Step One: Prepare the Foundation
First things first – you’re going to need a level foundation for your barn shed. The best way to do this is by digging out a trench for the concrete slab (this will save you time later). Then set up your forms for the concrete. After that’s done, pour in your concrete and let it set up overnight before removing the forms from around it. You’ll want about 2″ of gravel under your slab for drainage purposes. Note: If you have an existing foundation or concrete pad already in place, skip this step!
How to Build Trusses for a Barn
The first step in building a barn is to select the material that will be used for the roof. There are several options, but generally you will want to use something that will last for years and be able to withstand high winds without problems.
Once you have decided on your material, it’s time to build the trusses. This is an important part of your barn build because it ensures that everything fits together properly and is strong enough to withstand windy weather.
Trusses are made up of two pieces of wood that are connected at the top by a third piece of wood called a “web.” The web is placed between the two pieces of wood to create a triangle shape that gives strength to the structure.
There are many different types of trusses available today, including metal ones and wooden ones. If you want something that’s easy to install and won’t cost much money up front, wooden trusses may be right for you.

Here’s how they work:
First, cut two pieces of lumber into triangles with their sides measuring 12 feet each (or whatever length you need). Cut each triangle into two smaller triangles so that each one measures 6 feet long on each side (or
A truss is a framework of wood or metal used to support the roof of a building. It is made up of triangular shapes joined together by wood or metal beams. Trusses are typically used in roof construction, but they can also be used as support for balconies or decks.
To begin building your trusses, you will need the following materials:
Truss Design Software: You can download free truss design software online that allows you to determine how many panels you need and how they should be spaced.
Wooden Dowels: You can use wooden dowels to join the panels together once they have been assembled. Use metal staples to secure the joints between each panel and wooden dowels to connect them together as well.
Metal Nails: Metal nails may be needed to attach your trusses to an existing structure such as a house or barn. These nails are typically available at any hardware store in either galvanized steel or stainless steel varieties.
In this article we will discuss how to build trusses for a barn. The first thing to do is determine the size and pitch of your roof. Once you have done that, you can determine how many trusses you need and what size they need to be.
Trusses are designed to support the weight of the roofing material that will be placed on top of them. They are usually made from wood or metal. The size of the trusses depends on how much weight needs to be supported, as well as how steeply pitched the roof is going to be.
If you want a steeply pitched roof, then you will need thicker materials so as not to sag under the weight of snow or ice during winters when it rains frequently and freezes quickly.
There are two basic types of trusses:
open web and closed web. Open web trusses are lighter in weight than closed web trusses because they feature more open spaces between the members (the pieces) of the structure. Closed web trusses are heavier than open web ones because they have more solid members (pieces) making up their structure.*
Truss barns are very common in the United States. They are highly efficient and easy to build. The biggest advantage of truss construction is that it requires less lumber than traditional framing methods. The interlocking trusses create a strong structure that can span long distances and carry heavy loads.
Whether you want to build a barn for storage or as a workshop, here’s how to build trusses for a barn:
Step 1: Select Your Materials
Before you begin building, you must pick out the materials that you will use. You need wood that has been treated against rot or insects, so make sure you have treated lumber on hand before starting your project. You can also use pressure-treated plywood if you prefer not to use wooden beams in your structure.
Step 2: Build Your Frame
Once you have picked out all of your materials, start by building the frame for your barn using 2×4s or other pieces of lumber. Use joists spaced 16 inches apart on center and attach them to the frame with nails or screws if needed for extra support.
The basic building block of a truss is the triangle. By combining triangles, you can form any shape you need. The most common trusses are equilateral triangles (all sides equal) and isosceles triangles (two sides equal).
Trusses are built using wood or metal beams. Wood is the most common choice for residential construction because it’s easy to work with and relatively inexpensive. Metal trusses are used in commercial construction because they’re stronger than wood, but they’re also more expensive and less flexible when it comes to design options.
Trusses can be built using two types of materials: solid wood or laminated wood. Solid wood has a single solid piece of lumber running through it from one end to the other. Laminated wood uses thin sheets of plywood that are glued together over a formwork board called a “rib.”
The advantage of laminated wood over solid wood is that it’s stronger due to its multiple layers, which allows for greater design flexibility with fewer parts. The disadvantage is that laminated wood tends to be more expensive than solid wood due to the time-consuming process involved in manufacturing each panel.