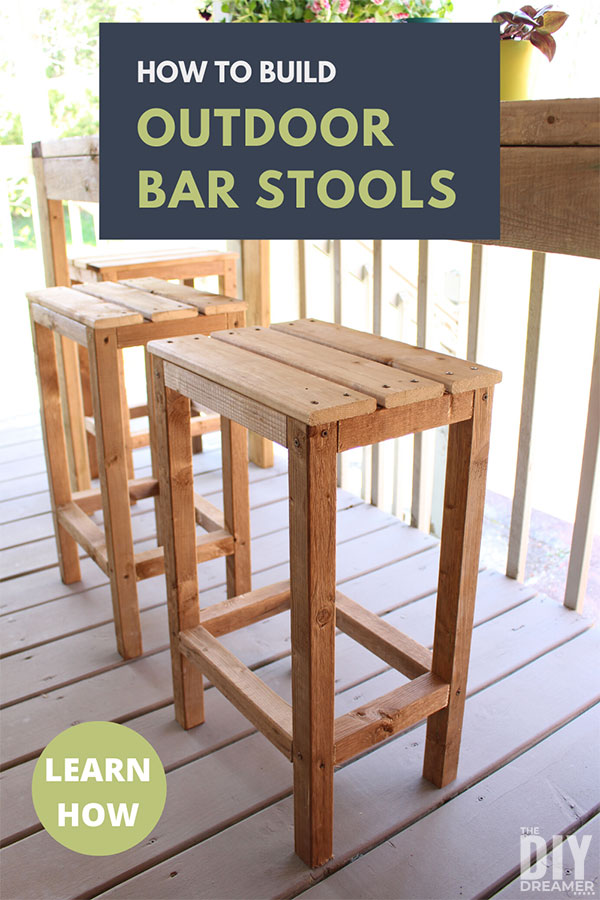
Furniture is a crucial part of a home. That’s why when it comes time to build your own bar stool, you’ll want to make sure you do it right the first time. The last thing you want is to have to redo it. Here’s our guide to help you build a bar stool like a pro.
Have you ever tried to build a bar stool from scratch? Well, I have — and I can tell you without a doubt that the results were not good. There was no way those stools were ever going to match the $300 leather ones I bought at the store across the street. You see, building a bar stool — or any kind of furniture for that matter — is something most people will never attempt to do. I think this is because there are so many factors you need to take into account when building something (i.e., measurements, safety, etc.), and it’s easy to make mistakes along the way.

How to build a bar stool
Making your own bar stools is a great way to personalize your home, and it’s surprisingly easy. You can build them from scratch or buy ready-made kits that make the process even simpler.
Either way, you’ll want to start with a good set of plans.
Here are several options:
Simple Bar Stool Plans: This free plan from Build Something shows you how to build an elegant wooden stool using just one sheet of plywood and a handful of tools. It’s perfect for beginners and only takes about 30 minutes to complete. The best part? It won’t cost much either — most materials will run you around $30-$40 per stool.
Curved Bar Stool Seat: If you want something more eye-catching than a plain wooden stool then this tutorial from Ana White is perfect for you. She uses 1/2″ plywood and 2×4 lumber along with some screws and glue to create an elegant curved seat that looks like it came right off the set of Downton Abbey! The total cost for this project was about $60 but remember that you can always find ways to cut corners if you need to keep costs down (like buying cheaper plywood or using fewer decorative
If you’re looking for a simple project, this is it! This stool is made from two pieces of plywood and the legs are dowels. It’s a great way to use up scraps from other projects.
If you want something a little more fancy, check out my post on how to make a curved bar stool seat.
This project is about as simple as it gets when it comes to building a wooden stool. I used 1/2″ plywood for the top and bottom pieces and cut them out with my table saw. The legs are just 1/2″ dowels that were glued in place using wood glue and then nailed on with finishing nails (I like these ones because they have square heads). I also added some casters so it would be easy to move around.
If you want to make your own bar stool, it is possible to do it in several different ways. You can use a circular saw, for example, to cut the seat and legs from a plank of wood. Then, you can use some glue and screws to assemble them together.

In this article we will show you how to build a simple wooden bar stool from scratch. This type of barstool is perfect for those who want to do something more than just buy a standard stool from the nearest furniture store.
The steps below will give you an idea of how to make your own barstool at home with minimal tools required. These steps will guide you through building your own chair with ease and without compromising on quality or style!
There are many tutorials online on how to make a bar stool, but they tend to be very basic and simple. This guide is intended to show you how to build a wooden stool that will last. The design is not complicated and you can use the same techniques for any type of woodworking project.
I’ve built several stools using the same method and they have all been strong and durable – perfect for my needs!
The seat is made from a single piece of wood and then shaped using a bandsaw or jigsaw before being fitted together with glue and nails or screws. The legs are also made from solid wood, glued together then drilled with holes at each end so they can be bolted onto the bottom section of the stool.
Materials needed: plywood sheet (3/4in), hardwood (1x2x8ft), dowel rod (1/2in), wood glue
Tools required: jigsaw, drill bit, sandpaper
If you are looking for a simple bar stool that’s easy to build and can be done in a short time, then this is the project for you. This project features a simple design with a comfortable seat and backrest, which makes it ideal for any type of home decor.
The materials needed for this project are minimal:
1×4 or 2×4 lumber (depending on the height of your bar stool)
2×2 lumber (for the legs)
1½” wood screws (galvanized)
DIY stool ideas
1. Simple Bar Stool Plans
These plans will show you how to build a simple bar stool that is perfect for your kitchen or bar area. It has a nice curved backrest, which adds to the overall comfort of this piece. The stool can be built from wood or metal and it doesn’t take much time to complete if you are well organized and have all the necessary tools handy.
2. How To Make A Curved Bar Stool Seat
This tutorial shows you how to make a curved bar stool seat using wood and some basic tools. You will need some lumber for this project and if you are not familiar with working with wood, make sure that you get help from someone who does know what they are doing in order to avoid any accidents or injuries during construction. The steps are very easy to follow and once completed, you will have a stylish looking chair that will last for years to come!
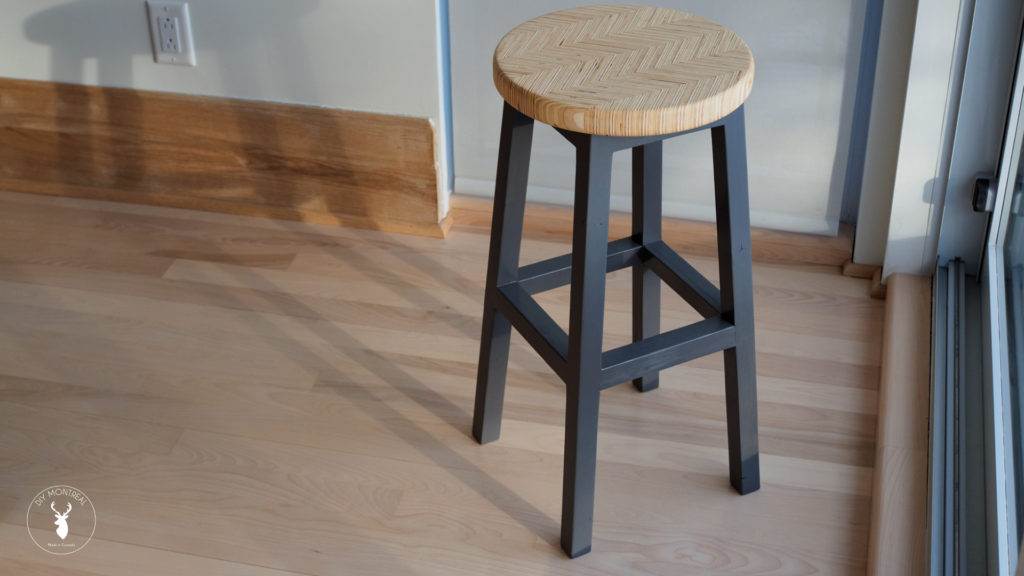
3. How To Make A Wooden Stool Seat
This is another great tutorial on how to make wooden stools that have a curved backrest similar to the one shown above in step one but with a few minor changes such as adding decorative designs on top of the seat as well as legs for support
I have a small shop and I’m always looking for ways to build the most cost-effective furniture. A bar stool is a great way to add seating to a room. They’re also relatively straightforward to build, especially if you use standard-sized lumber and hardware.
Here are some ideas for building your own barstools:
Stool Seat Construction
1. Simple Bar Stool Plans
2. How To Make A Curved Bar Stool Seat
3. How To Make A Wooden Stool Seat
DIY Stool Ideas
After you’ve got your basic stool plan, you can get creative with the details. Make a curved bar stool seat by bending thin strips of wood to fit around the legs and attaching them with screws.
If you’re using solid wood for your chair seats, try painting it for a new look. To make sure your paint will be smooth and even, use an orbital sander before priming and painting.
You can also add a little extra comfort by padding the seat with foam or batting before covering it in fabric or leather. If you want to make sure your fabric will last, use a spray adhesive to attach it to the seat before stapling it into place.
Finally, consider adding extra storage space to your barstools by building drawers into their bases or backs. Use shallow boxes or baskets that fit inside each other for easy stacking when not in use (or just for more style).
How to Make a Curved Bar Stool Seat
What You Need:
1 2×4 x 8′ piece of wood
1 1/2″ screws (or nails)
Wood glue or adhesive
Sandpaper, paint and stain (optional)
A curved bar stool seat is a great addition to your home bar. It can be made from just two pieces of wood and is a great project for beginners. It also makes a nice gift idea for the DIY-er in your life.
The first step is to cut one piece of 2×4 into two pieces that are about 15 inches long each. Then sand down any rough edges so they don’t scratch up your bar stool legs when you screw them together. Apply a coat of paint or stain if you want, then let it dry completely before moving on to step two.
For this step you’ll need three more 2x4s that are about 15 inches long each as well as some wood glue or adhesive (I used Titebond III). Attach one piece of wood to one end of each leg by lining up the edges and drilling screws through both pieces at the same time (if using nails instead).