When it comes to patching a roof with tar, you should have a keen sense of which approach is best for the job. In order to help the customer better understand the process, the right questions need to be asked. For example, if you want to make sure your building stays protected from the elements for a long time — even after it’s finished — a Metal Roofing System is the way to go.
When it comes to roofing, nothing beats the work done by professional roofing contractors. Yet, most homeowners seldom use the services of professional roofing contractors, opting instead to try their hand in doing the roofing themselves. While many are inclined to believe that this strategy can help them save money, the truth is that all it really does is expose them to unnecessary risks and additional expenses. What’s worse is that this practice might even be considered illegal in some jurisdictions.

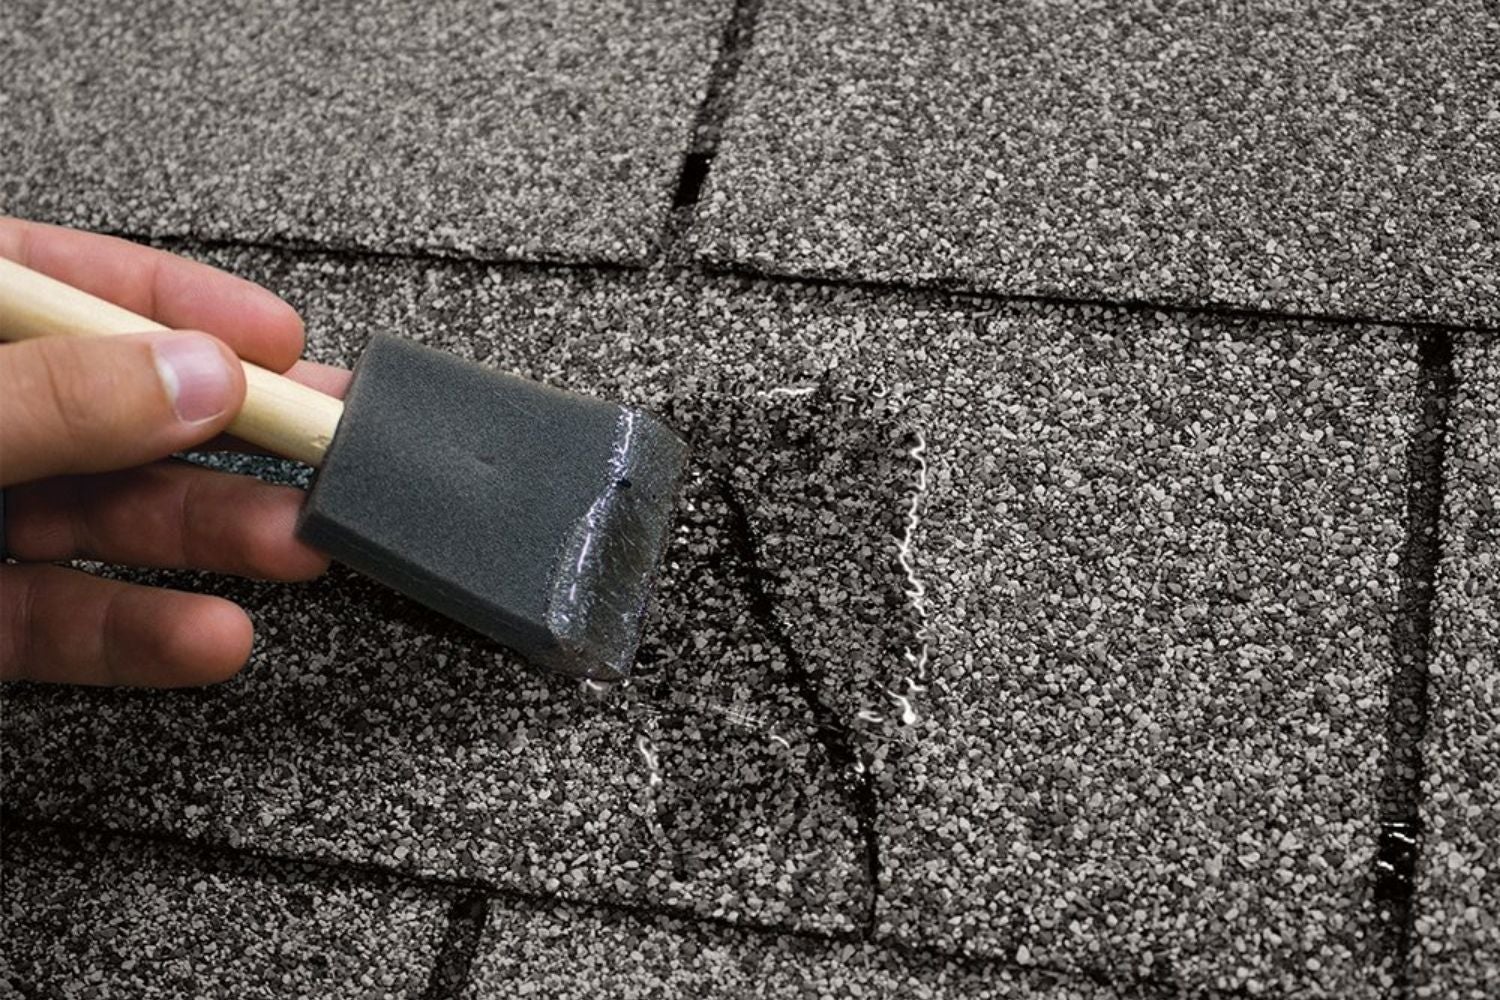
Patching a roof with tar
Roof tar is the most common type of roof repair material. It’s a sticky substance that comes in a can and is applied by brush or roller. Roof tar is usually black or dark brown, but it can be other colors as well. The color of the roof tar will vary depending on the type of roofing materials that were used to build your home.
Roof tar is used to repair cracks in asphalt shingle roofs, metal roofs, concrete tiles and clay tile roofs. Roof tar can also be used to stop leaks on flat roofs that have gravel or other granular materials installed over them.
If you have a hole in your roof that isn’t covered by any kind of flashing, then you need to patch it before applying any new sheets of shingles or metal panels.
Tar Roof Patching Material
If you’ve got a small hole in your roof, or a “weeping tile,” patching it up is easy. But if you’ve got a larger area of damage, you’ll need to use a material called “cold tar” that’s specially formulated for use on roofs. The difference between hot and cold tar is that cold tar has a lower viscosity — or thickness — than hot tar. This makes it easier to spread over the surface of the roof and helps it to adhere better.
Cold tar comes in two types: self-adhesive, which you can buy at any hardware store; and cementitious, which comes in buckets and must be mixed with water before application. Cementitious cold tar is much stronger than self-adhesive but harder to work with because it takes longer to dry, so be sure to follow all instructions carefully when using this type of patching material.

When repairing leaks, always use new nails or screws whenever possible; if they’re rusty or bent out of shape from previous repairs, they may not hold properly.
Roof tar is a black, sticky substance that is used to seal roof leaks and holes. Roof tar can be purchased at your local home improvement store and comes in varying degrees of thickness. The thicker the tar, the better it will stick to your roof.
The best way to patch a leaky roof is to remove any loose shingles or tiles, clean the area thoroughly with soap and water, dry it off with a rag and then apply a thin layer of roof tar over the hole. Do not use too much tar because it will be hard to spread evenly over the entire area. Put down newspaper or plastic sheeting on top of your grass so that it does not get stained by the tar. Use a putty knife to smooth out the surface of the patch so that it’s flat with no bumps or ridges left behind from applying too much tar.
Roof tar is the most common material used to patch a roof. The tar is applied over the damaged area and allowed to dry, creating a waterproof seal. This type of repair is most effective when the underlying problem has been resolved.
Treating any moisture issues or leaks in your attic will make it easier for you to patch your roof. If you’ve already done this, then read on for how to patch a roof leak once the water has stopped dripping through.
The first step is to clean off all debris from around the hole or tear so that there are no loose materials that could fall into your home while you’re working on the roof. Next, remove any loose shingles around the area where you’ll be applying the tar.
Spread a thick layer of tar over the damaged area using a trowel or putty knife. A 5-pound bucket will cover about 100 square feet of surface area at one time. You can also spread it by hand with a paint roller if you don’t have access to power equipment or if you prefer not to use too much energy when doing repairs yourself.
Allow the tar to set for about half an hour before continuing with your repair project
Roof tar is a great material for patching holes in your roof. It’s simple to apply, inexpensive, and it lasts a long time. If you have a leaky roof, here’s how to use roof tar to patch it up.
Before you begin, assess the size of the hole. You’ll need to buy enough roof tar to cover the entire surface of the patch. Don’t be tempted to cut corners by buying less than you need just because it’s cheaper.
Remove any loose debris from around the area where you’ll be working. This will help you avoid slipping or falling when walking on wet surfaces.
If there are any nails sticking out from your roofing tiles or shingles, remove them carefully with pliers or by hitting them with a hammer until they break off at their base so they don’t snag on anything else during installation.
Clean off any dirt or debris from around the area where you’ll be applying the tar using a damp rag or sponge dipped in water with dish soap added (1 part dish soap to 5 parts water). Rinse off all soap residue before proceeding further with cleaning up your work area and tools so that no soap remains behind when installing your patch materials later on!
If you have a leaky roof, it’s important to fix the problem fast. The longer you wait, the more damage will be done to your home and the more expensive it will be to fix.
Here are some things to keep in mind if you’re planning on patching a roof leak:
1) Roofing tar is sticky and messy. Wear old clothes when working with it, and make sure everyone who goes near the area stays away from it for at least 24 hours after application.
2) Use cold tar material instead of hot tar — it’s less likely to crack over time or shrink as much as hot tar does.
3) Make sure that any nails left in your shingles are covered with roofing cement before applying tar. If they aren’t, they’ll rust and cause additional problems.
Roof leaks are a common problem for many homeowners. Some are due to leakage from the roof itself, while others are caused by damage to the interior of your home. The good news is that you can fix most roof leaks yourself.

How to Patch a Roof Leak
If you have a roof leak, the first step is to determine where it’s coming from. You may need to get up on your roof to see what’s happening up there, but if you can see the problem area from the ground, that’s often enough.
Once you know where the leak is coming from, it’s time to patch it up. This can be done in one of two ways: by applying a patching material over the hole or by removing damaged insulation and replacing it with new insulation.
Using Patching Materials
If you have a small leak, such as a single nail hole or crack in an area of loose shingles, you can use caulk or tar paper to make an effective seal. Use caulk around any cracks or holes that water could penetrate easily; tar paper should be laid over any areas where water is collecting and soaking into the wood beneath the shingles.
The first thing to do is find the source of the leak. Roofs can leak in a number of ways: through the shingles, through the flashing at the chimney or skylight, or even from inside your attic. You’ll need to find out where it’s coming from so you can fix it.
Use a ladder to climb up onto your roof and inspect it for leaks. Listen for any dripping noises when it rains, and look for damp spots on the shingles or missing shingles that have been replaced with tar paper or felt paper. If you find evidence of water damage inside your attic, you’ll need to repair that first before repairing your roof.
To fix a leaky roof, you’ll need some tools: A hammer, crowbar, drill with bits and screwdrivers will help remove damaged shingles and nails. Flathead screwdrivers can pry away shingles that are too rotten (or nailed down) to remove by hand. A utility knife will make cutting out old nails much easier than using a hammer and crowbar alone.
You should also have some tar paper or roofing felt underlayment on hand for patching holes in your roof where there are no broken shingles left behind after removing
Roof leaks are a common problem for homes and businesses. In general, roof leaks occur when water gets into the building, either through cracks in the roofing material or through holes in the shingles themselves.
If you have a leaky roof, you’ll usually be able to hear it dripping inside your home. This can be especially annoying at night when you’re trying to sleep. The sound of dripping water is especially noticeable if you’re trying to watch TV or listen to music while someone else is sleeping.
You can easily fix most minor leaks yourself without having to call a contractor or spend money on expensive repairs.
Here are some things you can do:
1) Clean up any standing water that may be present on your property. This will help prevent further damage from occurring until you get around to fixing the problem permanently…2) Purchase new shingles if necessary – You may need to buy roofing material for this job depending on what type of roofing material was originally installed on your house…3) Patch any holes with tar or silicone caulk – This is an easy process that only takes about 15 minutes…4) Replace shingles – If there are multiple areas where shingles are damaged, consider replacing them all at once instead of