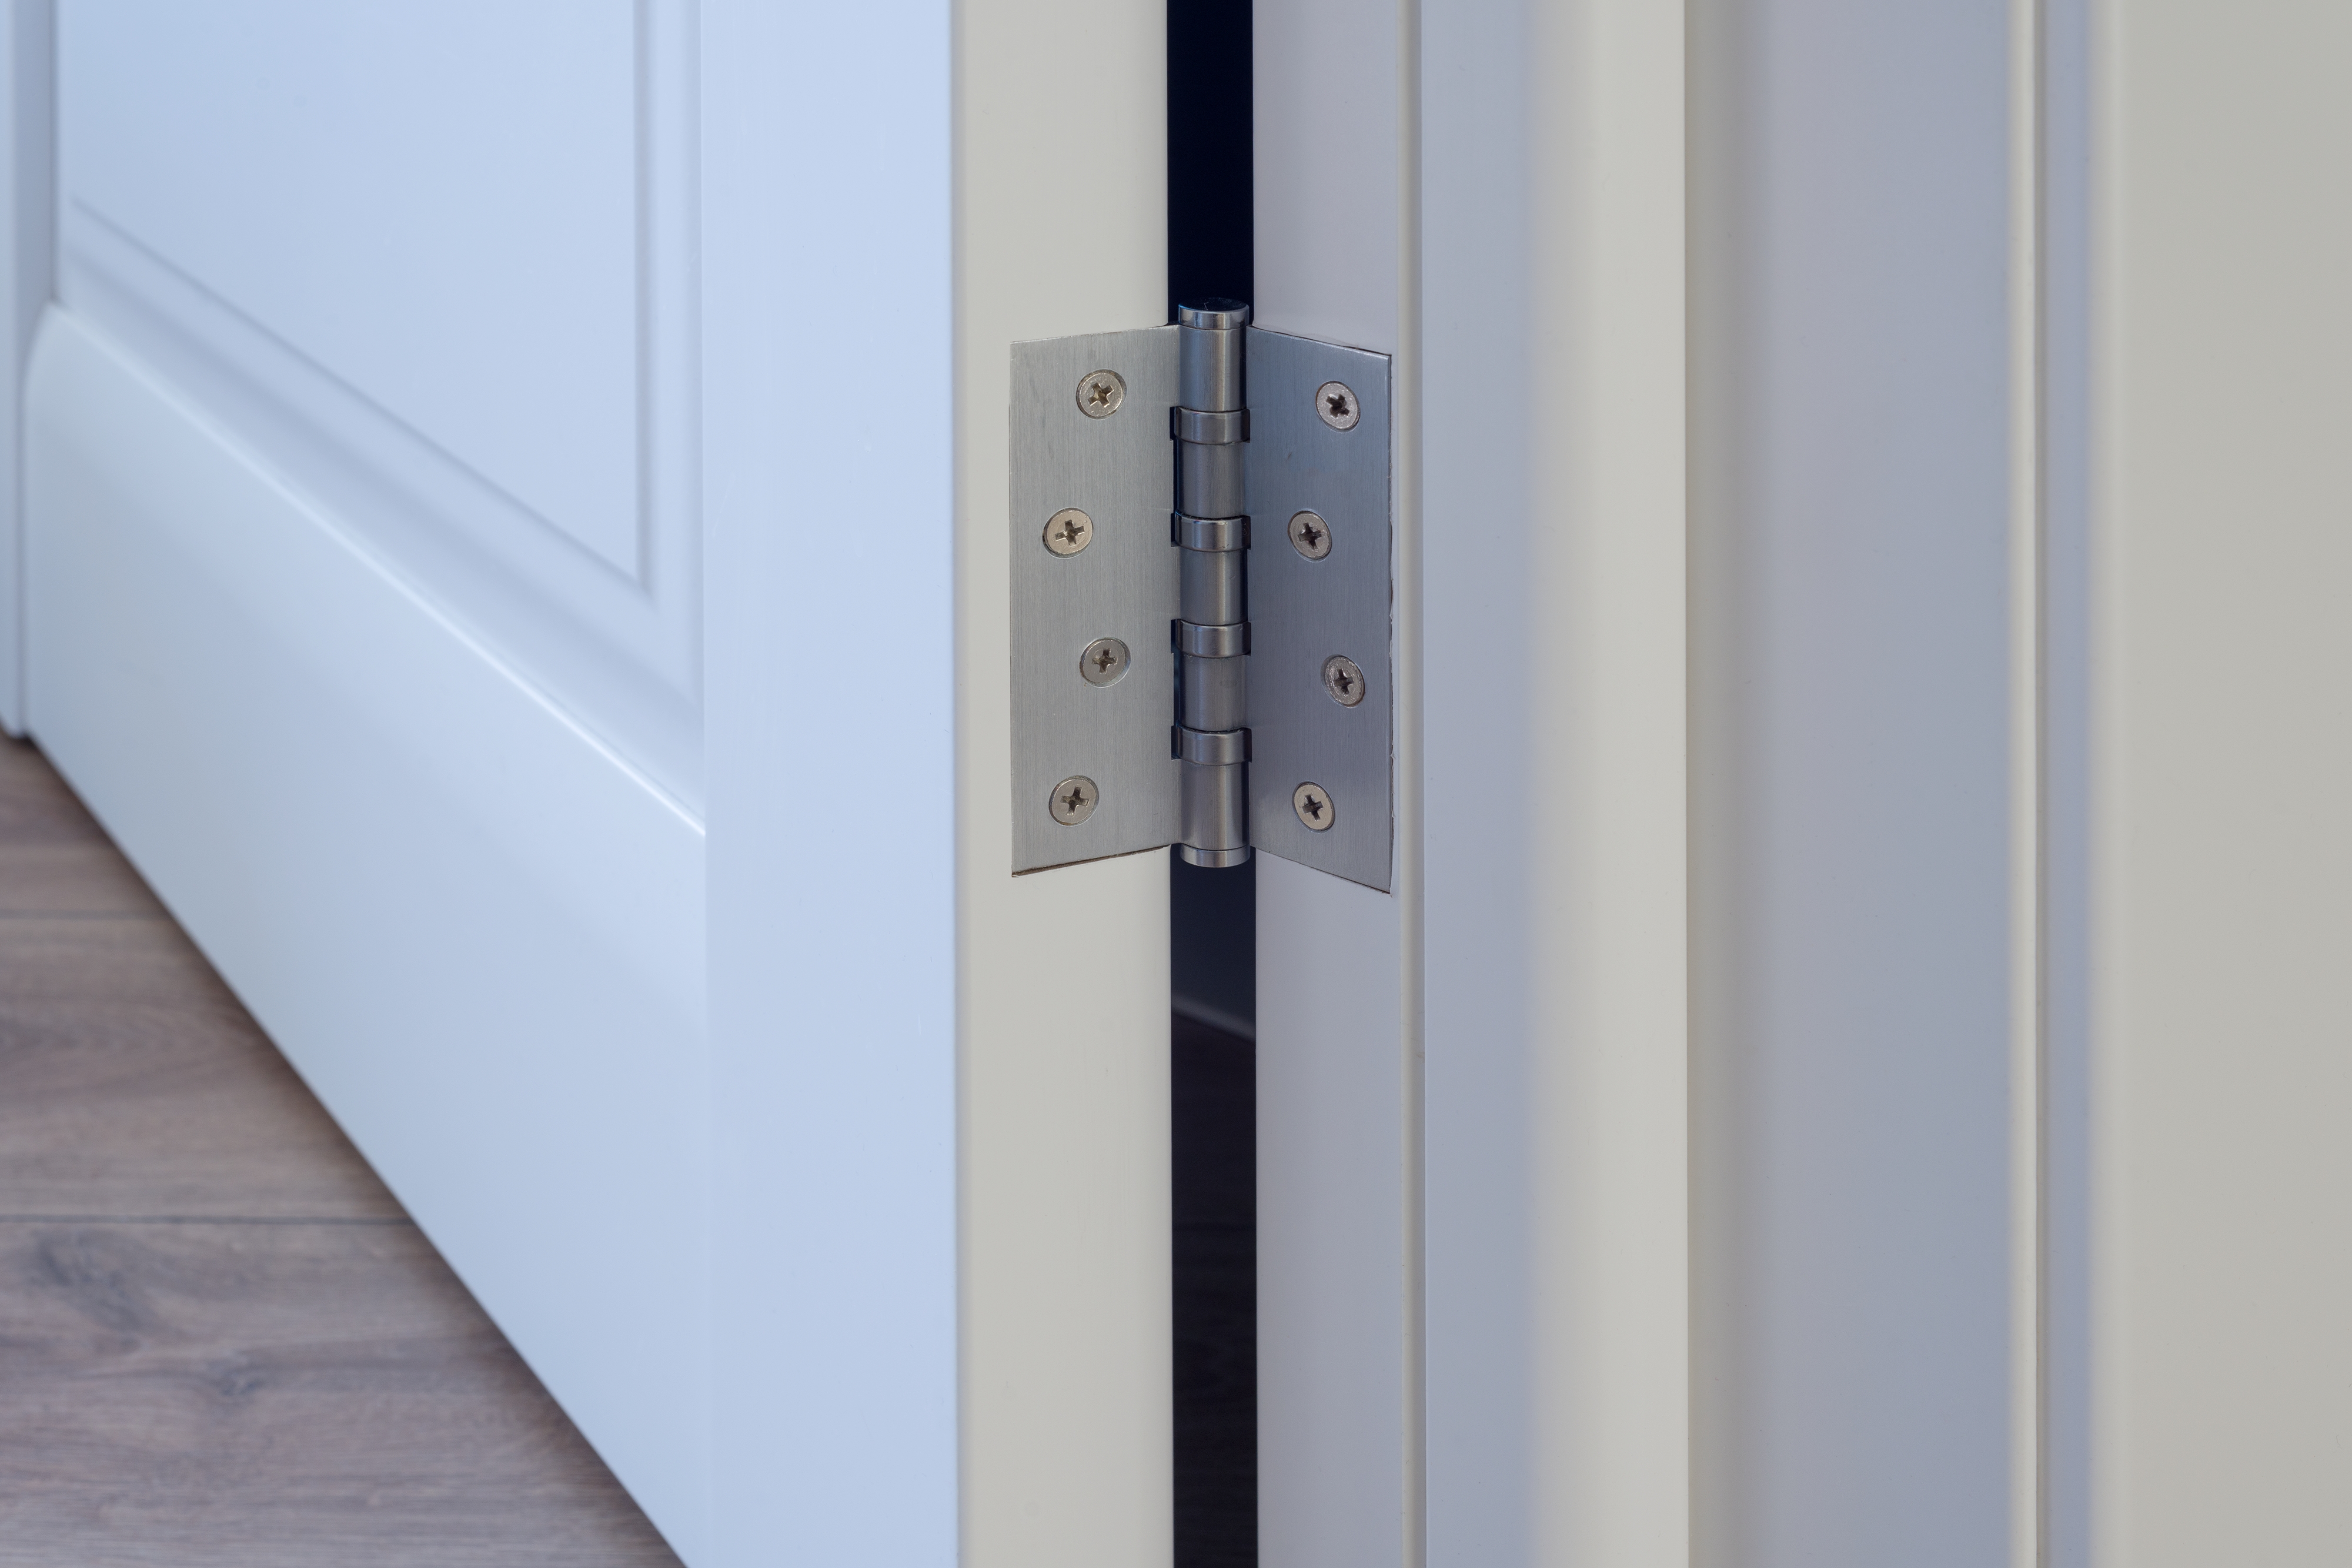
Notching doors for hinges is a process that can be done on site or in the workshop prior to installation. Hinges are integral to the operation of any hinge hung door and if they fail, the door will fail. A successful installation of hinges relies on two factors: local knowledge of specific building requirements and expert design knowledge. At Lizzie Blunderfield we make many types of doors but all hinge hung.
The notch for a new hinge was cut at the factory. You can use either side of the door’s edge, provided there is no finish on that edge. Fastening the hinge leaves a small gap between the door and frame, 1/8 inch being common. Both hinges must open in toward the room, that is push outward toward the hinges on each side of the door. If a door has a window on it, do not install one of these hinges very near to the window.

Notching doors for hinges
I’m working on a project where I need to install some new hinges on a door. The existing hinges had been removed and the holes in the door were somewhat enlarged by the previous owner. This made it difficult to find new hinges that would fit well.
The problem is that the hole in the door is too large for a standard hinge, so I have to notch out part of the door jamb to allow the hinge to sit flush against the jamb.
I did some research and found that there are several ways to do this, including using a chisel or router jig. But neither seemed very appealing, since both would require me to cut into an expensive piece of wood that has already been damaged by someone else’s mistakes.
Then I remembered my Dremel Multi-Max tool, which can be used for cutting as well as drilling and grinding. So I decided to try using it as a saw (to cut) instead of drilling or grinding (to notch).
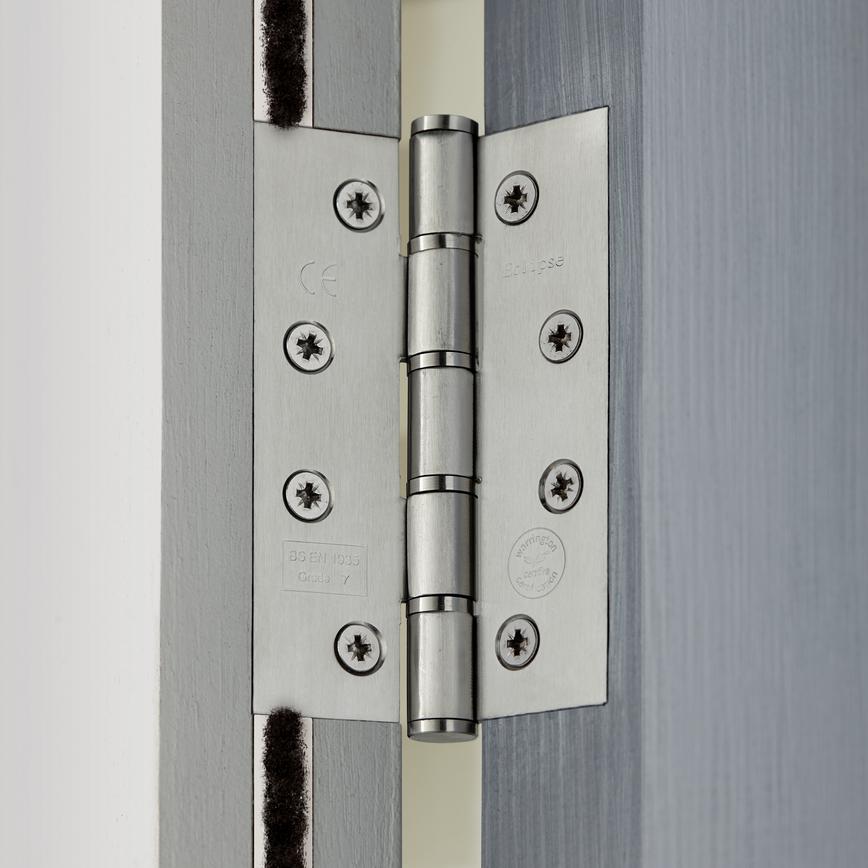
Notching doors for hinges
If you’re installing new hinges on a door, you may need to notch the edges of the door. Notching is cutting a groove in the edge of the door to accommodate the hinge’s thickness. Notching is also called rabbeting or rebating.
There are several ways to notch a door for hinges. Hinges are available with different thicknesses, so you should measure your hinge before making any cuts. For example, if your hinge measures 1/4 inch thick, but your saw blade is only 3/16-inch wide, then you’ll need to either buy thinner hinges or use an alternative method to notch your door.
Chisel for Door Hinges
You can notch doors with hand tools like chisels and planes, but this often requires patience and skill. A chisel works best if it has a sharp point that can penetrate deep into the wood without damaging its surface. Use a wooden mallet or hammer to drive the chisel through the wood without damaging it beyond repair. If you don’t have a mallet or hammer, use another piece of wood as an impact buffer between your workbench and the chisel handle
Notching doors for hinges can be a tedious and difficult job. You need to be careful when notching out the door so that you don’t make it too wide or too deep, as this will cause problems with the door closing properly.
Here are some tips for notching out your door:
1) Use a chisel to score around the hinge location. The chisel should be held at 90 degrees to the wood. Then use a hammer to gently tap around the hinge location to flatten out the wood, creating a notch for the hinge to sit in.
2) To make sure that you have enough space for your hinges, mark and cut out an area slightly larger than your hinges with a jig saw or mitre box and saw. Do this before cutting any of your hinges with a multi tool because it makes things easier if everything is done at once.
3) Once all of your notches have been cut out, drill pilot holes into each one of them using an appropriately sized drill bit – usually 4mm or 6mm depending on what size screws you are using (check with your supplier).
Notching doors for hinges
If you need to notch a door for hinges, the process is pretty simple. It’s just a matter of marking the cutline, measuring the distance between the door’s edge and the hinge, and cutting away the wood with a jigsaw.
Use a chisel to remove most of the waste. Then finish up with a saw.
I used an Irwin Marples chisel because I had it on hand, but any flat-bladed chisel will do.
Door hinge jig
You can also use a door hinge jig to make this job easier (and faster). It’s basically just two pieces of plywood that clamp together around the door frame so you can make multiple passes without having to measure each time. I’ll show you how it works later in this article.
There are many different methods for notching a door for hinges. Most of them require special tools and are beyond the scope of this article, but one method that is simple, easy to do and doesn’t require any special tools is shown here.
This method can be used to notch any size door up to 6 feet wide and 4 feet high (1.8 m x 1.2 m). For larger doors, see How To Install Door Hinges on Large Doors.
Step 1: Measure the width of your door from hinge leaf to hinge leaf, then subtract 3/4″ (19 mm) from this measurement for each set of hinges you are installing. The resulting dimension will be the distance between the centerlines of each hinge leaf when it is installed on your door.
Step 2: Measure the height of your door at its midpoint between top and bottom (this is where the hinge leaves will be located), then subtract 3/4″ (19 mm) from this measurement for each set of hinges you are installing. The resulting dimension will be the distance between the centerlines of each hinge leaf when it is installed on your door.
Step 3: Use these measurements to mark out a square or rectangle in each corner of your door panel that is exactly 3.
Door Hinge Template
Door hinge template is a very important tool for woodworkers. It is used to transfer the hole location of door hinges onto the door. Without it, you will have difficulties in drilling holes for your door hinges correctly.
Chisel for door hinges is a very simple and easy tool that you can make at home. With this chisel, you can easily drive out old nails from your door hinges. This tool is also useful when you need to remove some paint from your old wooden doors. You can use this tool to scrape off paint from your old wooden doors without damaging them.
A door hinge jig helps you drill holes into your wooden doors accurately and with ease. This tool helps you position the template exactly where it should be placed on your wooden door so that there will be no misalignment when drilling holes into it with your drill bit or screwdriver. Once you have positioned the template properly, just place it onto the surface of your wooden door and use a hammer or mallet to drive out nails or screws from them by tapping them gently until they come out completely from their original places inside
Door hinges are the piece of hardware that allows your door to swing open and closed. If you are replacing a set of door hinges on your home, it is important that you install them correctly so that they will work properly.
The two most common types of door hinge jigs are a template and a chisel. Both tools make it easy to create an accurate hinge mortise by placing the template or chisel in place and using it as a guide for drilling out the holes for the screws.
A template is a simple device that has a hole drilled into one end, which can be held against the door while you drill through with a drill bit that matches the size of the screw head. The main advantage of using this type of jig is that it provides accuracy when drilling out the holes in your doors.
A chisel is another tool used to mark out an area where you want to cut or drill into your door. The advantage of using this type of tool is that it allows you to create a mortise in any shape or size without having to measure out every angle and curve beforehand. Some examples include:
The door hinge jig is a tool that helps you cut perfect door hinges every time. It’s made of solid steel, so it can be used again and again.
The jig comes with two pieces of steel stock that are bent into the shape of a door hinge, as well as a guide pin to help you position them correctly on your workpiece. To use it, set one piece of stock in place against the edge of your board and lay the other piece on top. Then simply clamp the two pieces together at their ends with clamps or C-clamps and cut out the middle with a circular saw or router bit.
The door hinge template is a tool that can be used to cut out the holes for the door hinges. The door hinge jig is made of metal, plastic or wood and it has a slot in which you place your saw blade. This will allow you to use the jig as a guide when cutting out your holes for the door hinges. You can also use it as a guide for other cuts on your project, such as mortises or tenons.
The door hinge template has an adjustable fence so you can make cuts of different depths into the material that you are working with. It also has various stops that allow you to make multiple identical cuts in succession without having to resetting the fence each time. These stops are adjustable so that they will fit any size hole, from 1/2 inch up to 3 inches in diameter depending on what type of project you are working on at the time.
To use a door hinge jig, first place your material on top of it so that it fits into one end of the opening between two stops on either side of where you want your hole drilled out to be placed (see photo). Then set your saw blade depth into this opening by adjusting one side of the stop until it hits against one side
The best way to make a door hinge template is by using a router. You can use the router table or freehand, but either way it’s going to be very accurate and easy to use.
The first thing you need to do is make sure that the bit is set up properly. This means that there is enough material at the bottom of the hinge so that it will not come in contact with the template. You should also make sure that you have enough material at the top of your hinge so that it will not be too thin and weak when you install it.
If you are using a plunge router, then simply set your bit height so that it will cut through about half of the door thickness. If you are using a fixed base router, then use your fence as your guide for setting this height properly for each cut.
After setting up your bit height, clamp down your template onto your work piece and then make all of your cuts using this setup. The most important thing when doing this is to make sure that there is no tear out on any of these cuts because this will cause problems later on in assembly when putting together your entire project together.