Building a wood or wine rack takes patience and a bit of knowledge. You need to plan and then execute your design. Wood is an extremely versatile material so quite a few woodworking designs are available. In this article, I described the process of designing and making my own wine rack, but first let’s take a look at what it involves.
Wood Wine Racks are an ideal kit to build your own wine rack, how to build a wine rack wall, diy wine rack plans, source the materials and get started. I would like to share with you some useful information you may find helpful on how and why choose my wood wine racks over another.

How to build a wood wine rack
A wine rack is a great addition to any home and will make it feel more personalized and cozy. Wine racks can be built out of many materials, but wood is the most common choice. Building your own wine rack allows you to customize the design and style, as well as create something that suits your needs. If you are looking for a fun weekend project, try building your own wine rack.
How to build a wine rack wall
Wine racks can be placed on walls or on floors. If you want to build one that sits on the floor, you will need a sturdy base that can support all of the weight of the bottles in the rack. For example, if you have 20 bottles in your rack and each one weighs about 1 kg (2 lbs), then you will need at least 200 kgs (440 lbs) of weight capacity in order for it not to tip over when someone leans against it or moves around inside your home. This means that if you live in an area where earthquakes occur regularly (such as California or Japan), then you should probably opt for getting one that sits on the floor instead of on the wall because it is safer during tremors and earthquakes when there is less movement around
A wine rack is an excellent way to show off your wine collection and store your bottles in a convenient way. You can build your own custom-made wine rack with this guide.
The first step is to measure the dimensions of the space you want to fill, then choose the type of wood you require for building the rack. If you want a more decorative look, consider using hardwoods such as oak or maple. These woods are strong and durable, making them a good choice for furniture projects like this one.
Next, cut all of the pieces for your wine rack to size according to plan. Then sand each piece down and apply a coat of stain or paint that matches your decor. Finally, attach each piece together using glue and nails or screws as required by your plans or design.
How to build a wood wine rack
Wine racks are an excellent way to store your collection. Whether you have a small or large collection, it is possible to build a wine rack to fit your needs. You can even build one that will fit into your cabinets or into the wall. There are many different types of racks that you can build and this article will provide you with some tips on how to do so.
There are many different types of racks that you can build and this article will provide you with some tips on how to do so.
DIY Wine Rack Plans
A wine rack is a very useful item to have in your home. It can be used as a storage place for bottles of wine or other beverages and it can also be used as an attractive piece of furniture. A wood wine rack can be built using many different materials and methods. The most common type of wood that is used for making wine racks is redwood.
Redwood is strong and durable, it will last for many years without any problems. Redwood can also be easily worked with hand tools, which makes it easy to build your own wine rack.
Here are some tips that will help you build your own redwood wine rack:
Cutting the Wood
The first step in building a redwood wine rack is cutting the wood into the correct size pieces. This step should be done carefully so that all of the pieces fit together properly when they are assembled together later on in this project. You should also ensure that each piece is cut at an angle so that it will fit into its corresponding slot correctly when it comes time to assemble everything together by hand with screws or nails (depending on how you want your final product to look).
Assembling the Pieces Together
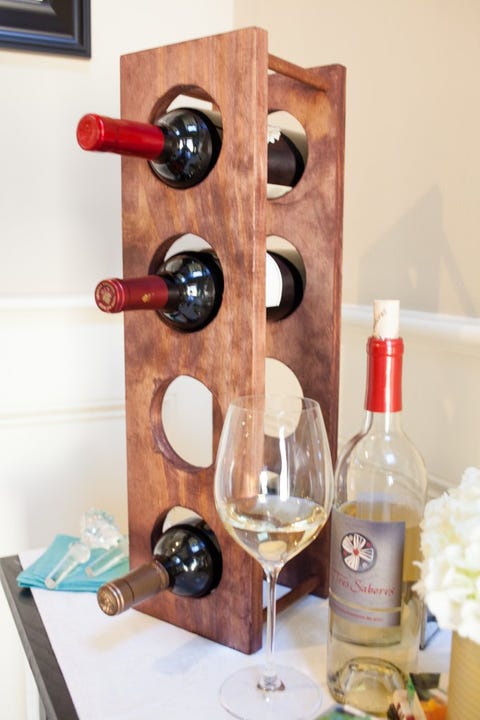
Can you build a wine rack? Yes, you can! You can make a really nice one, too — and in less than 30 minutes. Here’s how:
This is the easiest wine rack I’ve ever built. It’s made from a single piece of wood and it took me about 20 minutes to make it. It has three tiers that hold 12 bottles of wine, so it holds 36 bottles total. That’s enough for me, but if you’re looking for more storage space, just build another one!
What you need:
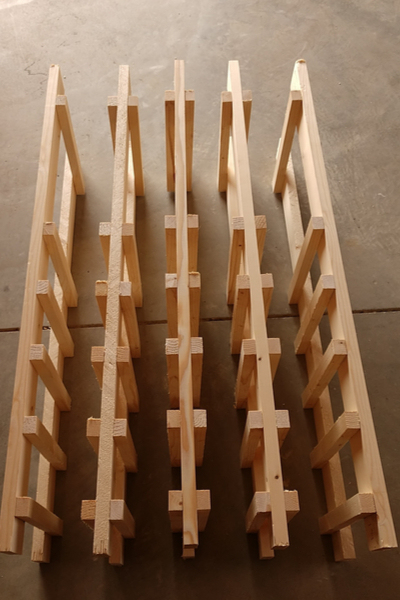
One 1x3x8′ board (I used pine)
Two 1x1x8′ boards (I used pine)
Wood glue
Wood stain or gel stain
Sandpaper
How to build a wine rack wall
Wine racks are usually made of wood and can be made to fit any space. Wine racks are great for storing your wine glasses and bottles. Wine racks are also a great way to decorate your home with a personal touch. A wine rack is a great gift idea for those who enjoy drinking wine or those who enjoy collecting wine.
Here are some tips on how to build a wine rack wall:
Choose your material
The first thing you need to do when building a wine rack wall is choose the material that you want for your project. You can choose between different types of woods, such as oak, pine or softwood like fir or pine. You can also use hardwoods like mahogany or oak if you want something more expensive looking than softwoods and woods like pine, fir or even poplar will work well too. Just make sure that whatever material you choose is strong enough to hold all of your bottles without breaking under pressure so your bottles won’t fall off the rack during transport if you plan on moving it around often after construction is complete!
Decide what size will work best for your space
Depending on how much room you have available in your home, you may need more than one wine rack wall depending on how many bottles of alcohol
How to Build a Wine Rack Wall
Wine racks are an easy way to display your collection and keep your bottles organized. But they can be expensive, so why not build your own? The project below shows you how to build a wine rack wall using just a few tools and supplies.
The first step is to choose the location for your rack. You’ll want it to be easily accessible, but not too close to the kitchen or dining room if possible. The ideal height for a wine rack is about 40 inches off the floor — this gives people enough room to reach over and grab a bottle without having to bend over too much or kneel down on the floor.
Once you’ve decided on the spot for your rack, measure it out so that there will be enough room between each shelf for bottles (typically 3/4 inch). If you have more than one level of shelves, make sure they’re at least 4 feet apart from each other so that you can fit large bottles in between them.
When building your own wine rack wall, use wood boards that are at least 1 inch thick — preferably 2 inches thick if you want extra stability. Then cut them into pieces approximately 3 inches wide by whatever length you need (usually around 6 feet long).
To make your own wine rack, you just need a few supplies. You can use any type of wood for this project, but hardwoods will last longer. Make sure your lumber is at least 2 inches thick if you’re using a hand saw and drill.
Wine Rack Plans
These DIY wine rack plans are perfect for anyone looking to build their own wine storage unit. The plans are easy to follow and include detailed illustrations that make it easy to build a beautiful custom rack that fits the style of your home.
How To Build A Wine Rack Wall
If you love wine and have an empty wall in your home, why not build one yourself? This DIY wine rack wall is a great way to store your favorite bottles while also adding some character to any room in your house. It’s easy to follow these step-by-step instructions so you can build one yourself or ask a friend or family member for help if needed!
How to Build a Wine Rack Wall
Build a wine rack wall with these simple instructions. You’ll need basic DIY skills and tools like a drill, screwdriver and hammer. This easy-to-follow step by step guide will show you how to build a wine rack wall in your home or bar.
How to Build a Wine Rack Wall: Plan Your Design
The first step is to plan out how many racks you want and where they should go. It’s best if they are not all facing the same direction so you can see them from different angles. You can install one rack above the other or space them evenly apart on the wall. The choice is up to you!
A good idea is to put one or two racks near the kitchen where you can easily grab a bottle when cooking dinner or entertaining guests. Another option is putting them next to the couch so it’s easy to grab one while watching TV with friends or family members!
Whether you’re building a wine rack wall or shelf, you’ll need the right supplies. You can make your own wooden wine racks using wood and tools you probably already have around your house. The type of wood you use depends on the design of your wine rack, but in general, hardwoods like oak and maple are best for wine racks because they’re more durable than pine or fir.

If you want to build a basic wooden wine rack, start by measuring the space where you want to put it. You’ll need at least 3 inches in each direction (height and width) for each level of your rack. Make sure there’s enough room between shelves so bottles don’t touch each other when they’re placed on them.
Once you’ve measured the space, cut wood pieces using a miter saw or handsaw according to your plan (or ours!). For example, if you’re building a straight-sided square shelf with four levels that’s 24 inches long by 12 inches wide at the base, cut four pieces of 2-inch-by-4 inch lumber into 24-inch lengths with one end at 45 degrees and one end at 90 degrees.