Wood fences are attractive, elegant and enduring. But that’s not all. They protect your property from intruders, from wandering eyes, from prying eyes. So if you are a property owner in need of a new fence or just thinking about building a new one for your own property then this article is right for you. We will discuss all the essential things you need to know so that you can build the fence with confidence.
If you’re looking to build a wood picket fence, how to build a cheap picket fence, installing picket fence panels, you’ll want to execute 5 crucial steps. Let’s get started!

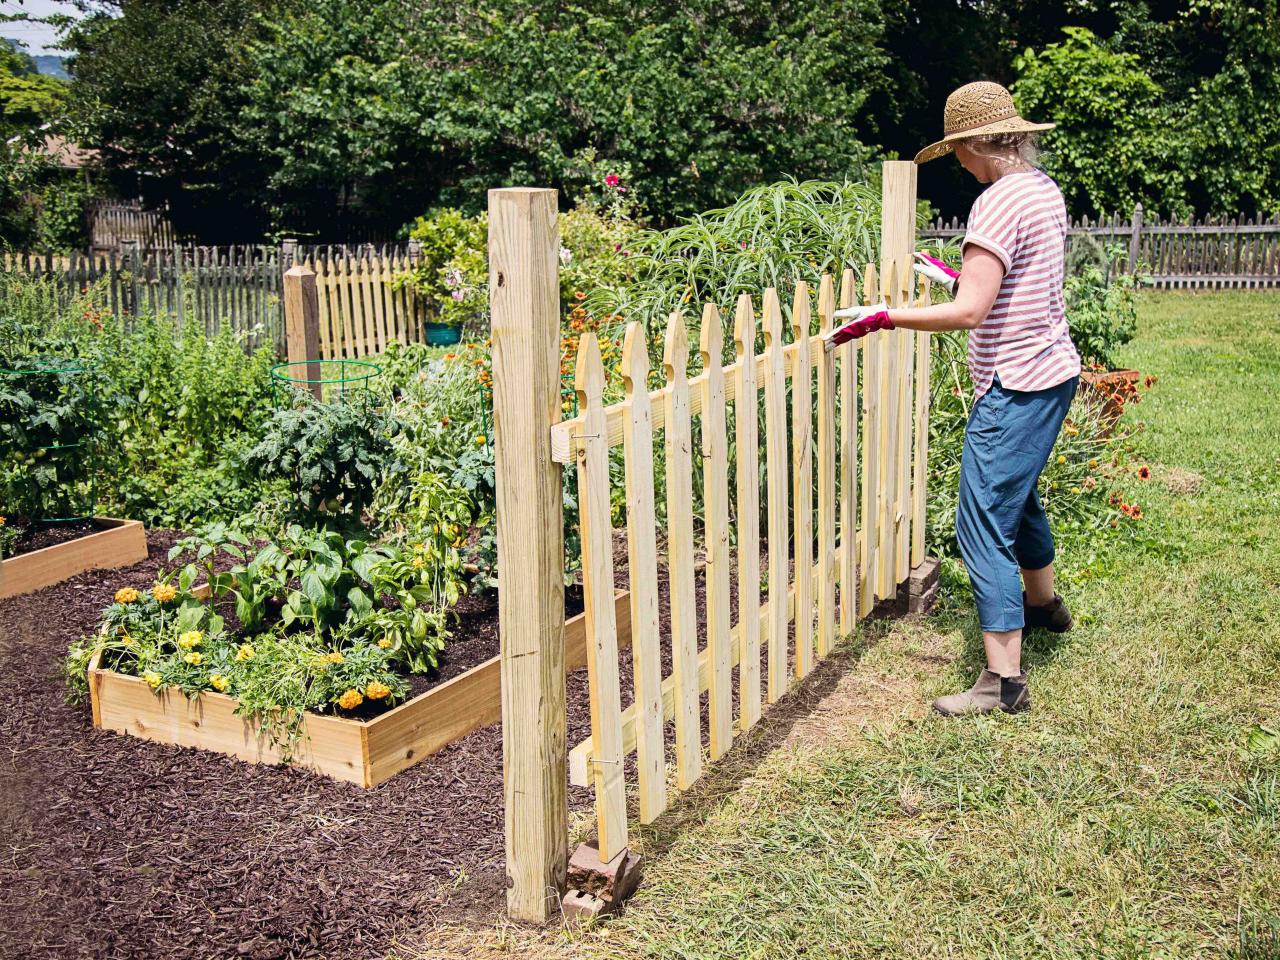
How to build a wood picket fence
Some people would say that building a wood picket fence is easy, but it really isn’t. You need to take some time to learn how to build a wood picket fence before starting the project. This way you can avoid common mistakes that many people make when building their own fences.
Installing picket fence panels
The first step in building a wood picket fence is installing the panels. The easiest way to do this is to use an electric saw with a guide attached. You can find these at your local hardware store or online. If you have access to power tools like this, then use them! They will help speed up the process and ensure that all of your cuts are uniform and straight.
Using a miter saw will also work well if you don’t have access to an electric one. Just make sure that you keep checking for straightness as you cut each piece of wood down into smaller pieces.
If you don’t have access to either of these tools, then use hand tools instead! A handsaw will work just fine if it’s sharp enough, but it might take longer than using an electric saw or miter saw would
How to Build a Wood Picket Fence
A picket fence is a traditional fence made of upright slats that resemble the pickets used on a horse corral. A wood picket fence is usually made from cedar or other rot-resistant lumber. The boards are usually 2 inches (5 cm) wide and 2 inches (5 cm) thick. They are nailed to a 4-foot (1.2 m) high frame, forming an open pattern with no spaces between the pickets.
Picket fences come in many styles, but the most common type is a boarder’s fence. It has two or three horizontal rails on top which are called boarders, as well as two or three vertical rails called stiles . A boarder’s fence is also known as a double-boarder fence because it has two levels of rails on top and one level of rails below (see diagram). A typical boarder’s fence is about 7 feet high with 6 inches (15 cm) between the top rail and bottom rail.
It takes about 50 hours to build such a simple picket fence if you use standard materials like cedar boards and 5/8 inch (16 mm) nails.
How to build a wood picket fence:
If you’re looking for an inexpensive way to enclose your yard or garden, but don’t want to spend money on a chain link fence, consider building a wood picket fence. This type of fence is relatively easy to install, and can be done in just a few hours. The basic materials needed for this project are:
• A hammer or mallet
• Wood pickets (also called palisade boards)
• Fence nails (1-inch galvanized fencing nails work well)
• A post hole digger or post driver
If you’re looking for a fence that will last, wood is the material to use. Wood is durable and can be stained or painted to match the rest of your property. The cost of building a wood fence is also considerably less expensive than other types of fencing.
You can build your own picket fence by following these steps:
1. Site preparation – Remove all vegetation from the area where you want to construct your fence. If there are any trees in this area, cut them down and dispose of them properly. Mark out the area on the ground using stakes and string so that you know where to build your fence posts.
2. Post installation – Dig holes for each post at least 12 inches deep and fill them with concrete mix until they are level with the ground surface around them. You should install at least two posts per side of your fence line so that it will be strong enough for anything that might happen in its path over time (i.e., kids climbing on it).
A picket fence is a type of wood fence that uses vertical wooden slats or boards to create a privacy barrier. The slats are usually made from cedar, redwood or pine wood and have the appearance of being cut by hand. These fences can be used to provide privacy in your backyard, around pools and gardens.
Installing a picket fence is not difficult if you have the right tools and know how to do it right. The materials needed for this project include:
Picket posts
Wooden slats (2″x4″s)
Nails
Hammer

How to build a cheap picket fence
A picket fence is a good addition to almost any yard. It adds a classic look and can help you achieve your desired aesthetic.
If you’re looking to build a simple, inexpensive picket fence, read on for our guide on how to do it right.
Installing Picket Fence Panels
The first step in building a picket fence is to install the boards that will make up each section of your fence. The best way to do this is by using L-shaped brackets attached with nails or screws. These brackets should be placed at the top and bottom of each board so they can be attached to the posts.
Next, install the pickets themselves by hammering them into place between the brackets on both sides of each board. When installing new boards, leave about 1/2 inch (1 cm) between them so there’s room for drainage and airflow between them as well as around posts in case extra space needs to be made for electrical wiring or plumbing later on down the road.
How To Build A Picket Fence Gate
The gate itself is easy enough to make: just attach another set of brackets (or a horizontal beam) at either side of gate posts
How to Build a Cheap Picket Fence
A picket fence is one of the most common types of fences. It is usually made out of wood, but there are other options as well. This article will explain how to build a cheap picket fence.
Installing Picket Fence Panels
The first step in building your own picket fence is installing the panels. You will need to make sure that the posts are secured in place so that the panels can be attached to them.
You will also want to make sure that your posts are level and spaced evenly apart from each other. To do this, you should use a post hole digger and hammer drill. If you don’t have these tools, you can rent them at any hardware store or home improvement store for just a few dollars each day.
If you already have posts installed in your yard, then skip ahead to Step 2 below. Otherwise, continue reading for more information about building your own posts for your picket fence project:
To build new posts for your picket fence project:
Take two 8-foot long 2×6 boards and cut them down so that they are 5-feet long each (4 feet 6 inches).
How to Build a Cheap Picket Fence
A picket fence is one of the most traditional fences that you can build. It doesn’t require much skill and it’s cheap to build. A basic picket fence will cost about $2,000 for a 100-foot long section.
You’ll need posts, rails and other materials for your fence. The posts should be treated with preservative or paint to protect them from rot. You’ll also need nails to attach the rails to the posts and wire mesh or chicken wire to cover any gaps between boards.
Building a Picket Fence Gate
You can build your own gate using 2x4s (or 2x6s if you prefer). Cut six pieces of 2×4 at 8 feet long, then cut one piece at 4 feet long and two pieces at 3 feet long (for example). Screw these together in an X shape so that the longer pieces are about 6 inches apart from each other at their bases and form an arch over the opening when placed on top of each other. Attach this frame directly onto your post with screws, then attach your railings onto this frame using more screws before attaching it all together at the top with hinges so that it swings open and closes
A picket fence is a great addition to any landscape. It can bring in a simple, rustic feel or give your home a more elegant style. If you’re building a new house or want to replace an old picket fence, it’s easy to build your own.
Building the Fence Posts
The first step is to dig holes for your fence posts. The size of the post depends on the height of your pickets, but you can get away with using 6-foot-tall posts if they’re placed every 10 feet along the fence line. Use concrete footing forms and pour concrete into each hole until it reaches the top of the form. Let it cure overnight before moving on to installing the posts.

Installing Pickets
Once your concrete has cured, you’ll need to install your pickets onto these posts. For this step, use 2x4s as spacers between each post so that each one is spaced properly apart from one another. If you’re using pressure-treated lumber for your pickets (which is recommended), drill pilot holes through them and into the post before attaching them with 3/8-inch lag screws or decking screws (make sure those are long enough).
Building a picket fence is a great project for the DIYer. It’s not hard to do and it can be done in just a few weekends. The average cost of materials for an 8-foot tall, 4-foot wide fence runs between $350 and $500.
You can buy pre-built panels at most home centers, but they’re expensive. You’ll pay about $150 per panel if you buy them pre-cut. You can also buy raw materials and cut them yourself at home centers or lumber yards for about half that price. If you don’t mind spending a little time on your hands and knees, it’s possible to make panels from scratch for less than $50 each.
To make your own panels, follow these steps:
Cutting boards: Buy pressure-treated 1x6s from any lumber yard that sells treated wood. The boards should be around 6 feet long and 2 inches thick (or 4 inches thick if you prefer more strength). Use a circular saw with a fine tooth blade to cut each board into three pieces 4 inches wide by 48 inches long; these are called “cutting boards.”