For busy homeowners, homemade wooden outdoor furniture is the perfect solution since it is usually less expensive than buying readymade furniture. Outdoor wood table plans can also save you money and eliminate some of the most frustrating parts of owning and maintaining your own home, such as yard work, mowing the lawn, painting, repairs and more.
If you’re a DIYer, how to build a outdoor wood picnic table, how to build a wood outdoor dining table, outdoor table is not a difficult project to make. You can easily build a simple outdoor table following these instructions.

How to build a wood outdoor table
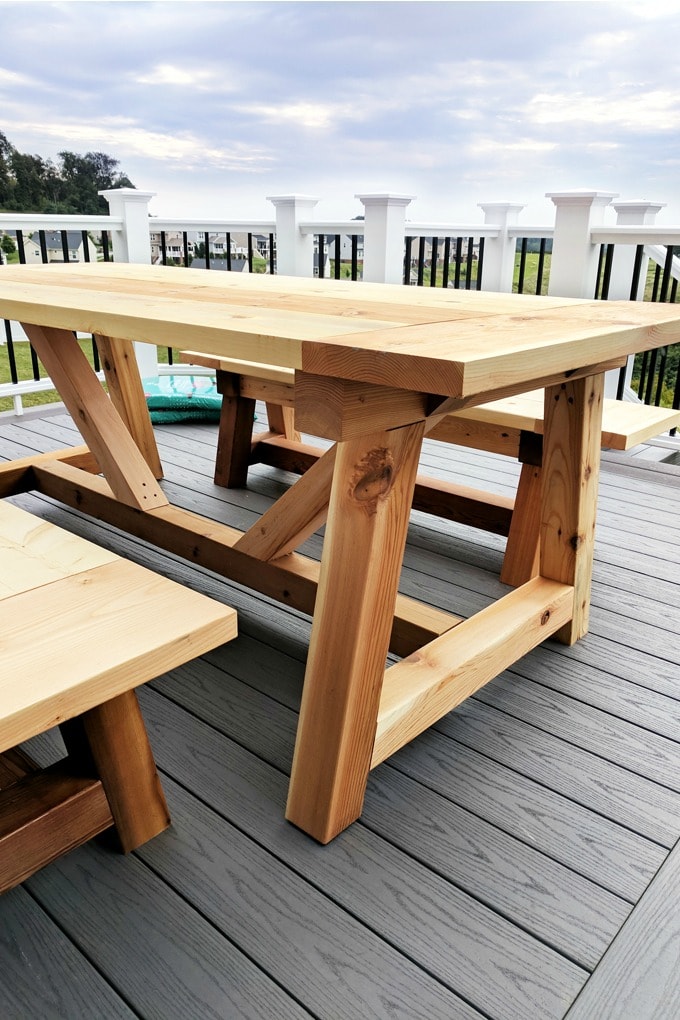
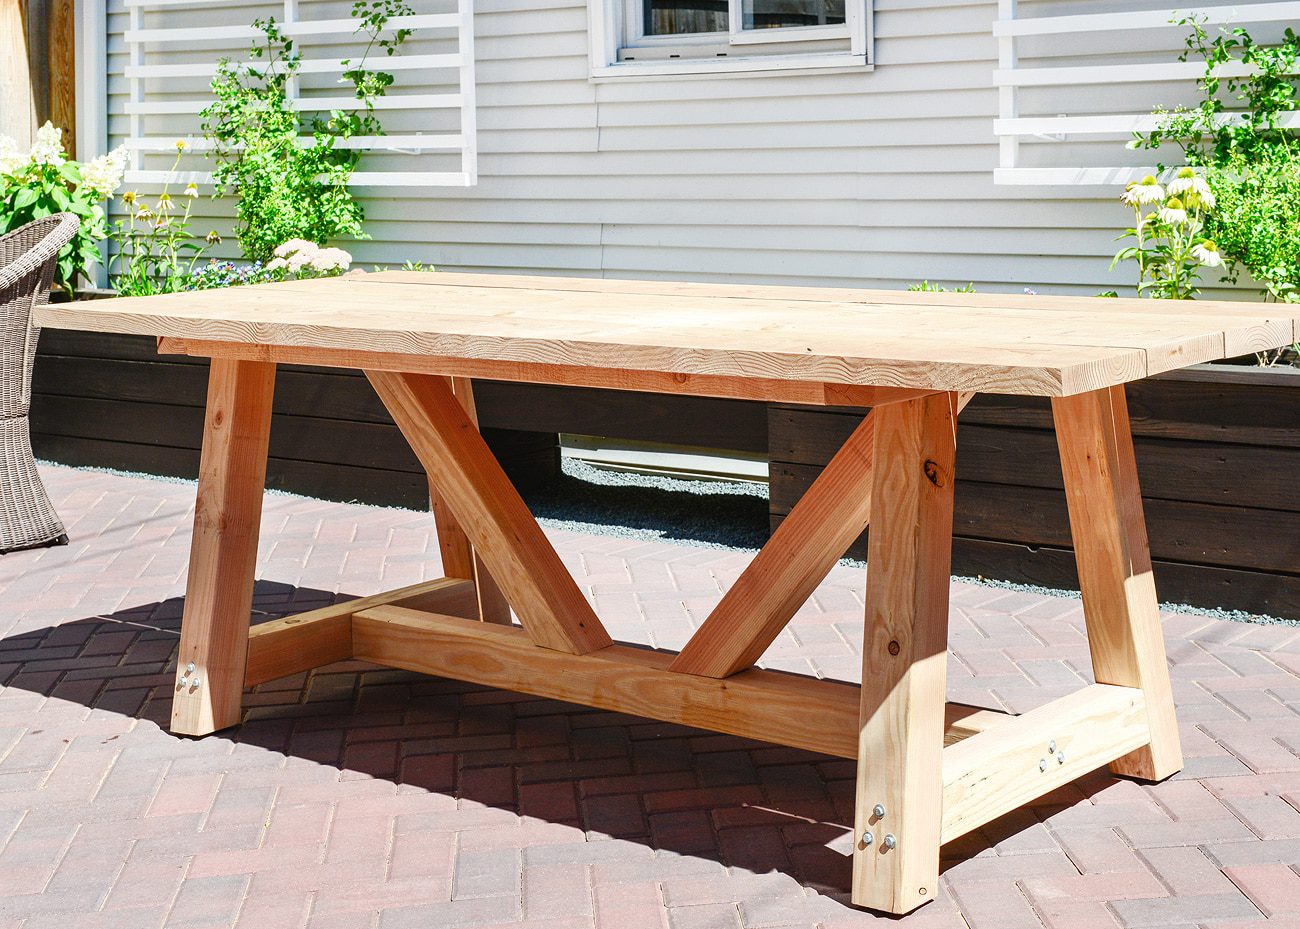
Outdoor wood picnic tables are great for making your backyard or patio area more functional. These picnic tables are easy to build and can be customized to fit your space and needs. You’ll need basic carpentry skills, but the project can be completed in a weekend or less.
Here’s how to build an outdoor table with 2x4s:
1) Cut the 2x4s for the tabletop frame. The 2x4s should be about 38 inches long, including the length of one end that will overlap the tabletop frame. You should have four pieces total, two of which will be used for each side of the table frame.
2) Assemble the tabletop frame by securing two of these pieces together at right angles using two 1 1/2-inch screws per joint. Each joint should be spaced about 8 inches apart across the entire length of the tabletop frame.
3) Lay another pair of pieces on top of this first pair so they overlap by 4 inches along one side (see photo). Secure them together using two 1 1/2-inch screws per joint just like you did in step 2 above (you should now have four layers combined into one tabletop frame).
How to build a wood outdoor table
Building an outdoor table is a great way to add some style, function, and durability to your patio or deck. An outdoor table will also help keep your guests from having to eat with their hands.
The process for building a wood outdoor table is pretty much the same as building any other kind of furniture. You’ll just need a few extra tools and materials.
You can use just about any type of wood for an outdoor table, but cedar and teak are two popular choices because they are naturally resistant to the elements. Other woods that work well include pine and redwood.
Get started by measuring all four sides of your tabletop so you can find out how much wood you need for each part of the project — this gives you a rough idea of how big your tabletop will be once it’s assembled. Next, cut out all the pieces using a circular saw (or jigsaw if you have one).
The first step is to purchase your materials. You will need two 2x8s, a 2×4, some screws and wood glue. You can also paint or stain your table to match the rest of your deck or patio.
Step 1: Cut the 2x8s to length using a circular saw with a carpenter’s square. Cut one of the boards into four equal pieces for legs and then cut another board into two equal pieces for the supports.
Step 2: Measure and mark where each leg should go on top of the tabletop board with a pencil so that they are spaced evenly apart from one another. Use your cordless drill and predrilled holes to secure each leg into place using three screws per leg. Then measure and mark where each support needs to be secured onto the tabletop using predrilled holes as well before securing it in place with three screws per support as well.
Step 3: Once both sides are finished, stand them up on their sides and line them up at both ends so that they match up perfectly straight together (this makes sure that your top remains flat). Secure them together with glue and some clamps until dry (usually about 20 minutes).
When building a picnic table, the most important thing is to make sure all the corners are 90-degree angles. This is something that can be easily checked by using a square and checking each corner of your table as you build it.
If you are looking for an easy project that you can do with your kids, this is the perfect one. A picnic table doesn’t require any power tools or fancy woodworking skills, so anyone can do it!
Materials:
2x4s – 8′ long (2)
1x8s – 6′ long (6)
1x8s – 4′ long (6)
1x12s – 6′ long (2)
Building a picnic table is a great way to add an outdoor dining area to your home. It’s also a great way to get the kids involved in helping out and spending time together as a family.
Building your own picnic table gives you the opportunity to make it exactly how you want it, from the size and shape of the top, to the color of the paint and even what type of wood you use.
The best part is that it doesn’t have to cost a lot of money to build your own outdoor table. All you need is some basic tools, some good quality lumber and some patience.
1. Pick a good spot for your table. If you want to build it on grass or dirt, make sure there’s enough room for all the legs to be level so they don’t sink into the ground. Also make sure that whatever you build your table on is flat and solid.
2. Use pressure-treated wood or cedar if possible because it will last longer outdoors than ordinary pine boards. You can also paint or stain treated lumber before you build the table, which will make it less likely to warp and crack over time, but that’s up to you.
3. Measure out what size table you want before buying any materials at the store and make sure all your pieces are cut exactly to those dimensions when you get home so everything fits together perfectly later on in the process (we used treated 2x4s for our frame). For example if your top width is going to be 36 inches then buy 36-inch boards so
This is a guide about making a picnic table for your backyard. It is easy to build and can be customized to fit your needs.
You will need:
A saw (circular or miter)
A drill
Wood screws
Sandpaper (optional)
Step 1: Cut the wood into pieces. You can buy dimensional lumber in various sizes at any home improvement store. The height of the table is up to you, but the bigger you make it, the more people can sit at it comfortably. For this project, we made our table 2 feet wide by 4 feet long. You’ll need two 2x4s cut into four 16 inch pieces (for each side), two 2x2s cut into four 24 inch pieces (for the legs), two 2x3s cut into four 30 inch pieces (for the top of the table) and one 2×6 cut into one 6 foot piece (for the seat).