Have you ever felt the need for a chest that fits in every corner of your home? One that you can store all the essentials in, like blankets or clothes? Do you want it to be rugged, but also beautiful? And most importantly do you want to know how to build it?
How to Build a Wood Chest, how to build a chest out of wood, how to build a wood toy chest: A Step by Step Guide to Building a Dresser or Chest of Drawers for your Home.

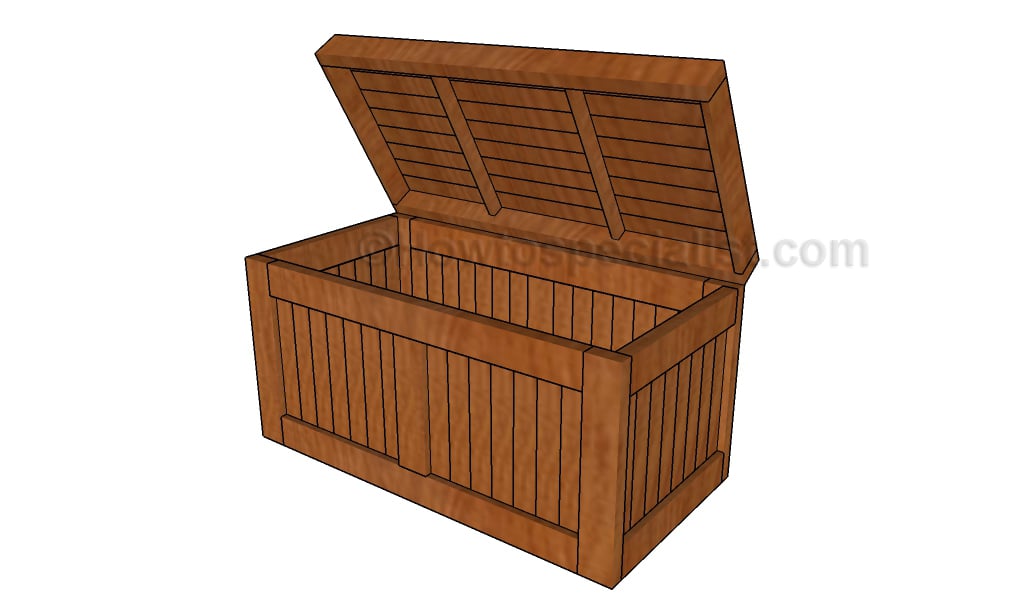
How to build a wood chest
How to build a wood chest. The first step in learning how to build a wood chest is choosing your materials. If you are making a toy chest for children, you will want to select material that is durable and safe for them to handle. You can choose from pine, plywood or even oak if it is not too expensive. Next, decide how big you want your toy chest to be. You can make it as small as a foot long to store just a few toys or as large as you like.
The next thing to consider is what kind of lid you want on your toy box. You can buy something pre-made or build your own lid by nailing 2x4s together and attaching hinges and handles with screws so that it can be opened easily by children without being too heavy for them (or adults).
The most challenging part about building a wooden toy box is cutting all the pieces and making sure they fit together properly when assembled into one piece. The easiest way to ensure your cuts are precise is by using a miter saw with an adjustable fence so that each cut will be the same length no matter where on the board you make it from.
How to build a wooden chest
Building a wooden chest is an easy project, and it can be done in a weekend. The first step is to decide what type of wood you will use. The best woods to use are pine, poplar or cedar because they are soft, easy to work with and not expensive.
You will also need nails, screws and glue for this project.
Step 1: Cut the wood pieces
Cut the side panels 3 inches longer than the top and bottom panels. This will allow extra material at the ends so that you can trim them later on. Trim the ends of each panel at 45 degrees so they fit together better when assembling your chest.
Cut two pieces of plywood into rectangles that are 4 inches by 6 inches (10 cm by 15 cm) in size. These will be used as dividers between each drawer in your chest, so mark them accordingly on one side with a pencil or marker before cutting them down to size with a handsaw and sandpaper if needed for an even finish.
Step 2: Assemble the sides
Glue together each pair of side panels by applying wood glue onto both surfaces and placing them face-up onto your workbench or kitchen table
How to Build a Wood Chest
Building a chest of drawers is a great way to add storage space to your bedroom or office. This project can be completed in just one day and will make an excellent addition to any room in the house.
Materials Needed:
Wood glue
Tape measure
Caulk gun with caulk tube attachment
Sandpaper
Paintbrush (optional)
Building a chest is an easy project that can be accomplished by the novice woodworker. The following steps will walk you through the basics of building a chest.
Step 1: Measure and cut the boards to length. If you are using a plywood back, measure it and cut one side first. Then measure and cut the side pieces so they overlap the back piece by 1/8 inch in both directions. The top and bottom boards should also be measured and cut to size as well as any shelves or dividers if desired.
Step 2: Make sure all your joints are square before proceeding further with assembly. Use a carpenter’s square to make sure all measurements are 90 degrees before cutting them to length on the miter saw or table saw.
Step 3: Attach the sides first, then add the top and bottom boards after that with glue and nails or screws (if using wood glue). Attach each shelf or divider separately if applicable before nailing down the back panel on top of everything else with glue and nails or screws (if using wood glue).
The materials used are:
2×4’s for framing
1/4″ plywood for the lid
mortise and tenon joints (for the lid)
3/4″ plywood for the base
wood glue
screws
How to build a chest out of wood
A wood toy chest is a great project for a beginner woodworker. It’s easy to build and will last for years to come. In this article, we’ll show you how to make a sturdy toy chest out of wood.
How To Build A Wood Toy Chest
Materials Needed
(1) 4×4 x 8′ Pressure Treated Lumber (2) 4×4 x 8′ Cedar Lumber (2) 1/4″ Plywood Sheets (1) 2-1/4″ Pocket Hole Screws (1) 1-5/8″ Pocket Hole Screws (1) 6′ Cordless Drill/Driver (1) 3/16″ Drill Bit (1) Dust Mask Safety Glasses Safety Gloves Ear Protection Measuring Tape Pencil Tape Measure Scissors Level Straightedge Clamps or C-Clamps Saw Tooth Hangers Screw Gun Sander Paint Brush 2 1/4″ Woodscrews Gate Handle
How to Build a Chest Out of Wood
A wooden chest, also known as a trunk or box, can be made out of any type of wood. The most commonly used types include pine and oak.
You can make a wooden chest of any size or shape, but it is best to keep it simple so that it is easy to build and maintain. You can get creative with the design if you want, but you should also consider what type of wood you want to use before starting your project.
If you’re planning on using pine or cedar for your project, then make sure that they are not too soft or they will crack easily over time.
Materials Needed:
Wood – You’ll need at least two sheets of ¼” plywood for this project; however, if you plan on making your chest larger than 12″ x 12″, then you’ll need an additional sheet per inch of extra width and height. If you’re using pine or cedar for the project, then make sure that it’s not too soft because this could lead to cracking over time. If possible, try to find some oak boards instead as this will help prevent cracking in the future.

How to Build a Wood Toy Chest
A toy chest is a great way to keep the kids’ toys organized and off of the floor. They are also a great piece of furniture for a child’s room. Building a wooden toy chest is easy and requires only basic carpentry skills. If you can use a saw, drill and other common tools, then you should be able to build this chest.
Step 1 – Materials
For this project you will need:
1/2″ plywood (for the body)
1″x2″ hardwood (for the trim)
Wood glue
Sandpaper (120 grit or higher)
Finishing nails or brad nails with finish nailer
How to Build a Wood Toy Chest
Wooden toy chests are great for kids’ bedrooms, playrooms and more. These wooden boxes are easy to make and can be customized with paint, stain and other finishes. They’re also sturdy enough to stand up to years of use.
You can build your own wooden toy chest using these instructions:
Materials needed:
Two sheets of ¾-inch plywood (one sheet will be used for the lid)
Four 2x4s at 8 feet long for the legs and support rails
Four 2x4s at 6 feet long for the sides of the chest
Two pieces of 1×4 lumber cut into 36-inch lengths (for the top and bottom rails)
Two pieces of 1×3 lumber cut into 37 inches (for the middle rails)

Woodworking is a fun hobby, but it can also be a great way to make some extra money. If you’re looking for a new side hustle, this article is here to help you learn how to build a chest out of wood.
In this guide, we’ll talk about what materials you need and the best way to go about building your first chest. You’ll also find our list of the best tools for beginners if you’re just starting out.
What You’ll Need:
Before we get started, let’s take a quick look at what you’ll need for this project:
A saw (hand saw or circular saw)
Drill or screwdriver with drill bit set (electric is preferred)