Building a wood box with hinged lid is a relatively easy project and probably one of the most rewarding ones, since you can get really creative with it. It doesn’t require any advanced carpentry skills, just some patience and dexterity.
How to build a wood box with hinged lid, wood box lid ideas, how to make a small wood box with lid. This article will teach you how to build a box using the best tips, tricks and methods on the internet.

How to build a wood box with hinged lid
This is a guide on how to build a wood box with hinged lid. The project is very easy and you can make it in less than 1 hour. All you need are some basic tools, wooden boards and screws.
The first thing you have to do is cut all boards into the right dimensions. This can be done using a table saw or a circular saw. Then screw them together using some 2″ wood screws. After that, place the top board on top of the box and attach it using long screws through both sides of the box into the bottom of the top board.
Now take another piece of wood and cut it into two pieces, one for each side of your box door. You should also cut two grooves for hinges on each piece of wood so that they form hinges when placed on top of each other. Attach these two pieces together by placing them on top of each other and attaching them with screws from underneath through both pieces at once (see image below).
A wood box with a hinged lid is a very useful project to make. It can be used for many different things, from storing small items in your home to using it as a gift box.
Wooden boxes are also great for making gifts. You can use them to hand out food or small items at parties, or give them out as favors at weddings and other events. Making these boxes is not difficult, but there are some things you should know before you start building one.
How to Make a Wood Box with a Hinged Lid
The first thing you need to do when making a wooden box with hinged lid is choose the right kind of wood for your project. You can use any type of hardwood or softwood that is available locally, but you should make sure that you have enough material left over after cutting all the pieces so that they can be sanded down smooth and finished properly before painting or staining them.
Once the wood has been cut into the proper sizes, it needs to be assembled into its final form by attaching the sides together with screws or nails. The bottom of your box will also need to be attached in this manner as well so that it doesn’t come apart easily when you open and close
A hinge is a mechanical bearing that connects two solid objects, typically allowing only a limited angle of rotation between them. Two objects connected by an ideal hinge rotate relative to each other about an axis of rotation, usually perpendicular to the direction of the hinge.
Woodworking hinges can be attached to flat surfaces using screws or nails, or they can be embedded in one side of the box and attached on the other side with a screw or nail.
If you want to build a wooden box with hinged lid, here are some helpful tips:
Cutting Out The Box
You can use any type of wood for this project. If you’re building an intricate design and need to make it out of plywood, use a jig saw with a fine tooth blade. You’ll also need to cut holes for your hinges and handles before assembling the box together.
How to Build a Box With Hinged Lid
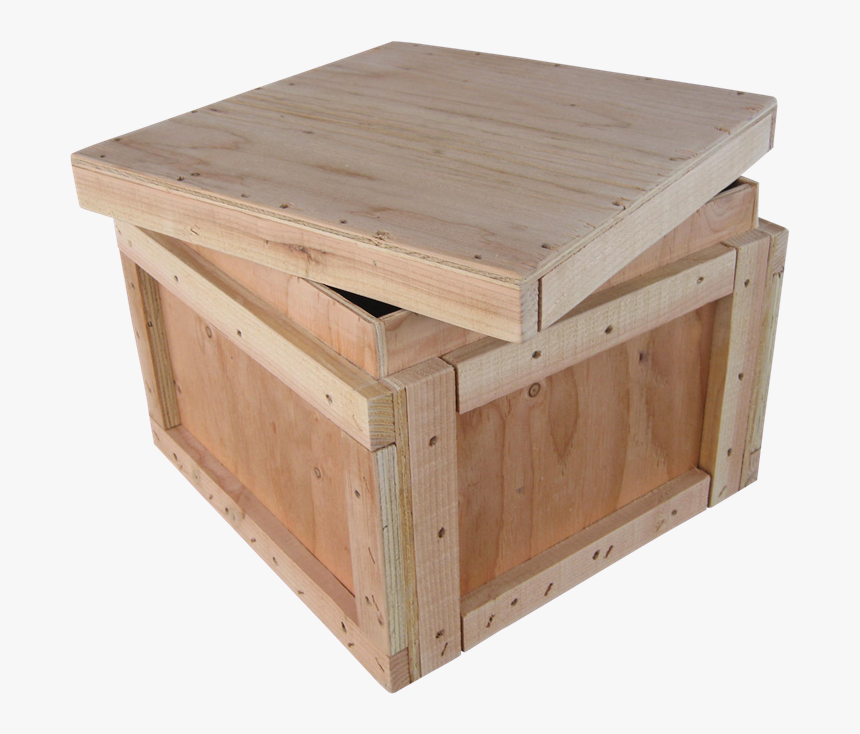
A hinged lid is a type of lid that is connected to the box by hinges. They are usually used on boxes that have a larger volume and can be opened widely, such as tool boxes or storage boxes.
Hinged lids are also commonly used on jewelry boxes and other types of decorative boxes.
There are many ways to build a hinged box with a lid, but one of the easiest ways is to use pre-cut pieces of wood for the sides, back and bottom. The top piece can be cut from a solid piece of plywood or thick cardboard.
You can use any type of wood that you like for this project, but some types will be easier than others depending on the size and shape of your box. For example, if your box is large or bulky, it might be easier to use plywood instead of solid wood because it will hold its shape better than solid wood does when it’s wet.
The first step in building a hinged box with a lid is cutting all of your pieces according to the measurements listed below:
Lid – 1/2 inch thick by 2 inches wide by 24 inches long (or whatever length suits your needs)
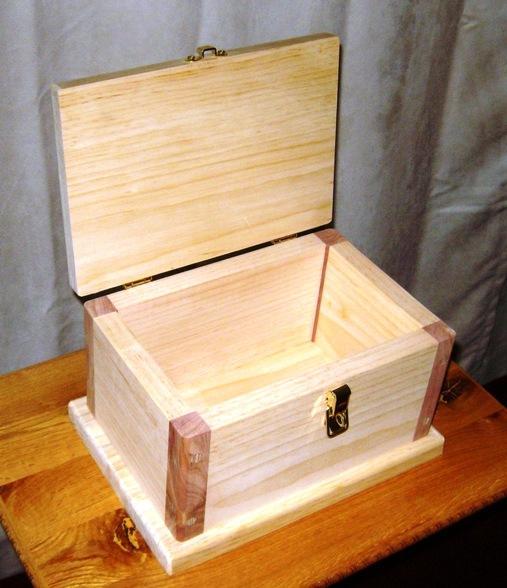
Wood Box with Hinged Lid
This is a simple and easy to make project.
You will need:
-A piece of plywood or hardwood that is at least 1/2 inch thick (1 inch if you want it to be stronger)
-Wood glue
-Wood screws
-A chisel or hammer
-Sandpaper (optional)
Wood box lid ideas
1.Begin by cutting out the top and bottom of your box. The sides should be 1/2 inch wider than your wood board. I used 3/4 inch thick pine for this project but you can use any type of wood that you like. Sand down all of the edges so they are smooth and even.
2.Using a drill and jig saw, cut out the holes that will be used to hold your hinges in place. The hole should be just large enough so that the head of your hinge fits into it nicely. You’ll need 2 holes on each side of the box (4 total) one on each side of each corner where they meet together on top of each other when closed up like an envelope (they should be placed at opposite ends). After drilling these holes remove any extra material that may have been left over inside the box with sandpaper so that when you put your hinges in there is no extra sticking out that could catch on something else later on in this project or any future projects you might want to use this same design for creating
Wood box lid ideas. How to make a small wood box with lid. How to build a wooden box with hinged door. Woodworking plans for boxes with lids.
How to Make a Wooden Box with Lid. This is a very simple project, but if you want to make a wooden box with a lid, the first thing you need to know is how to make the box itself. This tutorial will teach you how to do that and then show you how to make a wooden box with hinged door.
This is a very simple project, but if you want to make a wooden box with a lid, the first thing you need to know is how to make the box itself. This tutorial will teach you how to do that and then show you how to make a wooden box with hinged door.

If you want to store your car keys, jewelry or other small items, then you can make a box with a hinged lid. This is a simple project that only takes an hour or two to complete.
The box can be made from any type of wood, but softwoods such as pine and cedar work best because they’re easiest to carve and shape. You’ll also need some screws, nails and hinges for the lid.
You’ll find everything you need at your local home improvement center or craft store. You can even use the same wood for the sides of the box and for the lid if you like — just remember to choose thinner boards if you plan to make the lid out of wood as well.
Making a wooden box with a lid is a fun and easy project. Try it with your kids, or use the box as a gift.
To make this small wooden box, you will need:
Wood glue
Sandpaper
A piece of wood that is thin enough to cut with a jigsaw, but thick enough to resist breaking when you drill holes in it. The size of the wood depends on how big you want your box to be.
A template for drawing the sides of the box onto your piece of wood. You can use any shape you like. I made my first one using an oval template and my second using a rectangle template. They both worked well!