Waterfall walls offer a great modern design for your backyard. Following a few DIY steps and investing some money in the project you’ll be on track to having a beautiful addition to your home.Building a wall out of rocks certainly isn’t an easy task, but it can be done if you know what you’re doing. In this blog post, we’ll discuss how to build a waterfall rock wall.
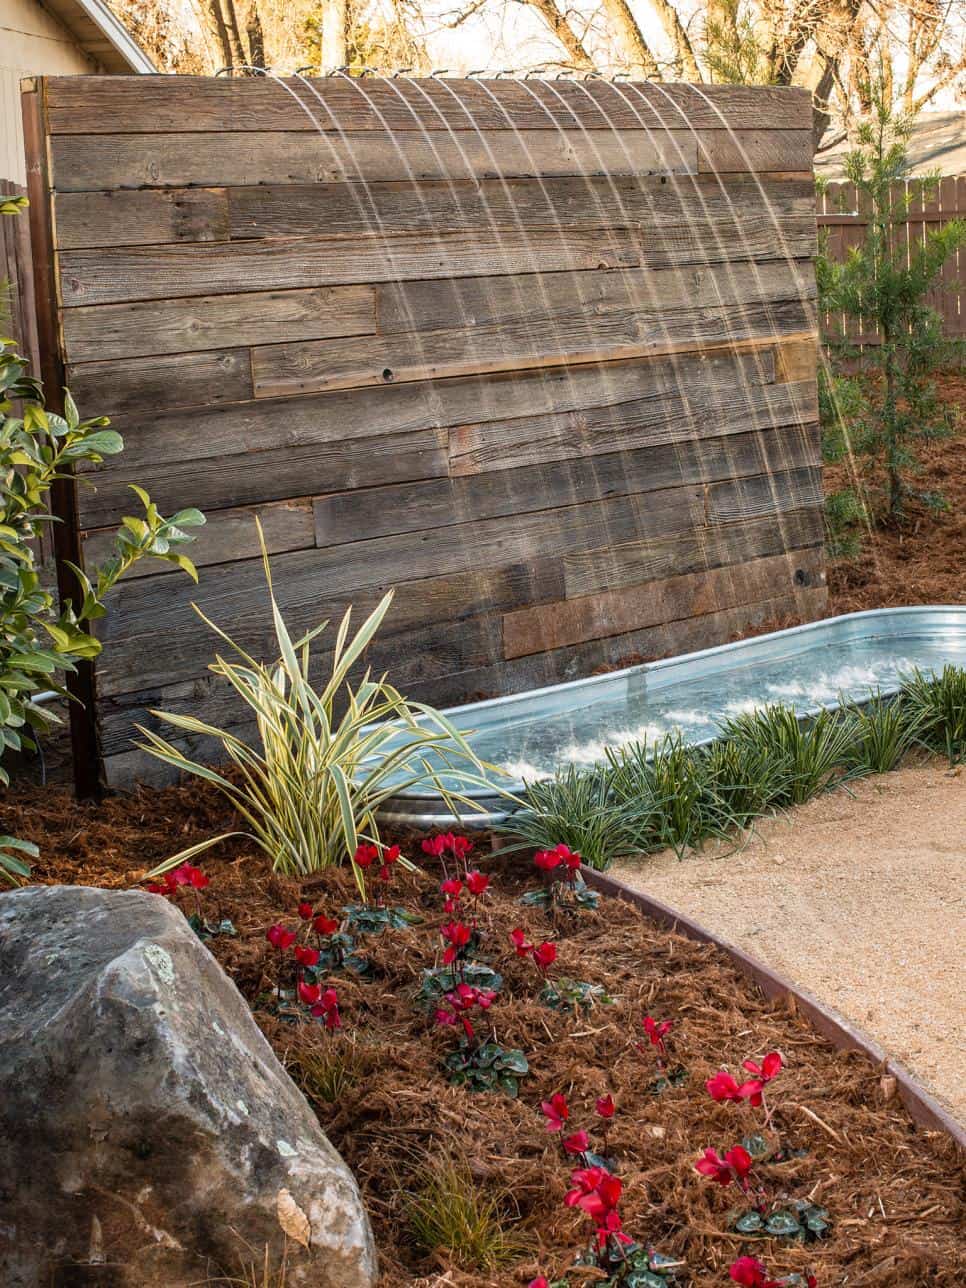
The idea behind this gardening project is easy enough – take a selection of hardy plants that you can easily find and plant them in pots or a pond, how to build a weeping water wall, diy water wall kit, then build a wall or area that will support the pots and let the water trickle over the sides.

How to build a waterfall wall
Water wall kits are a popular way to add water features to your yard. They are easy to install and come in different sizes and shapes.
Water walls can be built in any shape or size, but here are some guidelines that will help you get started:
Size: The size of the wall should be proportional to the size of your yard and other outdoor structures like patios and decks. A wall that is too big can overwhelm the space it is placed in, while a small one will seem out of place.
A good rule of thumb is to make sure that the length of your water feature is at least half as long as the length of your house or structure it sits next to. For example, if the length of your home is 100 feet (30 meters), then a 30-foot-long (10-meter) water feature should look balanced and proportional to the home.
Depth of Water Feature: In general, most water features have between 3 and 6 inches (8-15 centimeters) deep water on top with plants around it for visual interest. You can also add rocks or plants under the surface for additional color or texture effects.
Waterfalls are a beautiful addition to any landscape. They make a great focal point and provide soothing sounds as well as adding visual interest to your backyard or garden. If you’re looking for inspiration on how to build a waterfall wall, we’ve got the perfect project for you!
This DIY water wall kit is easy to install and made with high quality materials that will last for years. It’s also easy to customize with different size rocks and plants. This is a great project for beginners or those who want an easy way to add some extra beauty to their home or garden!
A water feature is an attractive addition to any garden. Whether you have a small yard or a large one, there are many ways you can incorporate a water feature into your landscape design.
Waterfalls and fountains are easy to install and can be added to any landscape. They come in many sizes and shapes, from small tabletop fountains to large ponds and streams.
A waterfall wall is a unique way of adding a water feature to your backyard or patio. It’s also an easy DIY project that doesn’t require much experience or skill.
The first thing you’ll need is a location for your waterfall wall. This could be on the side of your house, or in the middle of your yard where it will be visible from every angle.
Next, take measurements for the size of your waterfall wall and mark them out on the ground with stakes and string as guides for placement. This will help keep everything aligned when installing the rocks later on.
How to build a waterfall wall:
Waterfalls are a great addition to any garden, and they can be built in a variety of ways. You can create them from scratch, or you can make use of pre-made kits that are available for purchase at most home improvement stores.
The easiest way to build a waterfall wall is to use pre-made kits. These kits contain everything you need to construct your own waterfall wall, including the pump and tubing. The kits come in various sizes so that you can choose one that will work best for your needs.
If you are looking for something more natural looking, then building your own waterfall from scratch is the best option for you. This type of water feature is made from rocks and boulders that have been arranged in such a way as to look like a flowing stream or river bed. You can find these rocks at many hardware stores or landscape companies around town. You will also need some sort of pump system if you want to make sure your water flows smoothly over the rocks instead of just sitting there collecting algae and other nasty things!
How to Build a Waterfall Wall
The waterfall wall is a great way to add some natural beauty into your home. It can be used as an accent piece or as the focal point of the room. In this guide we will show you how to build your own waterfall wall using the following steps:
1. Wall prep
2. Sump pump installation
3. Pump installation
4. Trenching for the water line
5. Wall construction

How to build a weeping water wall
A weeping water wall is a beautiful addition to any landscape. The trick to making one is to understand the basics of how it works, and then decide what you want your water feature to look like. Once you have that down, it’s just a matter of following the steps below to create your own backyard water feature.
Build Your Wall
1. Dig a hole for the structure that will hold up your wall. This should be done with a post-hole digger or other specialized tool. Be sure to measure carefully before digging so that the hole is large enough for your chosen size of wall and also deep enough for proper drainage.
2. Pour concrete into this hole until it fills most of it up and forms a base for the rest of your project. Allow this concrete to dry completely before proceeding with other steps.
3. Build up one side of your wall using bricks or rocks placed vertically along its surface until they meet at an angle at the top of your structure (or whatever shape suits your tastes). Use mortar between each brick or rock as needed so that they remain tightly in place during construction and after completion of this first step in building a weeping water wall
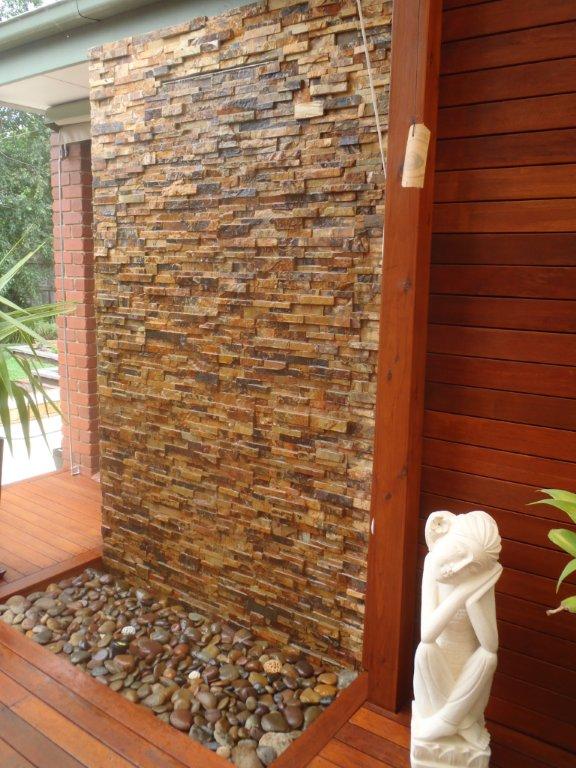
Weeping walls are a beautiful and unique way to add water features to your yard or garden. You can use them as a statement piece, or create small spaces for enjoying the sound of trickling water.
Weeping walls can be made from pebbles and rocks, concrete blocks, wood planks, or bricks. Each material has its own advantages and disadvantages for creating the perfect DIY water wall.
Pebbles and rocks – This is the cheapest option for building your own weeping wall. You can find large bags of pebbles at most home improvement stores for less than $10 each bag. Rocks are usually more expensive because they take up more space in the bag and require more material to fill up your wall. The biggest disadvantage with this method is that it’s difficult to keep the stones in place once they’re placed on top of each other because they’re so light weight compared to other materials like concrete blocks or bricks.
Concrete blocks – Concrete blocks are a great option if you have access to them but they tend to be more expensive than other materials like brick or stone due to their strength and durability over time (if properly maintained).
As the name suggests, a water wall is a wall that contains water. A weeping wall is a type of water wall that has a constant flow of water dripping down it.
These walls are very popular in gardens and patios because they provide a unique look and can be used to accentuate other features in your yard. If you’re interested in adding one to your home, here are some steps to follow.
Step 1: Decide where to put the wall
The first thing you need to do when building a weeping wall is decide where you want to put it. You’ll want to place it so that it’s visible from most areas of your yard or patio area without obstructing your view or access to any areas you’ll use regularly. Consider how far away from other features you want it placed as well as whether it should be visible from inside the house or not (if so, make sure there will be enough sunlight available). Also think about how much space you have available for the project and how big you’d like the finished product to be (remember, these things take up more room than they might appear at first glance!).
Step 2: Dig out an area for the base
Once you’ve found an ideal location for your wall, dig out an area
You can build a water wall in your yard, patio or garden with this easy to follow set of instructions.
You will need:
-2 x 4 lumber for the frame and legs. Use pressure treated lumber if you are building it outside.
-4 x 8 foot pressure treated plywood for the back of the waterfall.
-1 x 8 foot pressure treated plywood for the front face of the waterfall.
-2 x 8 foot pressure treated plywood for the top and bottom sections of your waterfall box (the part that will be submerged).
-1/2 inch PVC pipe, schedule 40, that goes from just below ground level to about 6 feet high above ground level (depending on how tall you want your waterfall). This is also known as 1 inch PVC pipe or “thinwall” plastic pipe. You can use schedule 80 if you want a sturdier base but it’s not necessary unless you’re having problems with squirrels chewing through the thinwall pipe and causing leaks in your design.
You can build your own water wall or feature. Make sure it’s not too close to your house, and that it doesn’t have a drainage pipe that could cause flooding in your basement.
1. Choose the location for your water feature, which should be level and near a power outlet.
2. Dig a hole wide enough for the tank and deep enough so that it’s below the frost line (typically 3 ft.). Line the bottom with stones or gravel to help prevent erosion.
3. Set up the pump at least 6 ft. away from the pond and bury it vertically into the ground with only its top exposed above ground level. Attach PVC pipes to both ends of the pump so they extend outwards horizontally from each side of the tank (see photo). Fill in around the buried pump with sand and gravel until you’ve covered all visible parts of it, then cover everything with mulch or stone chips for aesthetics and to keep weeds at bay