When you build a shed, you want to make sure it is constructed properly and lasts for a long time. That typically means building a solid and strong subfloor. The subfloor is typically made of pressure-treated lumber or plywood. This step-by-step guide will walk you through the steps to building your subfloor.
Building a structurally sound subfloor frame for your shed is one of the most important parts of the shed construction process. A subfloor frame provides a strong foundation that can support the exterior siding, interior walls and roof of your shed. Sheds are usually made from plywood or OSB and are supported with trusses. If you use a subfloor frame, you’ll need to build it first before assembling the outside walls.

How to build a subfloor frame
Building a foundation is one of the most important steps in building any structure. The foundation not only supports the structure, but also protects it from the elements.
A properly constructed foundation can extend the life of a building by decades and make it much more comfortable and durable to use.
When building a shed, house or garage, it’s important to get the framing right. This guide will help you understand how to build a subfloor for your shed, house or garage.
You can build a subfloor for an existing shed, or you can build a new one. A subfloor is the frame that supports the floor of your shed. It’s built on top of the ground and is meant to support heavy loads like storage bins and furniture.
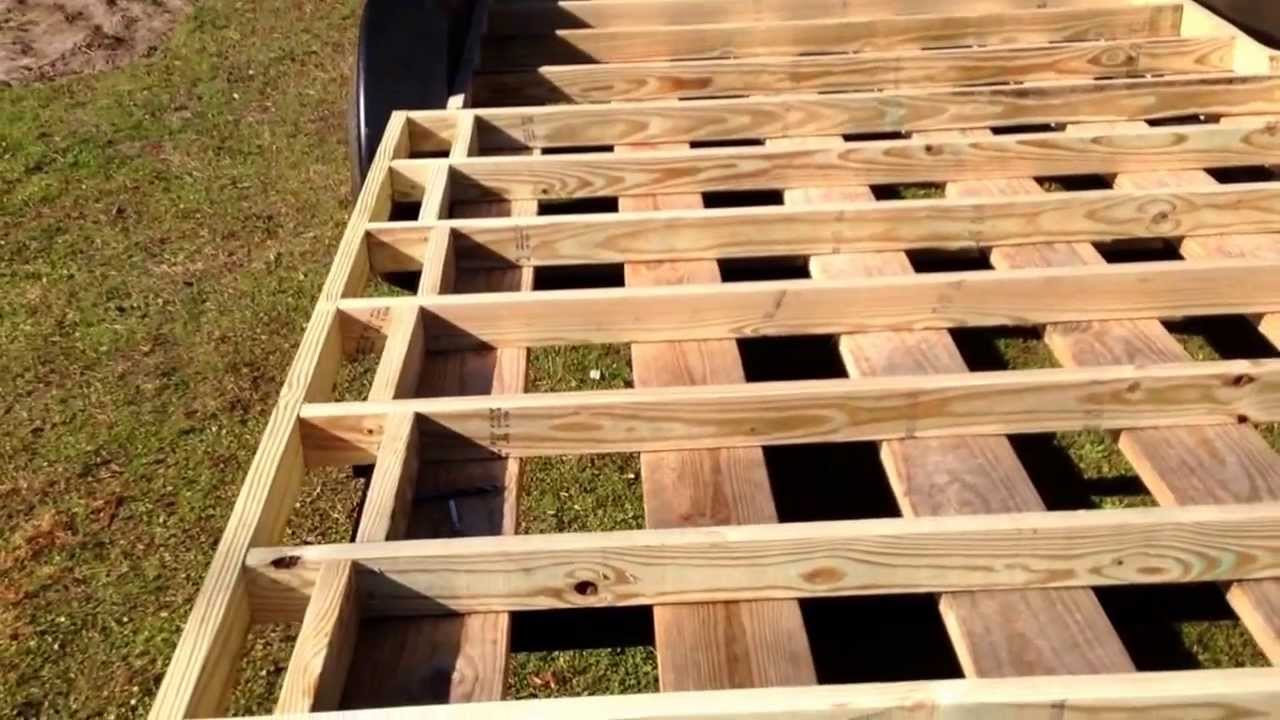
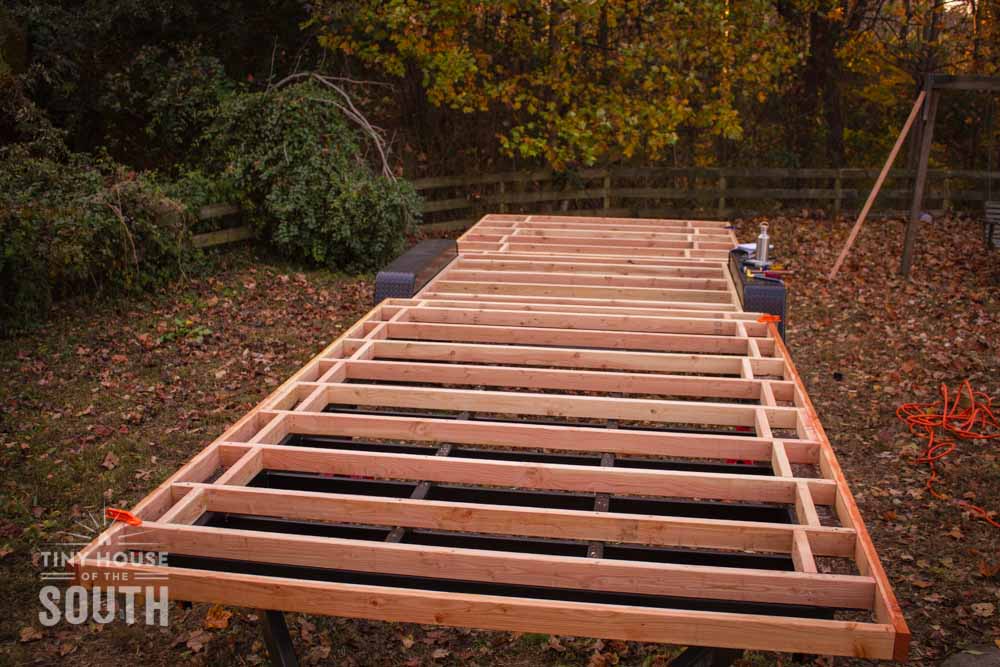
A subfloor is made up of 2x4s that have been laid horizontally and nailed together with 3-inch nails. The best way to build a subfloor frame is by using pressure-treated wood because it lasts longer than untreated wood. Before starting, check your local building codes to make sure you’re following them properly so your shed will be safe and secure.
Step 1: Measure Your Shed
Measure the length and width of your shed so you can determine how many 2x4s you’ll need for each side of the frame. If your shed has an uneven edge, add extra pieces of lumber where needed to make sure all sides are level before nailing them together into place.
The subfloor is the bottom layer of your flooring system. It’s often made of plywood, but it can also be constructed of concrete, foam or tile. In some cases, the subfloor will be visible when you look at your house from the outside.
In a shed or other small structure, you might use a single layer of plywood to make this part of your flooring system. For larger buildings like houses, however, you’ll need several layers of plywood to support the weight of people and their belongings inside them.
The first step in building a subfloor is to install joists that run parallel to each other across the room or space where they will go. You can do this by using metal connectors called joist hangers that allow you to screw them into place with screws rather than nails or other types of fasteners that would leave holes behind as they pull out from the wood over time.
Your next step is to install cross-braces between these joist hangers so that they form a grid pattern on top of which you’ll be able to lay down your plywood sheets later on in this process.
A subfloor is the bottom layer of a floor system. The subfloor provides a solid base for the layers above it, including the finished flooring material.
The subfloor can be made of wood or concrete. It’s typically installed after the walls are framed and before the sheathing and siding are added to your shed or house.
If you’re building a shed, you may want to use pressure-treated lumber for your subfloor because it will last longer than untreated wood. For a house, choose decay-resistant lumber such as cedar, redwood or Southern pine with a grade stamp that indicates its resistance to rot and decay (such as A1).
You’ll also need to install joists on which you can lay your floorboards or plywood sheets. Joist hangers attach these joists to the frame of your shed or house so they don’t sag under the weight of the finished flooring material.
Subfloors are a great way to create an even surface over the ground below. If you’re building a shed or a small cabin, you can use subfloors to support concrete piers, which will make your structure more stable and easier to build. In addition to being an important part of building your cabin, subfloors can also help protect the ground beneath your cabin from moisture damage.
Subfloors are usually made out of 2x6s or 2x8s, but you can use plywood sheets if you don’t have access to lumber.
The first step in building your subfloor is to lay down some plastic sheeting on top of the ground where you’ll be working. This will keep it from getting muddy when you pour concrete later on.
Next, dig holes for each of your pier locations using a post-hole digger or similar tool. The depth of these holes will vary depending on how deep your piers are going to be installed — typically about 10 inches deep for each pier location is sufficient for most cabins.
After digging holes for each pier location, place concrete blocks inside them and fill them with concrete mix until they’re full (keeping in mind that there should always be at least 8 inches
Subfloors are usually made of plywood or OSB panels that are attached to the floor joists. If you’re building a shed on a concrete slab, there’s no need for a subfloor. However, if you’re building on a wooden foundation and have access to the floor joists, it’s best to install a subfloor for added strength.
A subfloor provides additional support for your walls and ceiling, but it also helps with soundproofing and moisture control. In this article we’ll show you how to build a subfloor for a house using OSB panels and 3/4-inch plywood.
Materials Needed
Lumber: 4×8 sheets of OSB (oriented strand board) or plywood
1×3 furring strips
Screws: 2-inch wood screws or decking screws
2-inch nails (for attaching furring strips)
Tape measure
Pencil
Carpenter’s square
A subfloor is the base for your flooring. It’s usually made of wood, and it’s typically installed directly on top of the framing for your home.
Before you install a subfloor, you’ll want to make sure that the area is level and secure. To do this, you’ll need to build a few walls and secure them into place.
Once the walls are up, use your level to make sure they’re perfectly straight and square with each other. If they aren’t, use some shims or lumber to adjust them until they are perfectly aligned.
Next, cut pieces of 2x6s and screw them together into one long piece that will span all four walls at once. Make sure that this piece fits perfectly between all four walls without any gaps or overlaps — if it doesn’t fit perfectly, you’ll need to do another round of adjustments until it does fit perfectly.
Once your subflooring fits perfectly between all four walls, screw down 2x4s across the entire length of it so that it’s securely fastened in place. You’ll also want to screw these 2x4s down through both sides of the subflooring — this way, if someone steps on one side of the subflooring (like if
Subfloors are the foundation for any type of flooring system, from tile to hardwood. They are also the base of a finished floor and provide a level surface that allows you to install wiring and plumbing. The quality of subflooring depends on the materials used, how they’re installed and how well they’re prepared before installation.
Subfloors must be strong enough to support the weight of whatever is going to rest on top of them, whether that’s carpet or a concrete slab. If you plan to lay tile over your subfloor, make sure it’s rated for heavy traffic areas such as kitchens or bathrooms. If you plan on installing carpeting, choose a pad that will support heavy objects such as furniture and appliances.
You can build your own subfloor using plywood sheets or OSB panels fastened together with nails or screws. This type of subfloor is usually 4 feet wide (1.2 m) and 8 feet long (2.4 m). For larger areas where more than one layer is needed, multiple layers may be used with each layer spaced 3/4 inch (1 cm) apart from each other
A subfloor is the base layer of a floor and is typically made of plywood or OSB (oriented strand board). The subfloor provides support for the rest of the flooring materials, including tile and carpet. You can build a subfloor for your entire home or just in the areas where you plan to install hardwood floors or carpeting.
You’ll need basic carpentry skills and tools to build a subfloor. Your first step will be measuring and cutting plywood panels to fit your room. Then you’ll attach them together with nails or screws.
The two most common types of subfloors are floating and attached, which are explained below:
Floating subfloors are installed directly on top of existing concrete slabs, no insulation is needed. Floating floors should be installed over level surfaces, but you can use shims if there is any slight up-down movement in the concrete slab.
Attached subfloors are installed over plywood sheets that have been installed between joists or studs in your house, under insulation such as fiberglass batts or foam board insulation. Attached floors require more labor than floating floors but they can be installed anywhere in your house because they don’t require access to concrete slabs
Subflooring is the layer of material below a floor that provides support and insulation. Subfloors are typically made of plywood, OSB (oriented strand board), or particleboard. The subflooring material you choose will depend on your budget, the type of flooring you want to install, and the subfloor structure you have in place.
Building a subfloor from scratch is a relatively simple process that can be done by anyone with basic carpentry skills. It’s also an important step toward having a strong, stable home.
Materials needed:
– Plywood sheets
– 2×4 lumber
– Nails or screws (to attach plywood)