In this tutorial you will learn how to easily build sturdy wooden box frames. These square frames are an excellent way to show off your work or workspace, as well as give out as gifts.
Following the formula for building a sturdy box frame is simple, and it’s important to build the frame correctly. A sturdy frame will support a large cornice or crown molding, allowing you to do away with wall studs and heavy lumber. Here are the step-by-step directions.
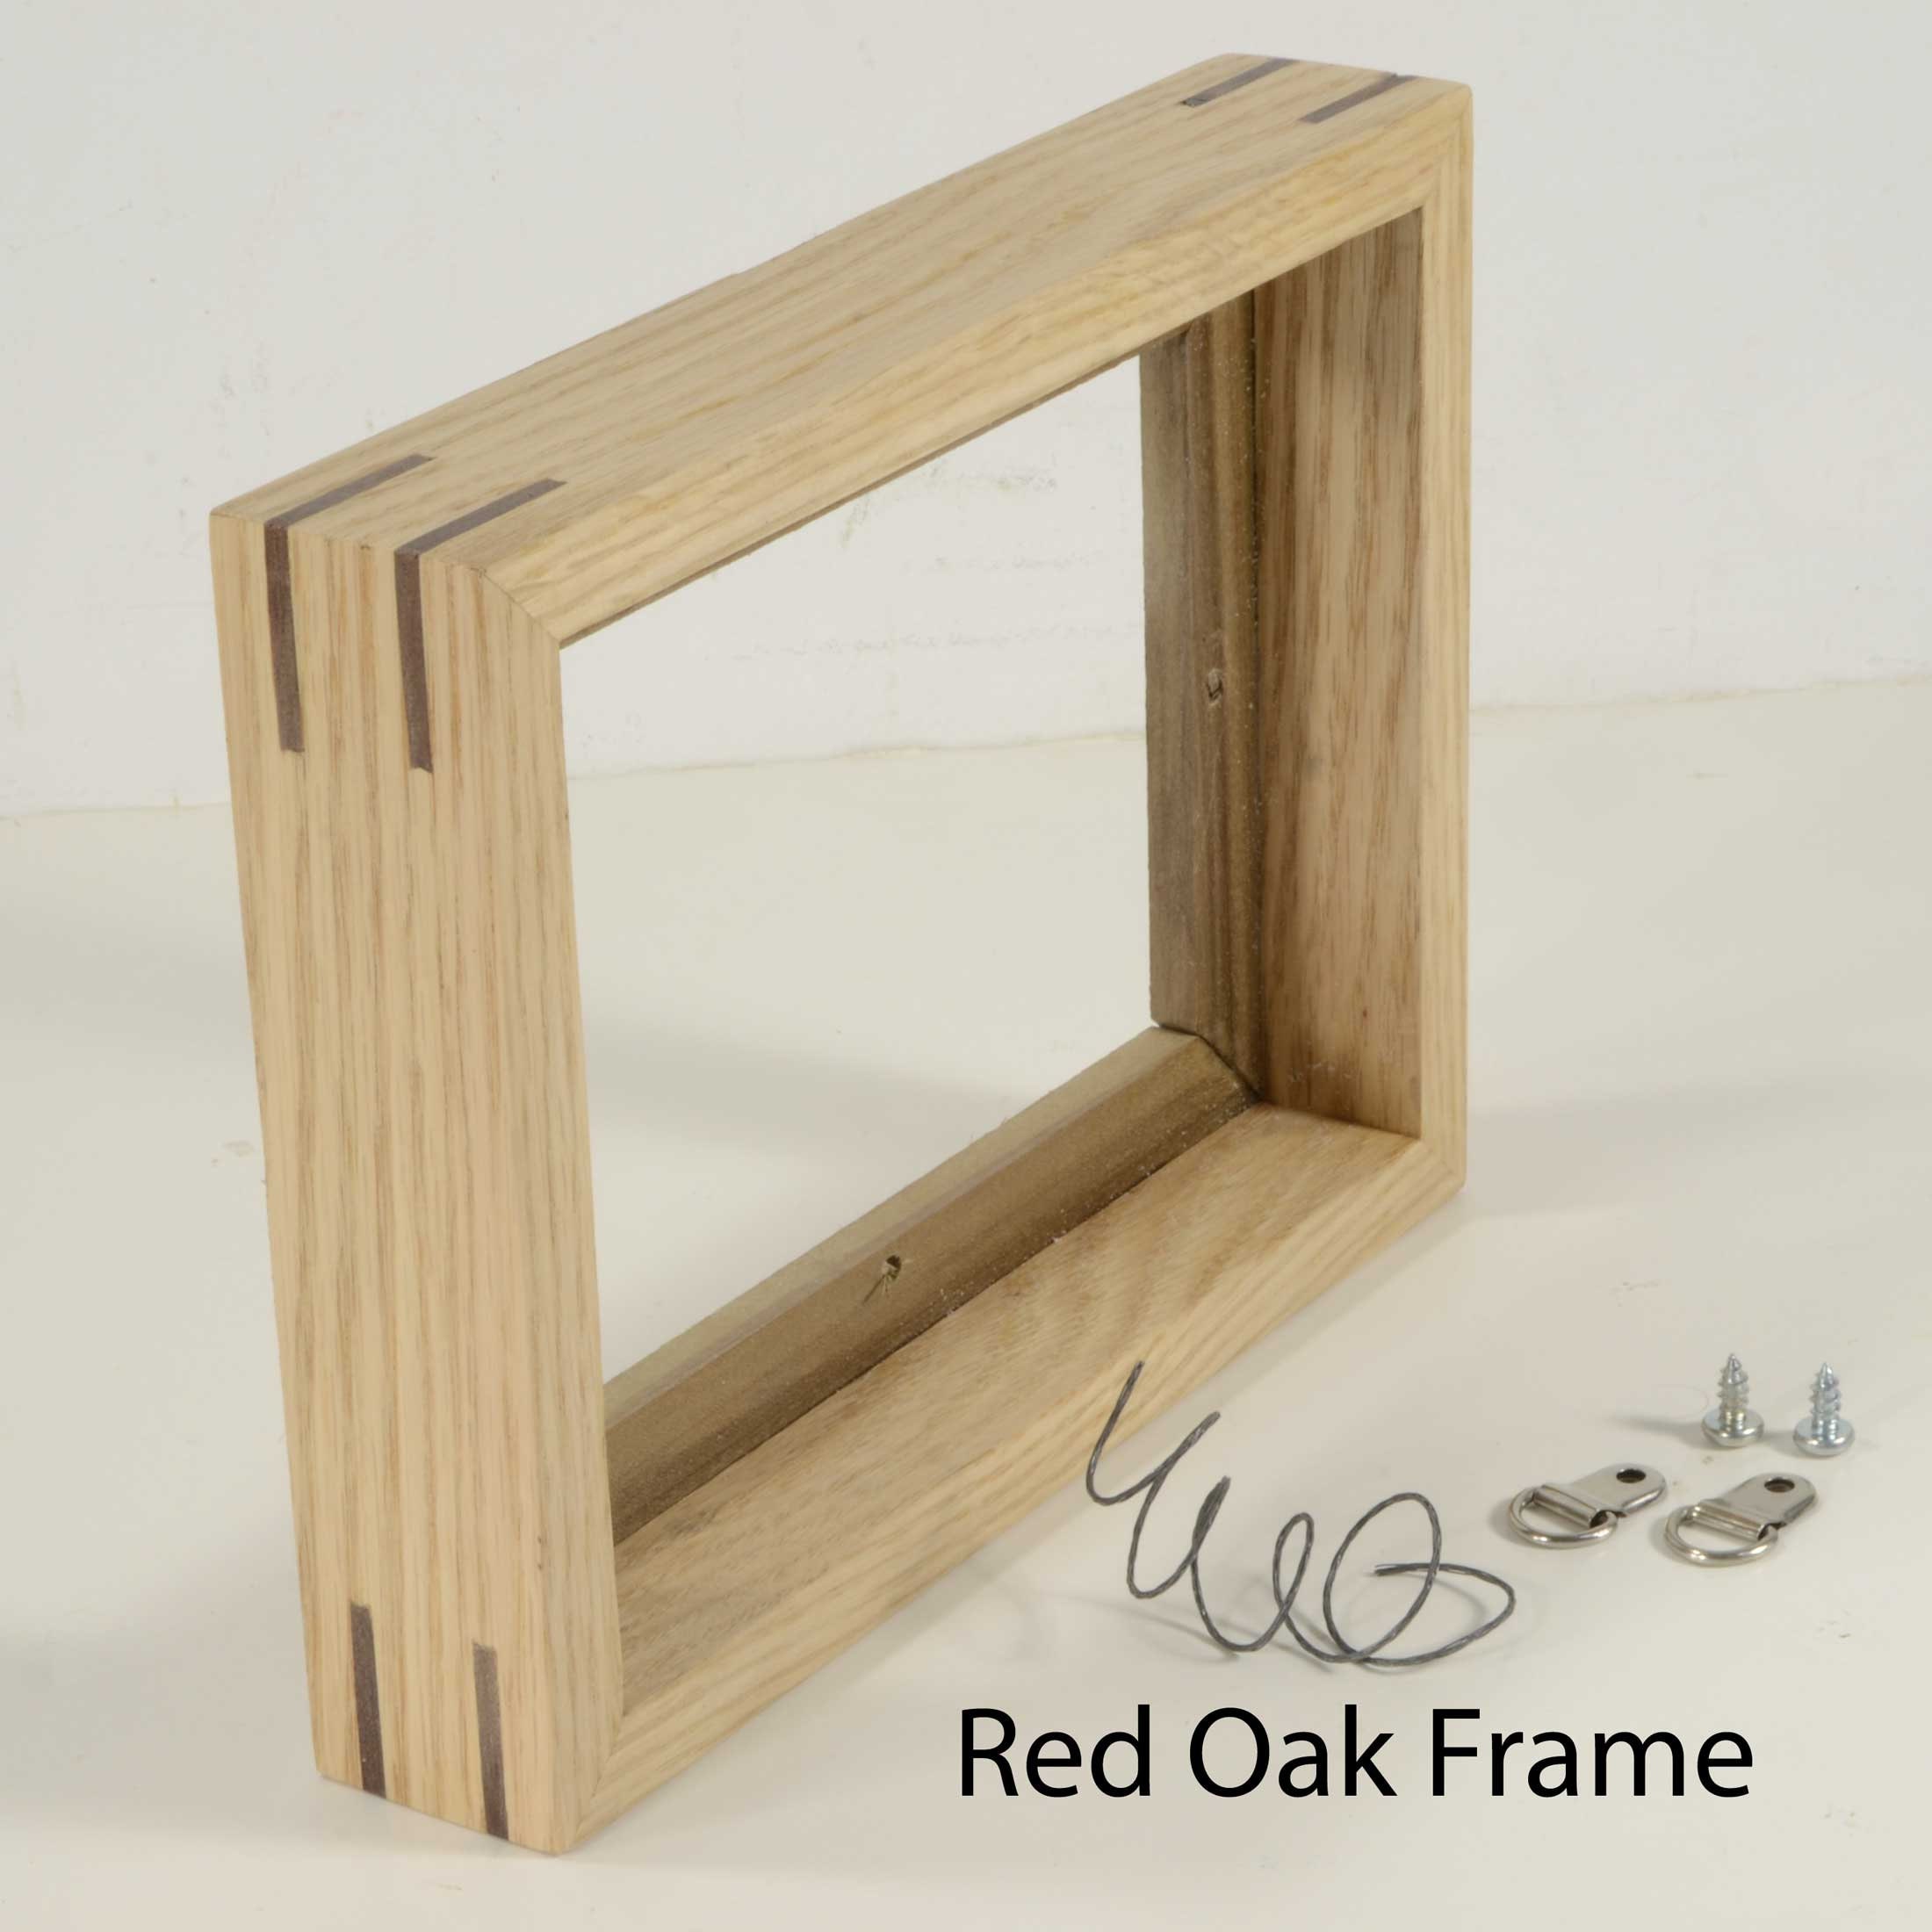
How to build a sturdy box frame
The first step is to make the corner joints. Take two pieces of wood and cut them into equal lengths at about 4 inches in length. You can use a miter saw or any other power tool for this purpose. Then, place one piece on top of another so that they form an L-shape as shown in the picture below.
Next, mark out some holes along the edges of both sides of these two pieces of wood and then drill them using a 3/8 inch drill bit. You can use a drill press to do this task if you have one at home. Otherwise, use another power tool like an impact driver or a cordless drill to do this job.
After drilling all these holes through both sides of these two pieces of wood, it’s time to connect them together using screws or nails so that they form a jointed corner as shown below:
The box frame is one of the most common frames used in carpentry. It can be used for a variety of applications, such as framing walls and ceilings. If you’re looking for a sturdy and long-lasting solution, here’s how to build a wooden box frame.
What You Need:
-Sturdy wood (2” x 4” or 2” x 6”)
-Brackets (for corners)
How to Build a Box Frame
A box frame is a type of picture frame that can be used to create a shadow box, or display case, to showcase your favorite collectibles, photos, or artwork. The frame itself is made up of two pieces of wood glued together in an “L” shape. This allows you to add glass or Plexiglas on top, so that everything inside can be seen clearly.
The reason for the name “box” frame is because the finished product looks like a rectangular box with a lid. Once you’ve learned how to make one, it’s easy to make multiple sizes and shapes from this basic design.
Step 1: Cut Your Boards
You’ll need two pieces of wood for this project: one long piece that will be the back and sides of your frame and one shorter piece for the front (which will also serve as the top). If you’re using cedar boards like I did, cut them into equal lengths first so that they’re all square on both sides. The measurements don’t have to be exact; just use whatever lengths work best for your project size and budget limitations.
Step 2: Mark Your Holes
Next, use a ruler and pencil to mark where each screw will go on each board (
Building a box frame is easy and fairly quick to do. It’s also a good project for kids and adults alike.
The materials you’ll need are:
Two sheets of plywood
Three pieces of 2×4 lumber, cut into 2-foot lengths (you’ll have some left over)
2-inch long screws, at least a 16-gauge length
Screwdrivers or power drill with screwdriver attachment
A box frame is a type of framing that forms a rigid box shape and is used in carpentry. The box frame is used to enclose an area, such as a room or structure, and provide support for the structure while allowing it to expand and contract with changes in humidity. Box frames are often used in construction because they are relatively easy to build and add strength to structures.
Box members are the individual pieces of wood that make up a box frame. They may be either structural or aesthetic members. Structural box members must be able to support the weight of any other member on top of them, while aesthetic box members do not have this requirement but may still be necessary for support or decoration purposes.
The two most common types of box frames are single-hung (or single-hung) and double-hung (or double-hung). Single-hung frames have windows that swing vertically open from one side; double-hung windows swing open from both sides at once.
How to Make a Square Frame Out of Wood
A wood frame is one of the most common ways to enclose a picture. They’re inexpensive, easy to make and can be used for any size picture.
Step 1: Measure the Picture Frame
To make sure you have enough wood for your frame, you’ll need to measure the outside dimensions of the framed picture. You’ll want to add about 1/4 inch (0.64 cm) to each side so that there will be room for attaching the hangers onto the back of the frame. For example, if your framed picture measures 16 inches by 20 inches (40.64 cm × 50.00 cm), buy 2-by-4 boards that are 54 inches (1.37 m) long and cut them down as necessary.
Step 2: Cut Boards into Squares
Once you’ve got your lumber home from the store, cut each board into four 18-inch lengths so that you have eight squares total (four squares per board). The easiest way to do this is with an electric saw or circular saw with an abrasive blade installed in it because it cuts straight lines quickly; however, if these tools aren’t available then use a hand saw instead! If you must use a hand
How to Build a Wooden Box Frame
Building a wood box frame is a great project for the beginner woodworker. This article will show you how to build a wooden box frame out of 2×4 lumber. The first step is to cut all of your pieces and make sure they are square. If you don’t have an angle finder or protractor, try this trick: Mark a line on one piece with a pencil and then line it up with another piece to see if they are at 90 degrees. If they aren’t, use your hands as rulers and adjust until they are square.
Once you have your pieces cut out, assemble them using glue and nails. I like to use glue instead of nails for larger projects because it makes for stronger joints that don’t need any extra reinforcement later on down the road when moving or transporting your project.
Make sure you pre-drill holes for your screws so that the wood doesn’t split when driving in your screws!
The first step in building a wooden box frame is to cut your wood pieces. Cut the sides, top and bottom pieces to length. The exact length will depend on the size you want your box to be.
The next step in building a wooden box frame is to cut the notches. You will need two notches for each side piece, one on each end of the piece. Cut these notches so that they are big enough for your 1-by-2s to slide into them easily but small enough so that they fit snugly together when assembled.

The next step in building a wooden box frame is to measure and mark where you want your joints between 1-by-2s and 2-by-4s to go. Once you have marked these areas, begin driving two screws through each joint area — one screw at each end of each joint — until all joints are secured together tightly enough that the entire structure can be handled as one unit without any movement or wiggling between pieces.
Use a jig saw to cut the sides of the frame. You should use a clamp so that you can ensure that the pieces are lined up properly.
Once you have the sides cut, use a router and bit with an edge guide to round over the edges of each piece of wood. This will give your frame a more finished look and make it easier to glue together.
Use clamps to help hold your frame together while you’re working on gluing it together. Use wood glue and your brad nailer to attach all four corners of your frame together.
Once your frame is assembled, use sandpaper to smooth out any rough edges or surfaces that might be sticking out too far from the frame itself.
Step 1. Cut the pieces of wood to size.
You need two pieces of wood that are the same length and width, and another two pieces that are longer than the first two. The length of these pieces depends on how big you want your frame to be, but if you’re making a small frame like this one you can use scraps from around your house (in this case, they were left over from building my entertainment center). The width should be as wide as the thickness of your longest piece (2x4s). In this case, I used 2x4s for my longest piece so I cut all four pieces at 2 inches wide by 4 inches long.
You also need two short pieces that will hold the sides together at their corners. These should be just long enough to reach across each side when they’re put together (about an inch or so).