This step by step diy tutorial is about how to build a storage ottoman – building a small storage ottoman can be very useful in your living room, especially if you do not have enough storage space in your home.
Have you ever wanted to build a storage ottoman? If you do, you’re certainly not alone. It can be a daunting task for inexperienced DIYers. But in this article, I’ll show you how to build a storage ottoman even if you’ve never built one before.

How to build a storage ottoman
Learn how to build a storage loft ottoman. This DIY project is perfect for adding extra storage to your home.
The great thing about this project is that it can be built in any size or shape, so you can customize it to fit your home and needs. If you don’t have the right tools, I recommend checking out The Home Depot’s selection of power tools. You can also find everything else you need at The Home Depot.
Materials Needed:
Wood dowels (for legs)
Wood dowels (for crossbars)
Bag of 2″ screws (1/2″ bit)
Drill bit set (1/2″, 3/8″)
A storage ottoman is the perfect way to add extra seating and storage to your living room. The ottoman can be placed in front of a chair, sofa or bed and used as an extra seat when needed. It also allows you to store blankets, pillows and other small items in the space under the ottoman. You can build your own storage ottoman using basic woodworking tools and materials.
In addition to building a storage ottoman, you can also make matching end table or coffee table that matches your new piece of furniture. The instructions below show how to build a freestanding storage ottoman with an upholstered top. If you want something more suited for indoor use, consider using plywood instead of solid wood for durability purposes.
Materials Needed:
One sheet of plywood (1/2″ thick) per side panel – cut down from a larger sheet of plywood if necessary**
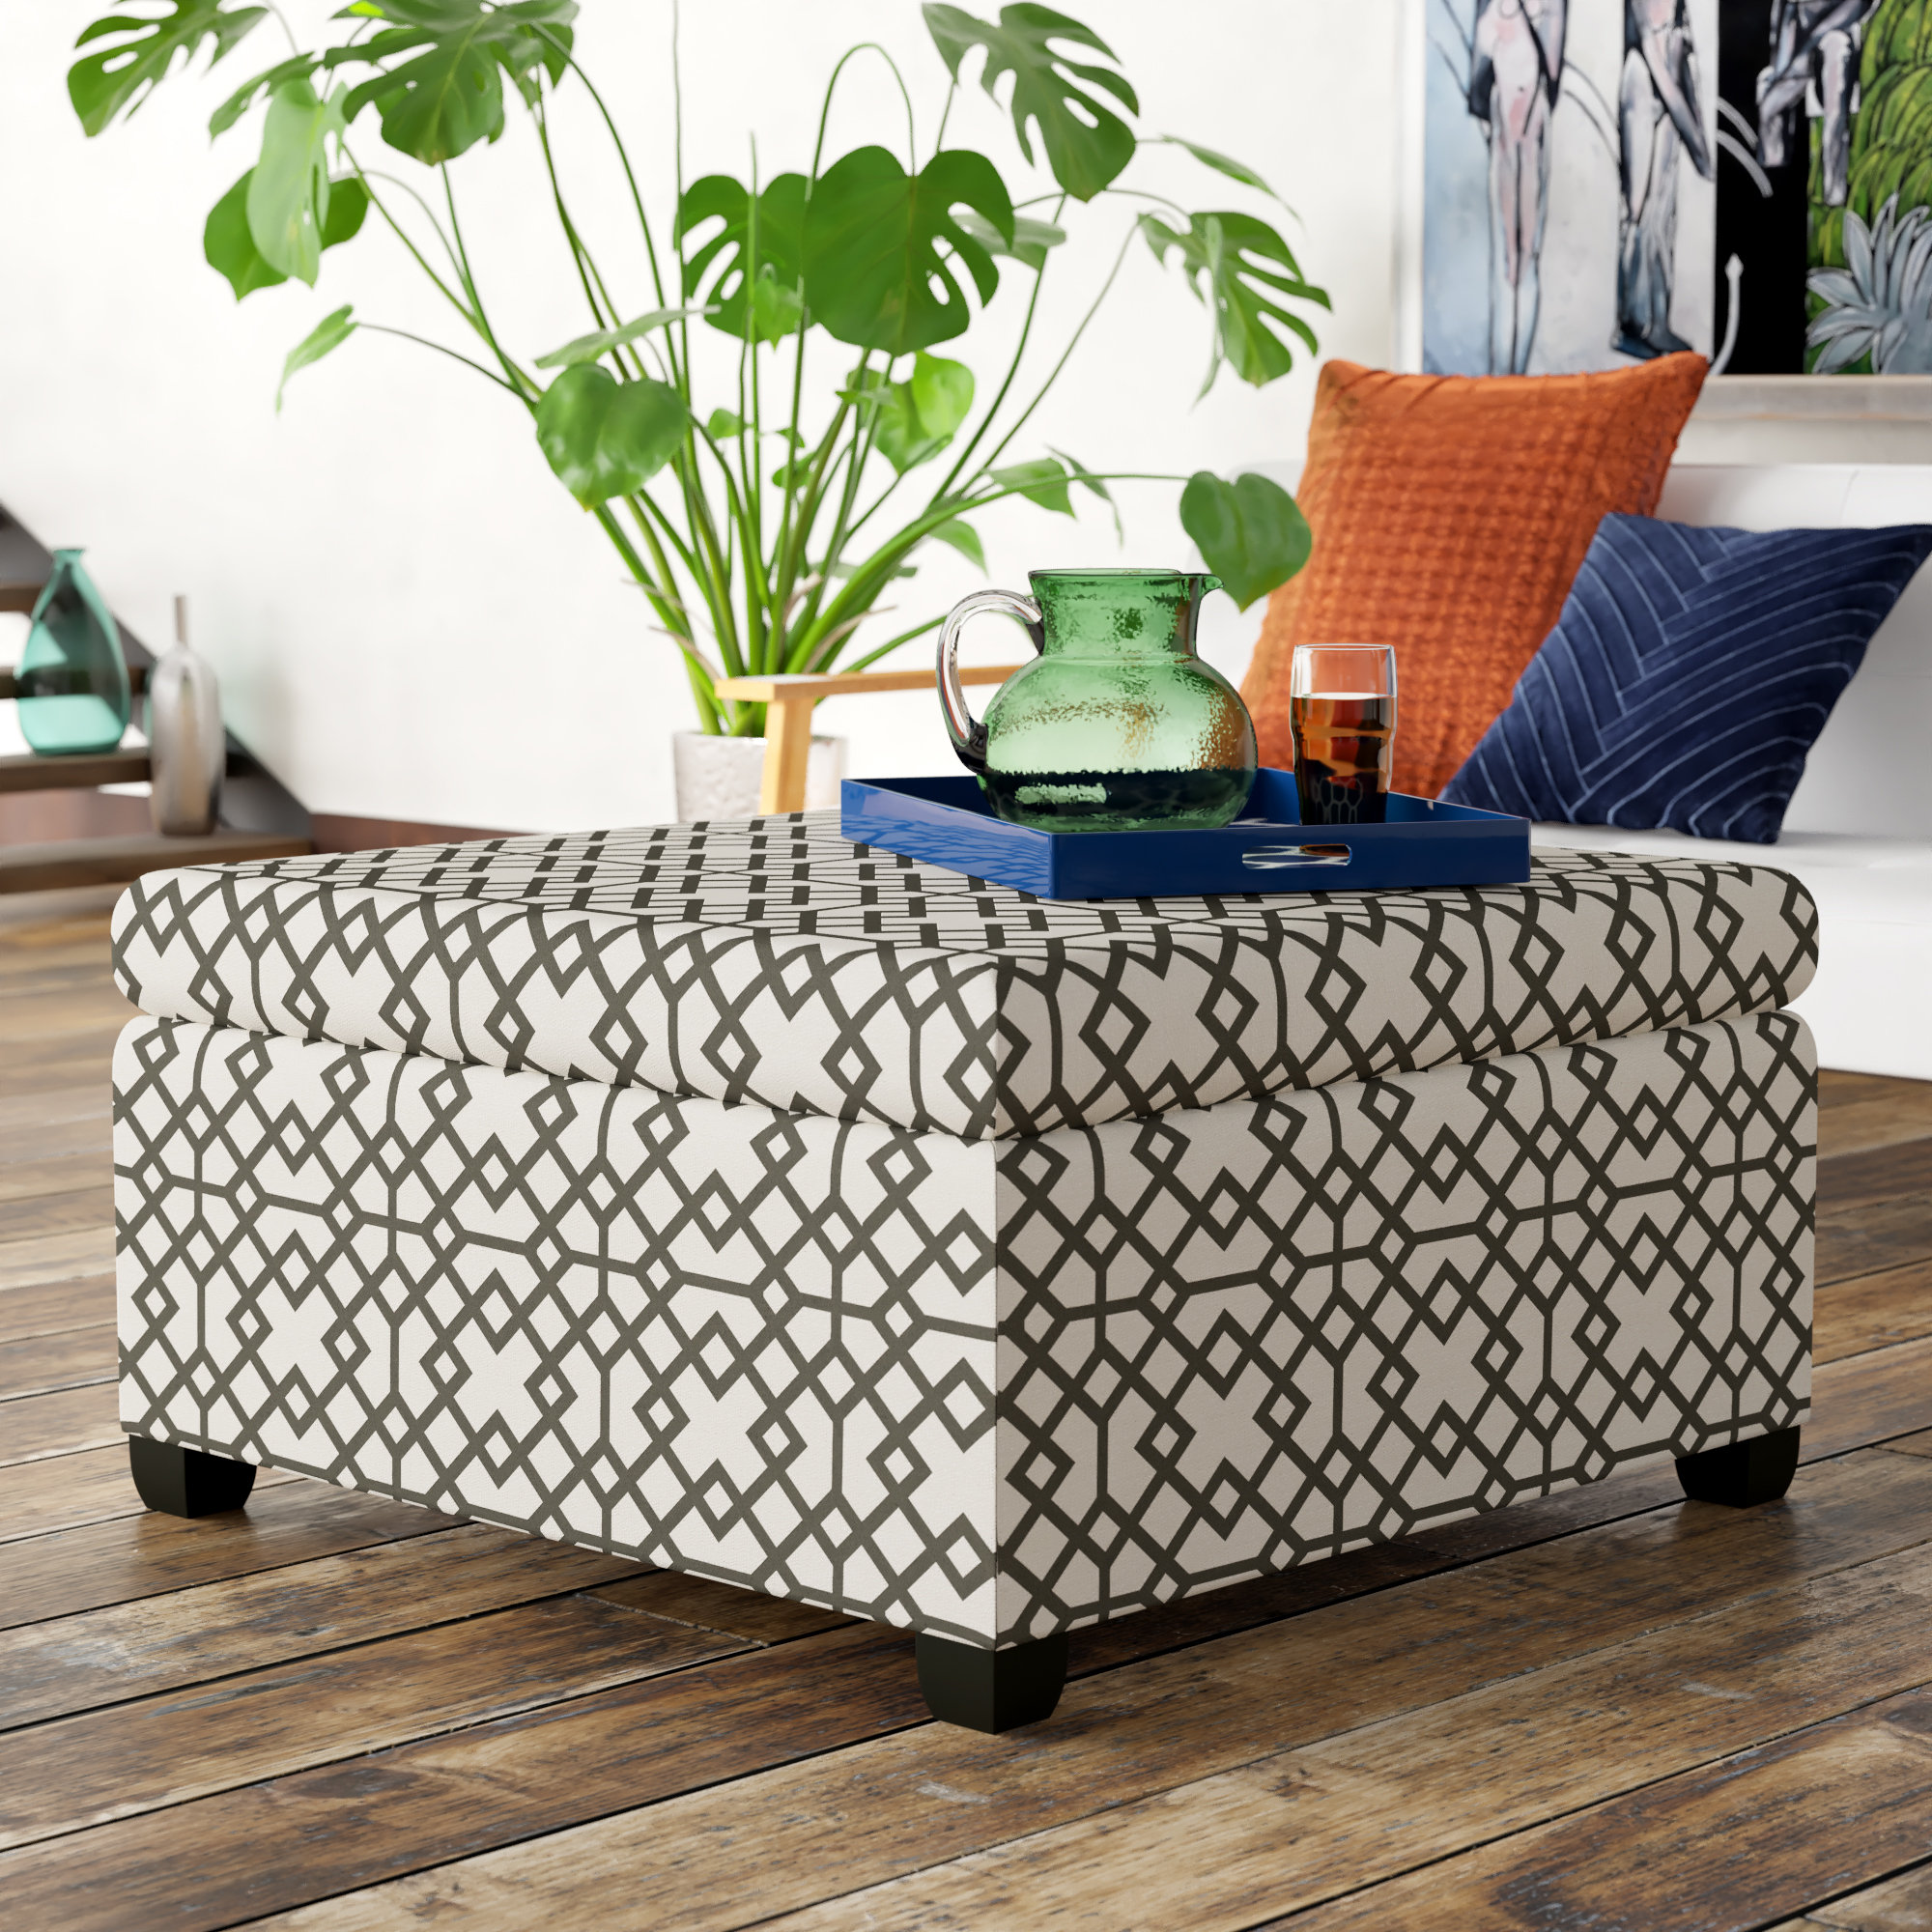
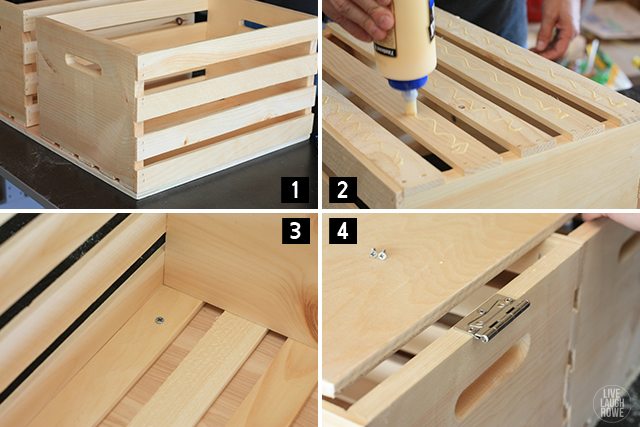
Once you have decided on the size and shape of your storage ottoman, you can begin building it. For this tutorial, we will use a simple cube shape. The first step is to cut out all of the pieces for your base and sides. In this case, I made my sides about 16 inches long and my top and bottom pieces about 14 inches long. You can easily change these dimensions to fit your space.
After cutting all of the pieces, you need to sand them down so that they are smooth and equal in width. It’s best to do this step before assembly because it will make it easier later on if there are any areas that need filling or sanding down (I had some issues with the corners of my sides being rounded). Also make sure that all edges are cleanly cut so that they can fit together properly without any gaps or overlaps.
Now is also a good time to paint or stain your wood if desired (I used white chalk paint). Once dry, glue together all of the pieces using wood glue or construction adhesive like Gorilla Glue. I would recommend using one of those two because they will create a stronger bond than most other glues which is important in
How to build a storage ottoman. Learn how to build a storage ottoman for your home. This DIY project is easy and affordable. Save space in your room with this super simple project.
1. You will need a wooden frame
2. Use plywood or solid wood as your base
3. Use screws to attach the legs to the frame
4. Cover the bench with fabric, leather or vinyl
If you have a lot of stuff, it can be hard to find a place for it. That’s where the storage ottoman comes in handy. You can use it as extra seating or a coffee table and then store all your stuff underneath when guests aren’t over.
This is a great project that only takes a couple hours to build, so if you’re looking for something fun to do this weekend, consider building one yourself.
Materials:
1/2-inch plywood (I used 3 sheets)
1×6 lumber (enough for 6 shelves)
8-foot lengths of 1×6 lumber (for legs)
1/2-inch plywood scraps (for dividers)
How to build a freestanding storage ottoman
This is a guide about making a storage loft ottoman. This is an easy project that can be made in a day or two.
Making a loft ottoman can be as simple as cutting some plywood and covering it with foam and fabric. You can buy pre-cut foam and fabric if you want to save time, but it might be cheaper to buy them yourself if you get coupons from your local fabric store.
The example I show here is made of pine, but you could use other types of wood such as oak or maple. Pine is soft enough that you don’t need to do any additional steps before starting construction. If you use hardwoods, you may need to pre-finish the materials before assembly so that they don’t stain easily when exposed to water (such as when cleaning).
Materials for this project include:
2 sheets of 3/4 inch thick plywood (one for the bottom and one for the top). See the “Tips” section below for more information about what kind of plywood to use.
The best way to build a freestanding storage ottoman is with a MDF box, but you can also use plywood. This article discusses how to create a beautiful storage loft ottoman using one of these materials.
I’m showing you three different ways to build this project:
1. Using MDF (medium-density fiberboard)
2. Using plywood
3. Using a combination of both materials
This tutorial is for how to build a freestanding storage ottoman.
The steps are as follows:
1. Build the frame of the storage ottoman with 2x4s, using pocket screws to assemble the legs and stretchers. Use 3/4-inch plywood for the top, sides and bottom. Cut each piece to size before assembling the frame. You can make your own mortise-and-tenon joints or use pocket hole screws to attach the pieces together.
2. Cut the fabric panels for the top of your ottoman, then staple them in place with an upholstery stapler or tack gun.
3. To make a padded seat for your storage ottoman, cut two pieces of foam so they fit inside your frame exactly as they will when finished — one piece should be slightly smaller than the other so that it fits into the recessed area above where you’ll be placing your legs (see photo). Use spray glue to secure these pieces in place on top of each other. Then cover them with upholstery fabric and staple it down around all edges, making sure not to miss any edges that might be showing through once you flip over this part of your ottoman (see photo).
For this project, you’ll need a few supplies:
Materials
1/2″ plywood (I used pine, but you can use any type of wood)
3/4″ plywood (I used pine again)
Plywood glue (if using a wood other than pine)
Wood screws (for attaching the side rails)
4×4 posts (to make the legs)
1×6 boards (to create the top and bottom rails)
1×4 boards (for the seat and back slats)