We’ve been building storage lofts for garages for over 5 years now and want to share our knowledge with those DIY garage loft enthusiasts out there. Let me just start by saying that you don’t need a degree in engineering and construction to build one of these storage lofts because you can be assured I’m not one. But, what we do know from experience is how to build a storage loft that not only looks great, but functions great as well.
Whether you call it a truck or not depends on how big the structures are that you are building. As was mentioned above, smaller outbuildings such as a woodshed or storage shed used to store firewood and yard tools can be built from wood. These small structures can also be built from concrete blocks.

How to build a storage loft in a garage
You can build a freestanding storage loft for your garage or shop in a weekend. It’s ideal for storing stuff that you don’t want to get wet, such as lawnmowers and snow blowers, or bulky items like bicycles and scooters.
Here’s how to do it:
1. Cut 2×6 boards to length using a circular saw and miter saw. The 2×6s will support the floor joists, while 2×2 lumber frames the walls and ceiling of the loft. Cut the ends at 45-degree angles using an angle guide on your miter saw. Use wood glue and 1-1/4-in.-long screws to attach each piece to the next, using a power drill with an impact driver (photo 1).
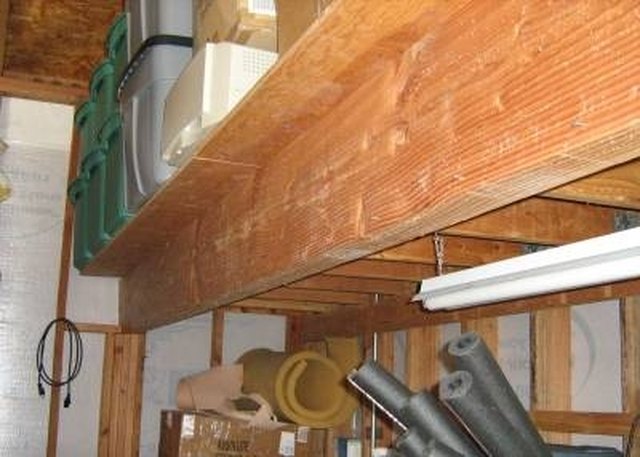
2. Toenail each joint instead of screwing it all together; this way it’s easier to disassemble later if necessary (photo 2).
3. Place some scrap plywood on top of the frame and mark where you’ll need to notch out pieces of 2×6 lumber so they’ll fit into place around any obstructions below such as electrical outlets or plumbing vents (photo 3). Use a reciprocating saw or jig saw
If you’re looking for a way to add more storage space in your garage, a loft is a great way to go. They’re easy to build and can be built in any shape or size.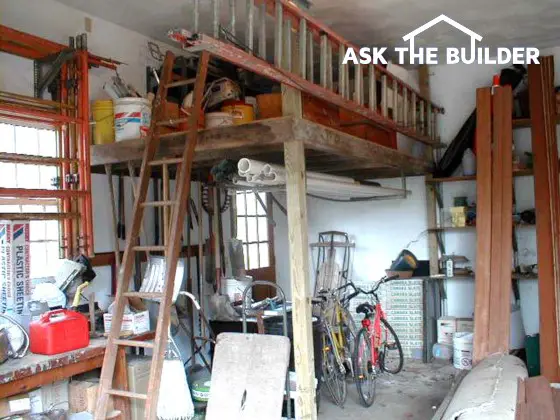
Here’s how to build a freestanding storage loft
1. Cut the lumber for the frame and rafters
2. Assemble the frame
3. Attach the rafters to the gable ends
4. Install floor joists as needed (or use plywood)
5. Attach plywood sheathing to the frame
6. Install a plywood floor on top of the joists
Storage lofts are great for storing things, but they’re even better for creating extra living space. The best thing about these projects is that they’re not very difficult to build and can be done in just a few hours.
These storage lofts can be built out of just about any material you like, but I prefer to use 2x4s and plywood because they’re easy to work with and are cheap. If you want something a bit fancier, you could use 2x6s or 2x8s instead.
The most important thing when building one of these storage lofts is making sure it’s strong enough to support the weight of whatever is stored inside it. The easiest way to do this is by attaching it directly to the wall or ceiling below with brackets or screws.
Here’s a quick guide on how to build a loft storage system over your garage. It will take you less than a day to build the entire system, and the materials are quite inexpensive.
The first thing you’ll need is lumber. You can use 2x4s for most of it, but for the base frame of the loft, I recommend using 2x6s so that it will be extra sturdy. Here’s what you’ll need:
One 4’x8′ sheet of plywood (for the base), or two 2’x4’x8′ sheets (for the sides)
One 4’x8′ sheet of plywood (for the back wall), or two 2’x4’x8′ sheets (for each side)
Four 3/4″ x 4″ x 8′ boards (for floor joists)
Sixteen 3/4″ x 1-1/2″ x 8′ boards (for floorboards)
Sixteen 3/4″ x 1-1/2″ x 14″ boards (for sideboards)
Building a freestanding storage loft is a great project for anyone who needs extra storage space. The loft can be built in a shop, garage, or any other room with enough floor space to accommodate it. To build this freestanding loft, you will need:
1. 2x4s for framing the structure
2. Plywood for the floor and roof
3. Screws for attaching the 2x4s together
4. Nails for attaching plywood to the 2x4s
Creating a freestanding storage loft is a great way to maximize your space and add value to your home. If you’re looking for extra storage space, but don’t want to build an addition, consider building a freestanding loft in your garage or shop.
A freestanding loft can be any size, but it should be large enough to fit your needs. For example, if you just want extra closet space, then a small loft will do the trick. On the other hand, if you need more room for general items and tools, then a larger loft is necessary.
This guide will show you how to build a freestanding storage loft yourself. It includes everything from materials and supplies needed, how much it costs and step-by-step instructions on how to build one yourself!
When you build a freestanding storage loft, it’s important to make sure that it’s sturdy enough to support the weight of your belongings. The materials you choose will have an effect on the strength of your loft.
Step 1 – Choose Your Materials
The first step in building a freestanding storage loft is choosing which materials you want to use. You’ll need some strong wood to construct the frame of the loft, but there are also several other options available for use as well. Plywood is one option; it’s easy to work with and can be cut into any shape you need for your project. Other options include pine boards, particleboard or even MDF (medium-density fiberboard).
If you want something that’s easier to assemble, consider using PVC piping instead of wood for your frame and rafters. This material will help keep costs down because it’s inexpensive and lightweight but still very strong. You can also add metal connectors so that everything fits together tightly without any gaps or spaces between pieces where pests might be able to hide out or get inside your loft area.
Step 2 – Cut Your Wood
Before you start cutting any pieces of wood, measure them carefully so that they’re all exactly the same size and shape. Then use a
A freestanding storage loft is a great way to add extra storage space without having to build an addition onto your house. Here’s how to build one.
1. Get the blueprints
The first thing you’ll need to do is get the blueprints for your garage and determine where you’d like your loft to go. Make sure there’s enough room for it, and also make sure it does not interfere with your existing garage door opening or other structures in the garage.
2. Cut studs for support
Once you have determined where you will be putting your loft, cut the studs into the appropriate lengths with a circular saw or table saw (make sure they’re long enough so that when placed side by side they reach from floor joist to floor joist). Once you have cut all of them, cut 45-degree angles on each end so that they fit together nicely when assembled.
3. Assemble the shelves
Take two studs and place them together at right angles with glue and nails so that they form an “A” shape (instead of two straight pieces). Then take another set of two studs and place them on top of
The first thing that you need to do is measure the space where you want to build your loft. Make sure that this space is large enough for the loft and any other items that you want to store in your loft.
You can use whatever material you want for your loft, but if you are planning to store heavy items, then you should use a sturdy material like wood or steel.
Once you have made sure that the area where you want to build your loft is big enough and has enough room for storage, then it’s time to start building!
Make sure that there is at least 12 inches of clearance between the top of your ladder and any overhead obstructions such as beams or pipes. You also need to make sure that there is at least 15 inches of clearance between the bottom rung of your ladder and any obstructions on the floor such as chairs or desks (if they are there).