The key to building a natural stone path is patience and a little know how. Building a stone path adds character and beauty to your landscape design . Most landscape design firms recommend building with natural stone. Natural stones not only look great but they hold up through the years.
Want to know how to build a stone path? Good! The stone mason in the video above will teach you step by step how to build one using flagstone pavers.Stones are some of the most versatile building materials on earth, and in this post we’re going to show you how to build a stone path for your yard or garden.:max_bytes(150000):strip_icc()/landscaping-accents--colorful-natural-paved-field-stone-sidewalk-yard-path-157485573-5c2435dd46e0fb00017e0fe3.jpg "How to build a stone path")
How to build a stone path
A stone path is a traditional element of landscape design, and it can be an elegant and functional entrance to your home. You can use stone paths in many different ways, including as part of a landscaping plan that includes flowerbeds and other garden features. Building a stone path is not difficult, but it does require some planning and patience.
Stone Path Design
Step 1: Lay out the path. Before you start digging or moving dirt around, make sure your path is going where you want it to go. Make any adjustments necessary, then measure the length and width of your new walkway so you know how much gravel or pea gravel you’ll need.
Step 2: Excavate the area for a shallow trench that runs parallel to where the path will be located — about 6 inches deep will work well for most applications; however, if you are building on clay soil or soil that has a tendency to erode easily, then make sure this trench is deeper (up to 12 inches). Then fill either side of this trench with dirt until it reaches ground level again — this should help prevent erosion from happening once you start laying down stones or pavers along the edge of your walkway later on down the line!/cdn.vox-cdn.com/uploads/chorus_image/image/65890070/paths_x_0.0.jpg)
There are many ways to build a stone path. The most common is a raised bed with stones placed over it. This method is often used in walkways and patios because it allows for easy drainage. However, if you want to build a more permanent pathway, you can lay the stones on the ground and then fill them with sand or gravel.
The first step in building any stone path is determining how wide you want it to be. Most people choose between three and six inches wide, though wider paths can be built if needed. You should also consider how many stones you want in each section of your path — two-foot sections are common but you can go smaller or larger depending on your preferences.
Once you have your measurements worked out, you will need to select the type of rocks you want to use as well as any other materials needed for construction like sand or gravel. Once everything has been selected, you will need to lay out your stone path using stakes and string so that all of the pieces fit together properly when they are installed.
After laying out your design plan, install all of the rocks into place by stacking them on top of one another until they reach their full height (or depth) and then filling in any gaps with sand or
When it comes to deciding what type of path you want for your home, there are a lot of options. From concrete to brick and even stone, there is something for everyone.
Stone paths may be one of the most popular types of walkways. They have a classic appeal that can add beauty and elegance to any property.
You can build a stone path in your yard by installing stones along the ground in a straight line or curving them around trees and other landscape features. While this may sound like an easy project, it does take some skill if you want to do it right
Building a Stone Path
If you prefer not to hire someone else, here are some tips on how to build a stone path:
The most important thing to remember when building a stone path is to make sure you have enough of the flat stones. You can use the flat stones for edging and for areas where the path will be stepped up or down.
The second most important thing to remember is that you want to make sure that all of the stones are level with each other. You don’t want one side higher than another side because then it will look awkward and uneven.
For this project, we built our path in sections so that we could keep everything even and level. We also used wood blocks to help keep everything even.
Once we had laid out our first section of stones, we used two-by-fours to hold up the wood blocks while they dried out overnight so they would be ready for us in the morning.
The best way to build a stone paver path is to start with a level area and work from there. Use stakes and string to mark the centerline of your path.
Next, measure out from the centerline in both directions and use stakes and string to mark the ends of your path.
Once you have these three points marked, dig holes for each stone using your spade or garden shovel. Make sure you dig deep enough so that when you place your stones in them, they will be level with the ground on all sides.
Once all of your holes are dug, lay out your first row of stones by placing one in each hole and leveling them by hand so they’re straight and evenly spaced apart. If they’re too close together or too far apart, add or remove dirt from under them until they’re correct.
Continue placing stones until you reach the end point of your path (or until you run out). Once you’ve reached this point, fill any remaining gaps with smaller pieces of stone or chunks of broken concrete pavers that fit into the gaps between the larger stones perfectly (no gaps should remain).
There are some important considerations when building a stone paver path. The most important thing to remember is that the stones must be set in place and compacted with minimal movement. This is especially true if you are using granite or other heavy-duty stone pavers.
Stone pavers can be laid directly on your existing soil, but they should be placed at least 1/2 inch above the ground so that water will drain away from them. If you use sand for your base, you should consider putting down a layer of crushed rock first before laying the sand over it.
Once you’ve laid out your path, it’s time to start placing your stones! Start by laying out a row of one type of stone (such as flagstones), then another row parallel to it but offset by half an inch or so. Continue laying rows until you have reached the length of your path, then repeat the process on the other side of your driveway as well.
When placing each stone, use a rubber mallet or hammer to tap each one into place. Make sure they all sit level and flush with one another before moving on to the next step!
Here’s how to build a natural stone path.
1. Choose your stones.
2. Lay out your path.
3. Dig holes for the stones.
4. Set the stones in place and level them off with sandbags, concrete or other weights if necessary.
5. Use a masonry edging tool to cut off any excess stone along the edge of the path that may have been left over from laying it down flat on the ground (if you need to remove any excess stone at all).
Natural stone pavers are a great way to add style and elegance to your landscape. They’re also durable and long-lasting, so you can use them for years without worrying about maintenance or replacement.
Natural stone paths can be laid in several different patterns, so they’re easy to install and maintain. Here’s how to build a natural stone path:
1. Choose the right stones.
Natural stone pavers are available in many different shapes and sizes — from large square tiles to small stepping stones. Choose the ones that best match your garden’s theme or style so that it looks natural and cohesive with the rest of the landscape design.
2. Measure out the area for the path.
Natural stone paths should be laid out in straight lines or curves, but not both at once because this will make them look disorganized and confusing when viewed from above or from afar. Before laying out any stones, measure out the size of your desired path with string lines or measuring tape so you know exactly how much space you need for each paver or stepstone before buying them at a local home improvement store or garden center.
3. Remove grass and weeds from the soil surface where you want to place the pavers (don’t forget
Stone pavers are a popular choice for patios and walkways because they’re durable, attractive and easy to install.
Stone pavers come in many sizes and shapes, so it’s easy to create an interesting pattern for your path. You can also mix sizes and shapes for added interest.
A stone paver path is easy to build with a few basic tools and materials:
A wheelbarrow or wheelbarrow-like contraption to transport the pavers from your driveway to where you’ll lay them out. If you don’t have one, rent one from a tool rental shop or buy one at a home center (they cost about $75).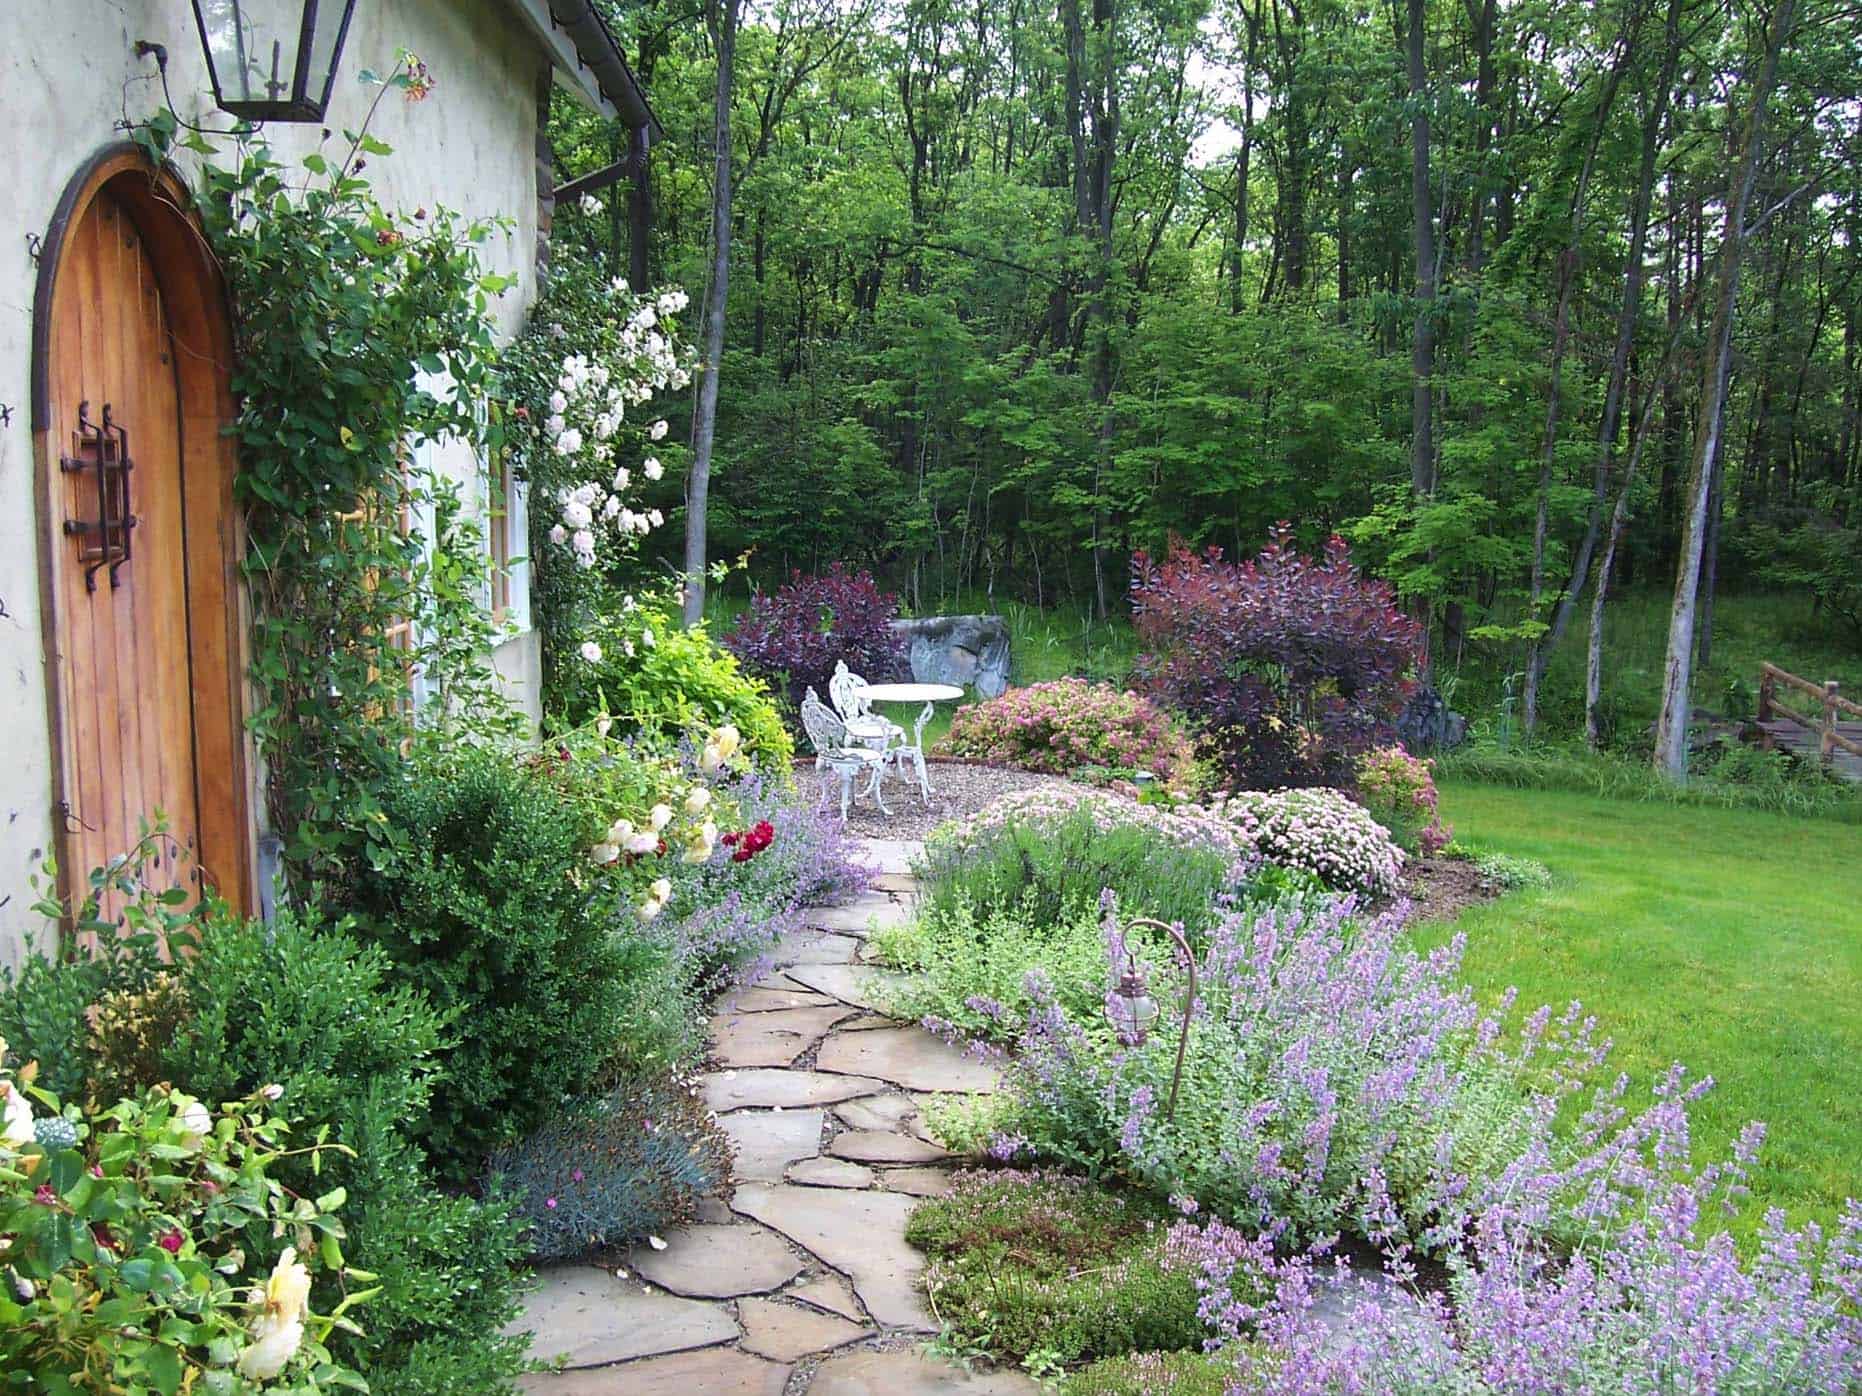
Landscape fabric, which is used as a weed barrier under the pavers. It’s available at many home centers in 50- or 100-foot rolls; the wide sheets of fabric come folded up so they don’t take up much room in the store. Buy enough to cover the width of your walkway; if you’re building several feet wide, buy two pieces sewn together end-to-end (look for “double” or “extended” on the package). Use scissors or a utility knife to cut it lengthwise into strips that fit between the stones without overlapping too much on top