What’s the cheapest, quickest and easiest way to build garden steps? Some say pavers, others have told me sleepers are the answer? I’m sure you’ve thought about it too. I know because I often wonder if sleepers will hold my weight (I’m a big guy). The problem is that I usually lack the time, tools and access to materials to do it myself. But in this article I’ll show you how Steps-Online can help you gain access to all of these resources. You can even hire someone else to do the work for you!
One of the most popular reasons for building garden steps is to make the access to the lawn, terrace or pathways easier. We take a look at what materials can be used to build these steps and how you can create an attractive finish.
How to build a step in garden
In this video, you’ll find out how to build garden steps using sleepers (wooden planks) and pavers. It’s a great DIY project that can really help transform your garden into an outdoor space you can enjoy.
Step 1 – Measure the area
Start by measuring the area where you want to create your steps. You need to make sure there’s enough room for them, as well as for any other pathways or garden furniture that might be planned in this area.
Step 2 – Dig holes
Next, dig holes for the sleepers that will form the base of your steps. Make sure they’re deep enough to support their weight once they’re covered in concrete and filled with gravel. If you’re using sleepers that are made from softwood, such as pine or cedar, make sure they are treated with preservative before using them in the ground because they may rot if left untreated. The size of each sleeper depends on its length and thickness, but most sizes will measure around 50mm x 50mm x 100mm (2″ x 2″ x 4″).
Steps are a great way to provide access to your garden, but they can also be used as decorative elements in their own right.
How to build garden steps with pavers
Using bricks or paving slabs is a quick and easy way to create attractive steps. The most important thing is working out the best height – too high and they’ll be difficult to use, too low and they’ll be unstable. You need to find the right balance between looks and practicality.
If you’re using pavers then you can simply lay them out on level ground, or if there’s an existing step, you can use it as a guide for your new design. If there’s no obvious height, then measure your own footfall when walking up or down stairs – this should give you a good idea of what feels right (around 30cm). Make sure that the pavers are all level too – if one edge is higher than another then it will become more noticeable over time as dirt builds up around the edges of each stone.
Steps are a great way to add interest and functionality to your garden. They can be used for access, as seating, or as a place to display plants.
There are lots of ways to build steps, but here are some of our favourites:
1) Pavers – These are great for creating a permanent feature in your garden that can be used on a daily basis. This method is also ideal if you want to match the rest of your paving work. The only downside is that it may be difficult to step onto the pavers when they are wet, which could lead to accidents in the garden.
2) Sleepers – Sleepers can allow you to create more interesting designs than straight-edged pavers, and they require less maintenance than brickwork or stone. They also provide more grip than concrete steps would!
3) Bricks – Brickwork is another option that’s easy enough for anyone to DIY at home. It’s also relatively cheap compared with other materials like timber or metal steps. The only problem with brickwork is that it takes time and effort – especially if you want it looking neat and tidy!
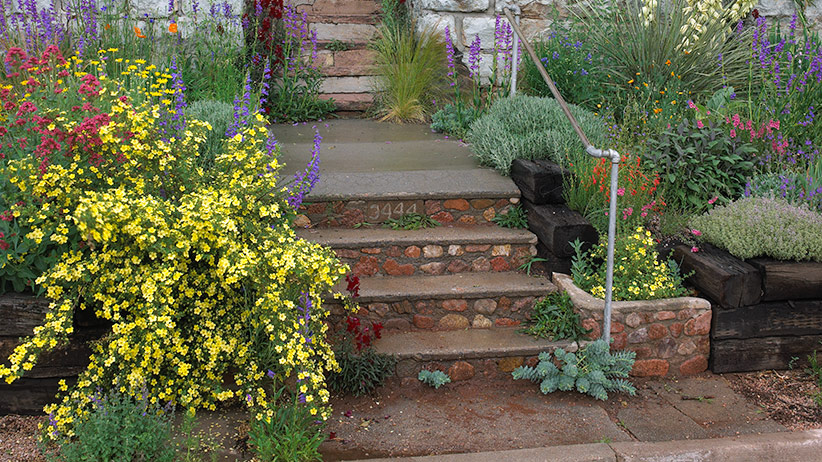
Garden steps are a great way of adding a level of sophistication to your garden, whether you’re looking to create a grand entrance or simply to add some extra seating.
Steps are also useful additions if you have any areas in your garden that have slopes, which makes it difficult for wheelchair users and others to access the space.
There are many ways to build steps in your garden, depending on where they’re going and what materials you have available. In this article we’ve listed some of the most popular methods for building garden steps and how to go about doing so.
Steps made from sleepers
Sleepers are wooden boards that are used for making railway tracks and other track-like structures. They can be purchased from DIY stores, or alternatively, if you know someone who works on railways or has access to an old railway track then they might be able to provide these at low cost.
To build garden steps using sleepers:
Cut them into individual sections using a jigsaw or circular saw (these tools will also come in handy if you’re planning on installing railings). The length of each sleeper should be around 300mm longer than the height of each step (ie if you want a 1m high step then use sleepers measuring around 1m
The steps to your garden can be a beautiful addition to your home. They can be functional and add value to your property, but they can also be a great place to relax and enjoy time with friends.
Steps are an easy DIY project, especially if you’re working with concrete or pavers. Here are some things to keep in mind when building your own steps:
Planning is key – Make sure you have all of the materials and equipment before starting this project. You’ll need enough space in the yard and on-hand tools such as a wheelbarrow, shovels, hoes, picks and rakes.
Materials – The type of material you use will affect how long your garden steps last and how much maintenance they require over time. For example, concrete steps require little upkeep other than sealing them every few years, while wooden stairs will need more frequent cleaning and repainting over time.
Design – Decide whether you want straight or curved steps (or both!). Choose from different types of materials such as concrete pavers or wooden boards for each tread if desired. Also decide how steep you want the risers (the vertical part of each step) to be so that they’re safe yet comfortable for walking up and down them every day!
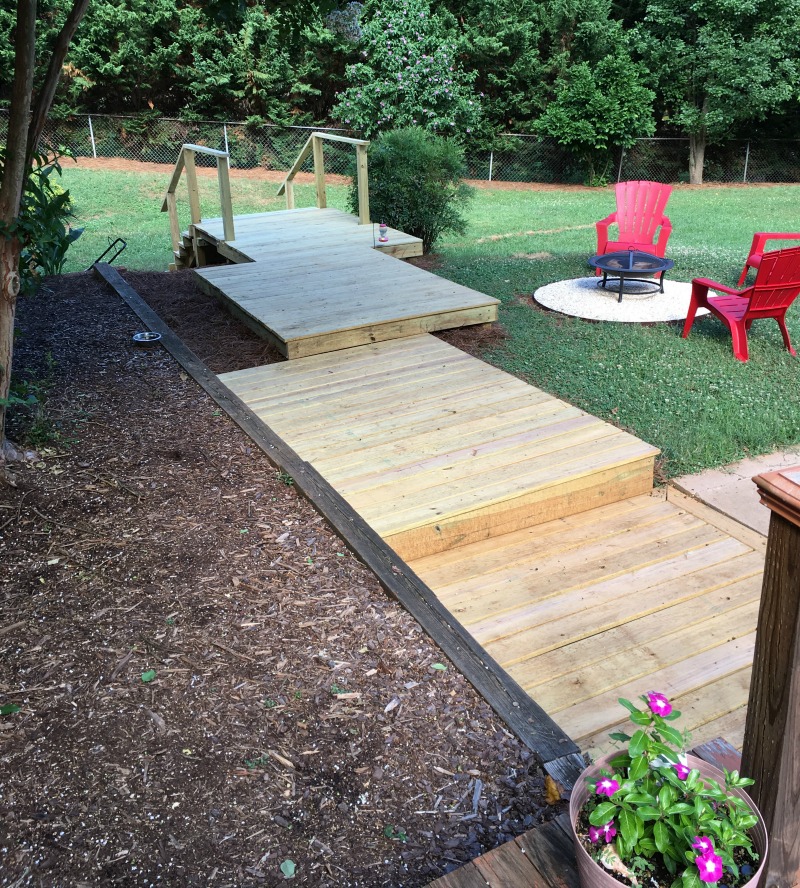
Adding steps to your garden is a great way to create an access point to your yard, or add a new focal point. You can use wood or concrete for the base, but if you’re looking for a more modern look, pavers are a great option.
Pavers are easy to install, and you can choose from different colors and materials to customize your steps. Here’s how to build garden steps with pavers:
Dig out the area where you want to install your new steps. The depth of the area should be at least as deep as the pavers themselves — about 2 inches — so that they won’t sink into the ground over time. If you’re using sleepers as rails, dig out an area that is wide enough for them (typically 3 to 4 inches).
Lay down some sand over the dug-out area. This will make it easier for you when installing the pavers later on. You can also use sandbags at each corner of your project if you don’t have enough sand available.
Install sleepers along the edges of your project area using nails or screws; these sleepers act as rails for your pavers later on
How to Build Garden Steps with Sleepers
This article is about how to build garden steps with sleepers. The first thing that you have to do is to find the right spot for the step. You have to make sure that there is enough space and it has a good view. The next step is to mark off where you want the step to be. Make sure that the step is not too steep, but not too shallow either.
The next thing that you have to do is cut down some sleepers and place them on top of each other. Next, you need to measure out how wide and deep your steps should be before you start cutting them down into shape. You can do this by using a tape measure or a ruler if you do not have any tools available at home. When cutting down the sleepers into shape, make sure that they are all exactly the same size so that your garden steps will look uniform when finished building them up together correctly!
If you want to build garden steps with sleepers, it is important to know how to do it properly. You can use sleepers for many different things in your garden and they can be used in lots of different ways.
There are many different types of sleepers and they can be used for all sorts of projects. If you want to build garden steps with sleepers, then here are some tips that may help you get started on your project:
1. Choose the right size sleeper:
When it comes to building garden steps with sleepers, it is important that you choose the right size sleeper for this purpose. If you choose a smaller sleeper than what is needed, then this could lead to problems later on down the line when it comes time for maintenance or repairs.
2. Measurements:
You also need to measure each step carefully so that each one matches up perfectly with each other when it comes time for building your staircase. This will ensure that they look good together and also make sure that they are easy enough to navigate around them when going up or down them in your garden at any point during their life span.
3. Keep it clean:
You should always keep things clean when building garden steps with
If you’re looking for a DIY project, building garden steps with sleepers is a great choice. The materials are inexpensive and the process is relatively straightforward.
Here’s how to build garden steps with sleepers:
1. Decide on your design
The first step in building garden steps with sleepers is to choose a design. You can opt for straight stairs or curved ones, depending on your preference and needs. If you’re building stairs for a porch or deck, it’s best to use straight stairs so that they match the rest of the structure.
2. Lay out your sleepers
If you’re using wooden sleepers as your base material, lay them down on the ground in order of size from largest at the bottom to smallest at the top. Place each sleeper next to one another until they form a step shape. This will give you an idea of how many sleepers you need for your project and where they should be placed relative to each other (you’ll see why in Step 3).
Step 1:
Measure the length and width of the area where you would like to place your steps. For this example, we are going to use a 8′ x 12′ area.
Step 2:
Cut your decking boards to fit the dimensions of the area you measured out in step one. You will need enough decking boards to cover the entire area (8′ x 12′). Each step is made up of two pieces of decking board that are 4′ long by 12″ wide. Cut your stringers (or sleepers) to fit between each pair of boards. The stringers should be 2″ shorter than the length of your decking boards so they sit flush on top and can support them properly.
Step 3:
Lay out all of your pieces for each step according to how many steps you want to build. In this example we are building one step but you can make as many steps as necessary depending on how high you want them to be and what material you are using for your steps (we chose cedar).