Are you in the process of construction and looking for plans or ideas on how to build a small ramp for wheelchairs or a small ramp off a deck? The following information will help you make an educated decision.
Improve the accessibility of your home with a custom ramp. Whether you’re looking to build a small ramp for wheelchairs or would just like one off the back of your deck, this project provides all the information
How to build a small ramp for wheelchairs
For most people, the first thing that comes to mind when they think of a ramp is a large structure that spans from the ground to the second floor of a house or other building. The truth is that ramps are used for far more than just getting into houses or buildings. Ramps can also be used to help vehicles get over obstacles such as curbs and speed bumps. A wheelchair ramp can also be built for use by those who want an easy way to get in and out of their car without having to climb into it.
The first step in building your own wheelchair ramp is deciding on what type of material you want it made out of. Aluminum and steel are both strong materials but they may not be as attractive as wood or plastic. Wood is beautiful but it can be difficult to cut and shape with power tools and smaller pieces like 1x4s tend to splinter easily when being nailed together. Plastic is easy to work with but it can be heavy and hard on the hands when working with it manually.
The next step is deciding on how steep your ramp needs to be so that it doesn’t pose any danger for those using it or cause them any discomfort while walking up or down it. This will also
The problem with most small ramps is that they don’t have the strength and durability to hold up over time. If you want to build a small ramp for your shed, or any other application, then there are a few things to keep in mind.
The first step is to determine what kind of material you want to use. Wood and metal are both common choices, but each has its own advantages and disadvantages. For example, wood can be easier to work with, but it also tends to be more expensive than metal.
Once you’ve decided on your material, you’ll need to choose what kind of surface treatment it will have. Some surfaces will be smooth while others will have ridges or holes drilled into them. Each type will affect how easy it is for someone in a wheelchair or on crutches to get up onto your small ramp by themselves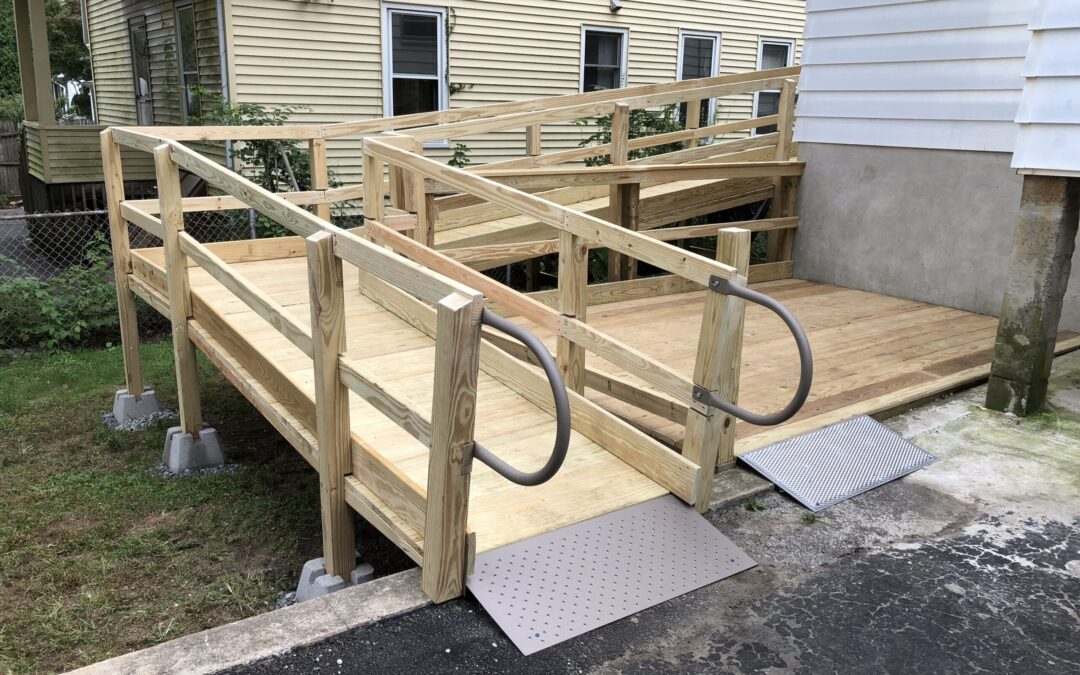
Ramps for wheelchairs are often built to help people get in and out of the house. They can also be used to help people get into a shed or onto a deck. The easiest way to build a small ramp is with two 2x4s and some screws. You can make the ramp as high as you need it, but if it’s too steep, it will be hard for someone in a wheelchair to use. To make sure your wheelchair ramp is safe and easy to use, follow these steps:
Step 1: Build the Frame
Cut two 2×4 boards into four pieces (see diagram). Each piece should measure 24 inches long. Sand the edges of each piece with 100-grit sandpaper so they’re smooth and straight.
Step 2: Lay Out the First Side
Lay down one 24-inch board with its smooth side facing up. Place another board across it so that both ends of each board line up with each other (see diagram). Make sure that both boards are parallel with each other; this means that if you drew lines along both edges of both boards, they would be parallel with each other as well as at 90 degrees (or perpendicular) from each other
This is a simple and easy to build ramp for your shed or garage. You can use this idea for other projects around the house as well.
This ramp is made out of pressure treated lumber and it’s 16 feet long, 9″ wide and has an 8% grade. The gap between the two pieces of pressure treated lumber is 3 3/8″ so that it fits over the door threshold.
I built this ramp by cutting two pieces of 2×6 lumber into 4 equal lengths. I then cut one 2×6 to be 9 inches long and one 2×6 at 11 inches long (these are the sides). Then I used my circular saw to cut a 1 1/4 inch notch at each end of all four pieces. This notch will allow the pieces to rest on top of each other when they are placed together.
Once your notches are cut you will want to carefully place them together so that they overlap evenly. Then attach them with screws through the bottom side of each piece into the top surface of another piece (don’t use too many screws because you want these screws to hold everything together without causing any holes in your wood)
If you have a shed and you would like to be able to get into it, you will need to build a ramp. The easiest way to do this is with a few pieces of wood. You can make a simple ramp for your shed using just two or three pieces of 2x4s. If you have more than one piece of lumber, you can make the ramp as high as you want it.
The first thing that you will need to do is cut your boards down into the appropriate lengths for each side of the ramp. You need two pieces for each side of the ramp, so if you have three boards, then your final dimensions will be 3 ft x 6 ft; if you have four boards, then your final dimensions will be 4 ft x 8 ft; etc. For example, if I had four 2x4s (which are actually 1 1/2″x3 1/2″), then my final dimensions would be 4 ft x 8 ft and my cuts would be:
1 board = 3 feet long (cut in half)
2 boards = 6 feet long (cut in half)
How to Build a Small Ramp for My Shed
How to build a small ramp for my shed. I have a smaller shed that I want to build a ramp for. It’s about 6 feet wide and 10 feet long. The ground slopes away from the shed about 3 inches in 10 feet. How can I build a ramp that will be safe for me and my wife?
What kind of materials do I need?
What’s the best way to make it?
I have built a small ramp for my shed, it is about 6 feet long and about 20 inches wide, the shed door is only about 2 feet above the ground and I need to be able to roll a lawn tractor in and out of the shed. The ramp is plywood on 2x6s.
I used 2x6s because they are strong enough without being too heavy to handle. The plywood also provides some traction when walking on it.
I used pressure treated lumber because it will last longer outdoors than regular lumber, but if you don’t have access to it or don’t want to pay the extra cost then regular lumber would work well too.
The most important part of building this type of structure is making sure that all of your cuts are made perpendicular (square). If they aren’t then things will not fit together properly and could lead to problems later on down the road if you try to use a tool that doesn’t fit properly into place because it’s too big or too small for where it goes.
I have a shed in my backyard that I would like to be able to get into. My wife and I are both disabled, so we are looking for an easy way to get into the small shed.
I have looked at some of the pre-built ramps that you can buy at Home Depot and Lowe’s, but they are very expensive. The cheapest one I could find was about $500 and it took two people to move it around.
I want something that I can just roll out of our garage and place on the side of our shed.
It needs to be strong enough for me (220 lbs) as well as my wife (150 lbs).
Here is what I have in mind:
A section of 2″x6″ board with a flat piece of plywood on top (like a ramp). On one side, there will be a 1″x6″ board that is attached at an angle so it looks like stairs going up over the plywood ramp. This will be attached with hinges so that it can fold down when not in use and open up like stairs when needed.
The other side will be attached directly onto the door frame of my shed so that it keeps people from falling off during entry/exit
This is a simple way to build a small ramp for your shed or other structure that has steps.
It’s easy and inexpensive, and you can do it in less than an hour.
You’ll need:
A 2×12 board about 8 feet long for the main part of the ramp (you can use more than one if needed)
2x4s for the sides of the ramp (use at least two, depending on how steep you want it)
Screws and nails
Stain (optional)
I’m not sure if you have the right materials, but if you have a 2×12, you can cut it into thirds and use the 2×6’s for the sides of the shed. If this is what you have, then here are some instructions.

You don’t need any framing lumber (2×4’s) or plywood unless it’s something that needs to be covered. If it doesn’t need to be covered, then build it with just 2×6’s and 2×12’s. You can use screws or nails (I’d recommend screws). You’ll also need some concrete for the slab where your shed will sit.
You’ll need 8′ long pieces of 2×6 for the sides of your shed. Cut two 4′ pieces from one end of each 8′ piece so that you can use them as rafters for your roof later on. Save all of these scraps – we’ll use them later on when we build our front porch!