Always keep in mind that no matter how small you build your house the most important thing is to realize the goal in the best way. Indeed, for building a small door of access it is not necessary to get confused and to think about which materials are needed for this or that purpose. Just try to find out what materials can be used in this or that situation, without thinking about things too hard.
The door is an element that we use in every day of our lives, from the moment we wake up until we go to sleep. We should pay more attention to these small structures that surround us, both in private and public spaces. Sometimes we have a clear idea of what the doors are for, but there are other moments in which they only make traffic flow more smoothly or separate public spaces in which we find ourselves.
How to build a small door
A small access door is a great addition to any workshop. It can be used to store tools and equipment, or it can provide an entrance for pets. If you’re building a new workshop or adding onto your existing one, consider adding a small door for convenience and organization.
First, measure the area where you want the door to open. This should be in a location that’s easy for you to reach when standing in front of it. Make sure there’s at least 5 inches of clearance on either side of the door so that it won’t hit anything when opening or closing.
Next, measure the height and width of your planned access hole. This will determine the size of your new door. To save time and money on materials, purchase pre-made doors that fit this size range. If you don’t have access to pre-made doors, cut down a larger door using a sawzall or table saw depending on how thick your materials are (see Resources).
For example, if your pre-made door measures 24 inches wide by 29 inches high, then cut down another 24-by-29 inch door so that both pieces are 24 inches wide by 29 inches high before continuing with these instructions:
A small door can be very useful in your home. It is a great way to make a room feel bigger and more open. You can also use it for storage or as an access point to your attic. This article will guide you through the process of building a small door.
Ensure that the hinge fits properly in the space available, then mark the position of the hinge on both sides of each door panel. Mark the centre point of each hinge and drill holes through both sides of each door panel at this point.
Use a straightedge to draw a line along each edge of each door panel, starting from one corner diagonally across to another corner, then repeat this process from the opposite corner until you reach the end of each side – this will be where you will cut out your panels using a jigsaw or handsaw (depending on how much material you want removed).
Measure up from the bottom edge of each door panel and mark lines at 90 degrees (horizontal) and 45 degrees (vertical), then measure up again at 120 degrees (horizontal) and 135 degrees (vertical). Connect these points with straight lines to form an X shape in each corner of each door panel – these lines will form your hinge slots when you glue
For those who have limited space and need a door, there are many options available. You can purchase prefabricated doors from home improvement stores, or you can build your own small door from scratch. The latter option is easier, cheaper and gives you more control over the final product.
Here are some steps for building a small access door:
1) Decide what size you want your door to be. Measure the space where you want to put it and compare that to the available sizes at home improvement stores or online retailers. If you want something custom-made, measure carefully so you can get exactly what you need.
2) Purchase materials at the hardware store or lumberyard. Be sure they match up with your measurements exactly or buy extra material in case any cuts need adjusting. You’ll need wood boards, hinges and screws or nails depending on how you want to attach them together (more on this later). You may also want to buy paint or stain if you want your new door to match existing ones in your house.
3) Cut boards according to measurements (or use pre-cut pieces). Make sure all sides and angles are square so that everything fits together properly when assembled
Making a small door with hinges
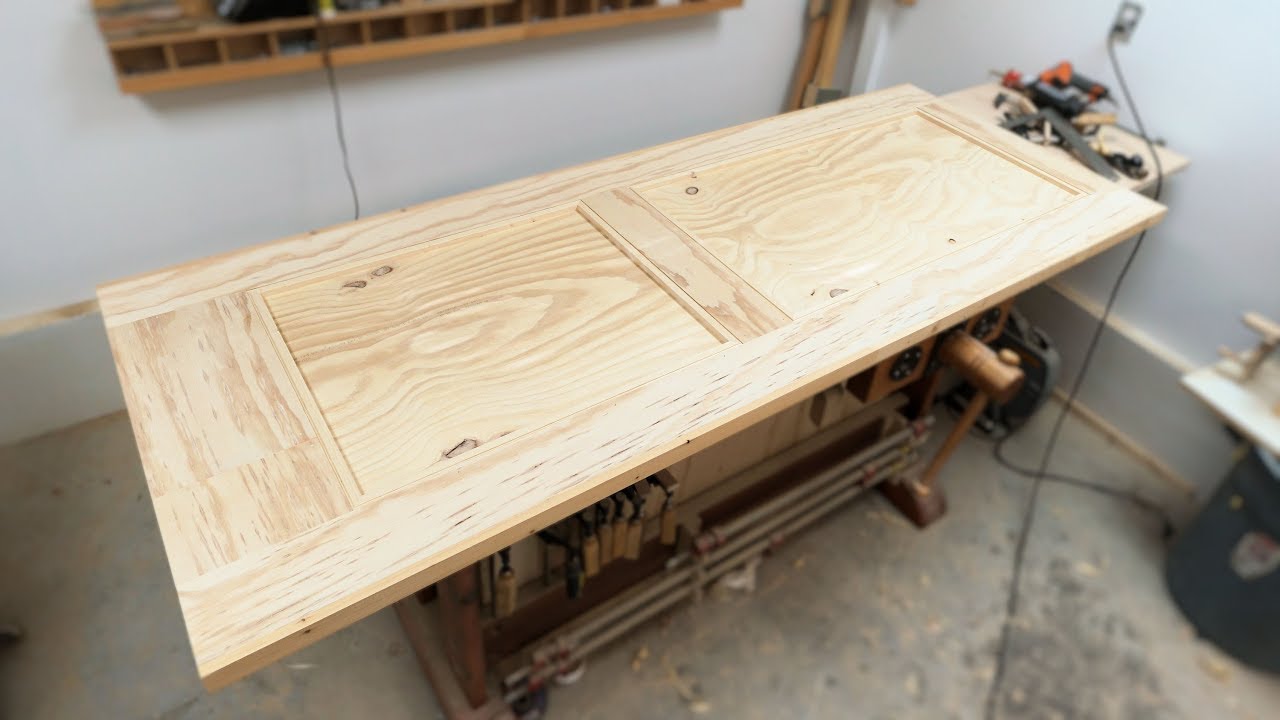
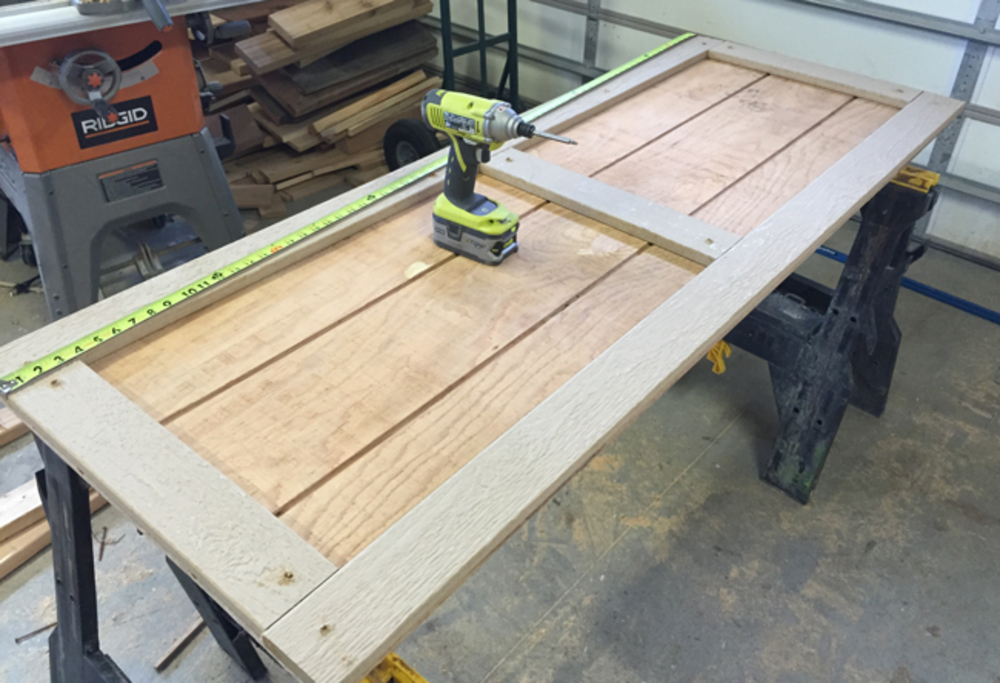
1. The first thing you need to do is make the frame. To make the frame, you will need some 2x4s and 2x6s. If you have a saw, it would be better if you cut the pieces yourself, but if not, buy them already cut at the store. Cut two 2×6’s into two pieces each at 48″ long, one piece at 37″ long, and two pieces at 31″ long. You should now have 8 pieces in all: four 48″ long pieces and four 31″ long pieces.
2. Next, take one of your 48″ long boards and one of your 31″ long boards and screw them together along one edge using 4 screws on each end of both boards (8 screws total). This will create a “T” shape with a notch taken out of it on the top side where they intersected each other (see picture below). This notch will be used later on in this step when we attach our hinges to it so that we can open our door!
3. Now take another 48″ long board and place it flat against your T shaped board as shown below
A small door is a great way to add storage space and functionality to your home without taking up too much floor space. The best part is, they’re easy to install and come in all shapes, sizes and colors.
Here are a few ideas for small doors you can make yourself or buy online:
1. Hinged Front Door – This front hinged door can be used as a closet door or pantry door. It’s made from oak plywood and measures 36″ x 80″. The hinges are included with the kit.
2. French Doors with Screens – These french doors with screens are made from solid wood, which will last longer than hollow-core doors. The kit includes all hardware needed for installation including hinges, latch sets, screws and more!
3. Sliding Barn Door Kit – This sliding barn door kit comes in many different sizes and colors so you can find the one that matches your decor best! The kit includes everything you need for installation including hardware, track brackets and more!
If you need a small access door, the best way to make it is to use a hinge and a latch. You could also use a hinge pin and a locking latch, but this design will not be as secure as the other one.
You can buy both parts at your local hardware store, and they are very inexpensive. You will need to buy 1/4″ thick wood for the door frame and 1/8″ thick wood for the door itself. The wood doesn’t have to be anything fancy, but it should be dry and straight.
You will need some screws at least 1/4″ long and some nails or staples with heads large enough to hold the hinges in place while you put them together.
The first step is to cut your pieces of wood into rough squares or rectangles with dimensions that fit your needs. For example, if you want an 18″x30″ door that swings open inwards then cut your pieces accordingly so that they’re slightly larger than those dimensions (19″x31″ or so). If you want something smaller then cut it even smaller until it fits in the space you want it to be located in and still swing freely when opened all the way back against the wall behind it (or forward if
The most common design for a small access door is the sliding door. This type of door is easy to install and can be built in any size. The steps below will show you how to build a sliding door, but they can easily be adapted to other types of doors.
To make a small access door, start by building a frame out of 2×4 lumber. Cut the vertical sides so that they are as long as the length of your opening plus about 8 inches (20 cm). Cut the horizontal pieces so their length is equal to your opening’s width plus about 1 inch (2.5 cm). Use wood screws to assemble the frame together using biscuits or pocket screws wherever possible.
Once your frame is assembled, attach it to the wall using metal strap hangers attached with lag bolts and washers through each corner hole of the frame into the studs on either side of it.
Next install two lengths of trim along both sides of your frame using wood screws driven into counterbores drilled into each corner post and then secured with wood glue and nails driven into predrilled holes in each trim piece.
This is a small access door that I built. It was built from a piece of 2×4 lumber, some scrap plywood and a hinge. It’s held together with a couple of screws, so it can be removed if needed. The main purpose for this project was to provide access to the rafters in my attic for cleaning and light installation. The original plan was to build it out of 2×6 lumber, but after buying all the materials and taking them home, I realized that it would take up too much room in my car.
The first step was cutting the plywood into two pieces to make two doors. Next, I cut the 2x4s down into two pieces with one end being longer than the other. This allowed me to create a hinge that could fit between both doors without any gaps between them or on either side (see below).
We’re going to build a small access door that opens outwards with hinges.
We’ll start by measuring the opening. Make sure you measure the width of the opening, and then measure from edge to edge to find out how deep it is.
For this example, our opening is 33 inches wide by 22 inches deep.
The next step is to cut our pieces of wood for the frame. For this example, we’ll be using 2×4 lumber for our framing and 2×2 lumber for our hinge mounts (or “ears”) on each side of the door.
If you’re working with a different size door, make sure to cut your pieces accordingly!
Cut two pieces of 2×4 lumber lengthwise so that they are 22 inches long (the depth of your door). These will be used as the top and bottom rails of your door frame, so make sure they are straight and without any knots or other defects in them!
Cut two more pieces of 2×4 lumber into two pieces that are 22 inches long (the depth of your door) and one piece that’s 21 inches long (1/2 inch shorter than your depth). These will be used as stiles for your frame
The average door frame is 24 inches wide and 80 inches high. If you’re replacing a door, you may be able to reuse the old one as a template.
The first step in building an access door is to mark the framing studs that will support the door header, jamb and floor (see Figure A). Use a chalk line to make these marks.
Figure A: Marking Framing Studs for Access Door Header, Jamb and Floor
Measure from each end of the opening to determine its length; add 1-1/2 inches to this measurement (see Figure B). Cut a 2×4 block that size, then cut it into lengths equal to half of this measurement plus 3-1/2 inches (see Figure C). These pieces will form the sides of your access door.