A simple portable sluice box can be used to screen minerals on the go, from any source. In the wildest parts of Alaska or deep in the jungle, these boxes can be used instead of rocker boxes or heavy table-top sluices.
The sluice box is a tool used for separating out lighter materials from gravel or sand. This is done by letting water flow through the contents of a box and the machine allows the heavier material to settle out of the water while allowing lighter material to wash into a drip pan. This tool is especially useful when pursuing gold or other heavy material using a pan as it can enhance how much light material you get in your pan and how much gold you might hope to find.
How to build a sluice box
Sluices are a good way to separate gold from sand, gravel, and other debris. They can be built out of wood or metal and are very portable. They are also relatively inexpensive to build and easy to maintain.
Materials Needed:
1 piece of plywood (1/2 inch or 3/4 inch)
2 pieces of plywood (1/2 inch or 3/4 inch)
7 pieces of 1×2 (2 inches long)
8 brass hinges
3 1-inch screws or nails for each hinge you use
A sluice box is a device used for separating gold from other materials. It uses the force of moving water to separate gold from dirt and gravel.
A sluice box consists of a long, shallow channel with riffles along the bottom. The device is typically made from wood, plastic or metal.
The materials needed to build your own sluice box are available at hardware stores or home centers. You can use a variety of materials for the construction: plastic PVC pipe, galvanized steel mesh or wooden boards. The main thing is to choose material that will last for years and won’t rust or corrode easily.
If you want to build a portable sluice box that can be used anywhere in your garden, you’ll need to make sure it’s light enough for one person to carry around easily. A good size for most people is about 4 feet long by 2 feet wide by 1 foot high (1.2 by 0.6 by 0). This gives plenty of room for washing out the stones and panning out the gold nuggets collected in your panning troughs!
The first step is to get your hands on a sluice box. This can be done by building your own or purchasing one from a local store. The next step is to choose the type of sluice box you wish to make. Some of these include:
Portable Sluice Box
The portable sluice box is perfect for someone who wants something they can take with them on the go, but it isn’t as sturdy as other types of boxes. It’s also great for beginners because it doesn’t require much effort or special tools.
Boxes For Hire
If you don’t have time to build a sluice box yourself, then you can hire one instead! These are typically built out of metal and are extremely durable. They are also quite expensive which means that they aren’t ideal for people just starting out in mining or prospecting
Sluice boxes are used to separate gold from other materials. They allow you to quickly separate large amounts of material, making it easier and more efficient than panning.
The best sluice box designs are built with rigid PVC pipe and fittings, but some people choose to make their own out of wood. This can be a good option for people who don’t have access to the materials needed for a PVC sluice box.
If you want to try your hand at building your own sluice box, here’s how to get started:
Step 1: Gather Your Materials
The first thing you’ll need is an idea of what materials will work best for your project. You’ll need some sort of rigid plastic or rubber tubing that will withstand the force of rushing water without breaking or cracking. This tubing is usually available at local hardware stores or online retailers such as Amazon and eBay.
You’ll also need some sort of rigid plastic or rubber connectors which can be attached to the end of the tubing so it can connect with other pieces of tubing or fittings. These connectors are also available at local hardware stores or online retailers such as Amazon and eBay.
Make sure you have all the tools and materials you need before starting.
Tools needed:
Saw
Drill
Hammer
Sander
Materials needed:
3/4″ plywood (2′ x 4′)
1/8″ thick plastic sheeting (2′ x 4′) (optional)
How to Build a Portable Sluice Box: 13 Steps (with Pictures)
How to Build a Portable Sluice Box. A sluice box is a simple machine used to separate gold and other heavy minerals from sand and dirt. The sluice box was used by miners in the 1800s, but it can also be used by hobbyists. You can build your own with just a few common tools and materials that are readily available at any hardware store.
Step 1 – Preparing the Base Board
Step 2 – Cutting the Lid Boards
Step 3 – Assembling the Sides
Step 4 – Attaching the Bottom Boards
Step 5 – Hanging the Sides on the Base Board
Step 6 – Installing the Lid Boards on Top of Each Other
Step 7 – Attaching Straps to Hold It Together
Step 8 – Drilling Holes in the Sluices
Step 9 – Adding Rocks for Extra Weight
Step 10 – Finishing Touches and Testing Your New Sluice Box
I built my own sluice box out of wood and it works pretty well. The key is making sure that you have a good sluice box that will catch all of your gold.
I started off by building a frame out of wood, then attaching a metal mesh on top of it. The mesh can be bought at any hardware store, but if you don’t want to buy it, you can make your own from chicken wire or other wire mesh materials.
The metal mesh will help keep the rocks from falling out of your sluice box when you run water through it, which makes it easier for you to sort through the rocks later on when you are looking for gold nuggets.
Once I had my frame built, I attached some rollers to one end so that I could easily roll my homemade sluice box around while searching for gold nuggets in rivers or creeks where they might be found.
You can build your own homemade sluice box by following these steps:
Get an old piece of plywood and cut it into four different pieces, each measuring about 2 feet wide by 2 feet tall by 1 foot long (or whatever size fits your needs). Then screw them together so that there is about 2 inches
The first step in building a sluice box is to cut the wood to size. The size of the sluice box will depend on the size of your stream and how long you want to be able to operate it before having to rebuild it. For example, if you are using a portable generator that only runs for two hours at a time, you might want to build your sluice box so that it can be easily dismantled and reassembled at the end of each day. If you are using a permanent power supply, then you might want to build a larger sluice box that can run for several days at a time without having to dismantle it.
The next step in building a sluice box is assembling the frame for the sluice box. Get two pieces of 2″ x 4″ lumber and cut them into 6″ lengths (this will give you four pieces). Next, drill holes through both ends of each piece using an electric drill and drill bit set at 1/2″. Place these pieces on top of one another with their holes facing downward and use screws to join them together as shown below: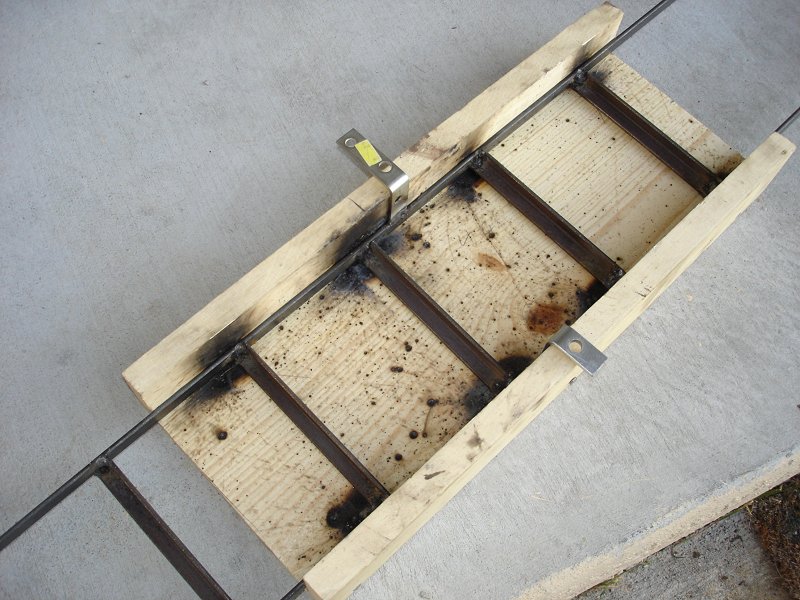
Sluice boxes are a great way to pan for gold, but they’re also heavy and bulky. If you want to go mobile, you can build your own sluice box out of wood.
This sluice box is made with two pieces of plywood and some PVC pipe. The whole thing weighs less than 10 pounds and is easy to transport in the trunk of your car.
You’ll need three sheets of plywood (1/4″ will work fine), eight 48″ pieces of PVC pipe, four 3/4″ wood screws and four 3/4″ diameter dowel rods.
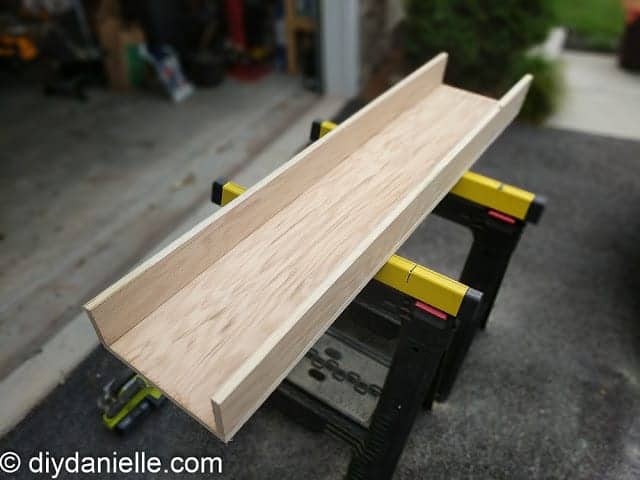
The easiest way to build a sluice box is to use a piece of plywood for the bottom and sides. The top should be made from 1x2s or 2x2s, depending on the size of the box you want to build.
To make your own sluice, you will need:
A piece of plywood that is at least 4 feet wide by 8 feet long (or larger if you want). You can cut this down later if needed.
Some 1x2s or 2x2s that are at least 8 feet long (or longer if needed). A miter saw will make this part easier but it’s not necessary.
A cordless drill and bits (or drill press)
A jigsaw (optional)