DIY Automatic Sliding Gate – Planning and designing a sliding gate for your home garden is a crucial thing. While most of the people look for having metal gates, wooden and plastic grates are very much in usage to avoid unnecessary metal corrosion and rust. This article is all about discussion on how to plan and design sliding panel gates.
Sliding gates are very popular and do not take up too much room, so people like that. They also look good and can be a major deterrent for thieves. Your gate needs to be perfect, as it is the first thing seen by your visitors. So here we look at how to build a deck gate for your home.
How to build a sliding deck gate
Sliding gates are usually made of wood or metal, and can be either swinging or sliding. They are used for doors, windows and fences. The sliding gate hardware is the same as that of a garage door.
There are many different types of sliding gate kits available on the market today. Some are made entirely from wood while others have a metal frame with wood slats running along the sides. The advantage of using a kit is that it allows you to make many adjustments to your design without having to start from scratch each time.
Building Your Own Sliding Gate
The first step when building your own deck gate is to decide whether you want it to be automatic or manual. This will determine how much work you need to put into the project, but it also affects how much money you will spend on materials (or how much time).
Building a sliding deck gate requires some basic carpentry skills. The gate must be very sturdy to withstand the force of the water pressure in the pool, so it should be built with 2-by-6 or 2-by-8 planks. Make sure to use pressure-treated lumber, which resists rot.
Cut two pieces of plywood to make a top and bottom track for your sliding gate. Cut these pieces from 1/4-inch plywood using a circular saw with a jigsaw blade attached. Then cut a third piece of plywood for the left side of your frame. Attach these pieces together using wood glue and 2-inch screws every 6 inches along each board’s edge.

Measure and cut four 2-by-4s for your gate posts using a handsaw and square them up at 45 degrees with a miter saw. Attach these posts to the outside edges of your frame using wood glue and 2-inch screws every 6 inches along each post’s edge
Measure, cut and attach two more 2-by-4s to make diagonal cross braces on each end of your gate frame using wood glue and 2-inch screws every 6 inches along each brace’s edge. These will help support the weight of your
The sliding gate hardware is the most important component of a sliding gate. It’s what allows you to operate your gate easily and smoothly. There are many different types of sliding gate hardware, but the most common ones are listed below:
Sliding Gate Motor
A motorized gate can be controlled by an electric keypad or remote control. This type of automatic gate is a great option if you want to be able to open and close your gate easily without having to walk over to it and manually operate it each time. The downside is that these gates are more expensive than other types of sliding gates and require regular maintenance.
Sliding Gate Opener
An opener is another type of motorized gate that operates automatically when you push a button on your remote control or keypad. You can also purchase an opener with a manual override feature so that you don’t have to walk over to the gate every time you want to open or close it manually. However, this adds more time and effort into operating your automatic sliding gate, which can be inconvenient if you’re away from home often or live in an area where there aren’t many people around at all times who could help you out with opening and closing the gate manually when necessary (such as when someone else needs access
Sliding gates are a great way to keep your pets and children safe, but they can be difficult to install. You can buy a pre-made gate or build your own. If you’re building your own gate, here’s how to do it:
Sliding Deck Gate Hardware
You’ll need the following materials:
(1) 4×4 wood post (galvanized steel if you’re in an area with corrosive soil)
(2) 2×4 wood posts (you can use 2x6s if you want a taller gate)
(4) 1/4-inch carriage bolts with nuts and washers for each hinge
(2) hinges for each swinging door
Sliding deck gates are a great way to create a secure, child-friendly area while maintaining the look of your deck. If you’re interested in building a sliding deck gate, there are several options available.
Sliding deck gates can be constructed using a variety of materials. They can be made from wood or composite lumber and finished with paint or stain. Most sliding deck gates are made from two pieces of wood fitted together with hinges, but there are also some models that use rails and rollers instead.
To build your own sliding deck gate, follow these steps:
1. Purchase the necessary supplies
2. Cut the lumber to size
3. Attach the latch hardware to one side of each piece of lumber
4. Attach both pieces of lumber together using hinges on opposite sides (typically one hinge on each side)
5. Attach the latch hardware to the other side of each piece of lumber so that it will secure when closed
Sliding deck gate hardware, diy automatic sliding gate
Diy Automatic Sliding Gate
If you own a dog, or just want to keep your kids in the yard, you might be interested in building an automatic sliding gate. This guide will walk you through the steps of building one using basic tools and hardware that can be purchased at any hardware store.
What You’ll Need:
Tools:
Drill/driver
Circular saw or jigsaw (if cutting your own panels)
DIY Automatic Sliding Gate Kit
The DIY automatic sliding gate kit is designed for those who want to build their own automatic sliding gate. The kit comes with everything you need to make your gate opener, including a controller, motor, and all of the necessary hardware. This kit is great for people who have some experience with working with power tools and wants to save money by building their own gate opener.
If you are interested in purchasing this DIY kit, then check out our website at www.DIYAutoGateOpener.com
Automatic sliding gate can not only save labor, but also improve the security of the house. In this article, we will introduce how to build a DIY automatic sliding gate.
When choosing the automatic sliding gate hardware, it is best to choose a large-sized motor that can open and close the door quickly and smoothly. The speed is important, because slow speed will reduce the safety of the gate.
The power supply should be 220V, which is more convenient to use. The motor can be controlled by a remote control or mobile phone APP.
The automatic sliding gate should be equipped with an infrared sensor so that when there are people passing through, it will automatically open; if no one passes through for a long time, it will automatically close itself and lock itself in order to prevent theft.
The low-maintenance, auto-open feature of an automatic sliding gate is perfect for your home. This DIY project will have you up and running with your own automatic sliding gate in no time.
What You Need:
Electric Gate Opener (or other hardware) – $100-$200
Wooden boards – $10-$20 per sheet
Paint/stain – $5 per quart
Hinges (optional) – $15-$25 per hinge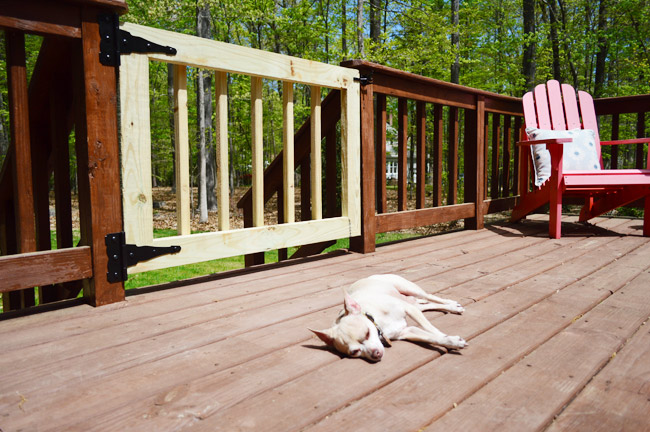
This is a great DIY project for anyone with some basic woodworking skills. If you can use a saw and a screwdriver, you can build this sliding gate. Building the track will be the most difficult part of this project, but it’s not that hard if you take it one step at a time.
Step 1: Cut the bottom rail to length. Cut it to fit between the upright posts and along the bottom of your deck railing. It should be just shorter than the distance between your posts so that it slides easily in and out of place.
Step 2: Screw on support blocks (or “stops”) to keep the bottom rail from sliding too far out of position when it’s open. These go on top of each upright post, so they don’t interfere with closing or opening the gate.
Step 3: Cut two more rails from 2x4s as shown in the photo above, then screw them into place on top of your deck railing using 2-inch screws (see image below). These will form the sides of your track when it’s assembled later on in this project.
Step 4: Attach another pair of stops to each side rail using 2-inch screws as shown above (see image below). These will keep.