Have you ever needed to create a slanted roof shed? Or maybe you’re working on your own home and need to create a slanted roof pergola? This post will walk you through how to build both of these projects.
Test to destruction. That’s what we do here at ShedHub. We’ve spent months testing out various shed designs to figure out which ones are the strongest. Once we had our results, we created a guide that walks you through everything from choosing the right materials for your shed to putting together an efficient and functional structure that will last for years. Our free shed plans walk you through the step-by-step process of building your own slanted roof shed and can be downloaded from our website in a matter of minutes.
How to build a slanted roof shed
Step 1: Prepare the Foundation
The first step in building your shed is to prepare the foundation. Measure and mark the location of each corner post. You will need to dig holes for these posts, so make sure that you dig down far enough for them to be stable.
Step 2: Lay Out the Sheeting
After you have laid out your foundation and prepared it for concrete, you can start laying out your sheeting. The first sheeting layer should run parallel to the longest side of your shed (or whichever side has more space). Use 3-inch thick sheets of plywood or OSB (Oriented Strand Board) that have been cut and pre-drilled according to specifications from your local home improvement store. Attach them using nails every 12 inches along each edge, then also every 6 inches in between these edges for extra strength. Make sure that all seams are tight and aligned before moving on to the next layer of plywood or OSB!
![How To Build a Shed with a Slanted Roof [Step-by-Step Guide]](https://plasticinehouse.com/wp-content/uploads/2018/04/roof-framing.jpg)
Building a slanted roof shed is quite a simple project. If you are looking for a way to add extra storage space to your yard, this is the perfect project for you. With just some basic carpentry skills and tools, you can build this shed in no time at all. Here are some tips on how to build a slanted roof shed:
Decide on the Size of Your Shed
The size of your shed will depend on how much stuff you want to store inside of it. For example, if you want an area where you can store lawnmowers and other garden equipment, then you may want a larger shed with more space inside. If all you need is extra space for storing gardening tools and other small items, then a smaller sized shed would work just fine.
Measure out the Area Where You Want Your Shed Placed
Before starting any construction work, you should measure out the area where you want your shed placed in relation to where it will be built on your property. This way, when it comes time to build it there won’t be any surprises such as needing more room than what was originally planned for when laying out its location during planning stages prior building process begins before
The slanted roof shed is a popular choice for many homeowners. It’s a great way to add extra storage space to your property without having to expand onto your backyard. The sloping roof is also attractive and helps keep the interior of your shed cooler in the summer months. If you are looking for an easy project that will add value to your home, consider building a slanted roof shed.
The first thing you will need to do when it comes time to build your slanted roof shed is pick out the size that works best for you. This can be done by measuring your yard and estimating how much space you will need for each type of tool or equipment. When choosing the size of your shed, keep in mind that it should be large enough so that two people can comfortably stand up inside at once (this will allow you easy access when it comes time to clean or store items). You may also want to consider adding on extra space if there are any items that are too tall or bulky for normal use (such as a riding mower).
Building a sloped roof shed can be done by anyone with basic carpentry skills. This type of roof is great because it helps direct rainwater runoff away from the structure, which helps prevent leaks and rotting. In addition, it gives you more storage space by increasing the height of your storage area.
Materials Needed:
Roofing material (asphalt shingles or other)
Screws and nails
Lumber (2x4s or 2x6s)
Step 1: Building the foundation
Before you start building the shed, you need to construct its base. The base needs to be strong enough to support the weight of the entire structure. So, you can use concrete blocks or stones for this purpose. You can also use heavy duty lumber if you want to make sure that your shed is sturdy and durable.
Step 2: Constructing the walls
After creating a strong base, it’s time to start building the walls of your shed. You can use any material for this purpose, but make sure that it’s waterproof and long-lasting so that you don’t have to repair or replace it after using it for some time. If possible, try using pressure treated lumber since it has all these qualities and lasts for a long time as well.
Step 3: Constructing the roof
Constructing the roof is similar to constructing other parts of your shed in terms of materials and skills needed in order to do so successfully. Make sure that your roof is strong enough and able to withstand harsh weather conditions such as rain, snowfall and winds without causing any damage to the structure itself or its contents inside the shed.
How to Build a Slanted Roof Pergola
A slanted roof pergola is a great way to expand your outdoor space. It’s easy to build, and it looks great. Here’s how:
Step 1: Build the Frame
Start by measuring the width of your deck or patio, then cut two pieces of 2×4 lumber to that length. You’ll use these pieces as the base of your pergola frame. Cut two more pieces to match this length, but add an inch or two extra on each end (for example, if your original piece was 8 feet long, add 1 foot on each end). These will be used to support the rafters. Cut two more pieces of 2×4 lumber to match this length as well, but don’t add extra on either end. These will be used as crossbeams in your pergola frame.
Next, you need to cut some rafters from 2×6 boards so that they’re long enough to span from beam to beam at the top of your pergola frame. They should all be about 3 feet longer than the distance between beams so you have room for insulation inside when you’re done building your pergola.
A slanted roof pergola is a great way to add some shade and protection from the elements to your outdoor space. A slanted roof can be a little tricky to build, so it’s important to make sure you have all the right tools and materials on hand before you start work. This guide will show you how to build a slanted roof pergola in just a few easy steps.
1. Measure out your base
The first thing you need to do when building your pergola is measure out the area where it will go. You’ll want to measure out at least three feet away from any walls or buildings that may be nearby so that there is plenty of room for people to walk around under the pergola (if they need). You should also measure out the height of your pergola by standing back and looking up at the top of it — this will help you determine how far down into the ground you need to dig for your footings and posts.
2. Prepare your wood
When building a slanted roof, you’ll want to make sure that all of your boards are cut at an angle in order for them to fit properly onto each other as well as onto their supports — this means that
How to Build a Slanted Roof Shed
Building a slanted roof shed is an easy project that anyone can do. The materials and tools are not expensive, and it does not require any special skills. A slanted roof shed can be built out of wood or metal. You can also use metal panels for the roof and siding if you want to add more insulation or keep out weather elements. Here’s how to build a slanted roof shed in just a few steps:
Plan your design before you begin building your slanted roof shed. You need to decide how large you want it to be and how long each side should be before using this information as a guide while building. The easiest way is to draw up plans on paper first before getting started with construction so you know exactly what needs to be done before getting started on the actual project itself. If you’re working with an existing structure, such as an old tool shed or garage that has already been built, then this step isn’t necessary because the measurements will already be available for you when planning out your design beforehand so that all of your measurements match up properly with each other during construction time itself instead of having
How to Build a Slanted Roof Pergola
Building a slanted roof pergola is a great way to add shade and style to your backyard. The pergola can be made of wood or PVC, and it’s fairly simple to construct. If you have the right tools and materials, you can build one in just a few hours.
Step 1: Start by building the frame of your pergola. You can use 2x4s for this part, although cedar or redwood is recommended because it won’t rot as quickly as pine. Cut two pieces of lumber for each side at 20 inches long, then cut two more at 14 inches long for the top and bottom pieces. Nail them together with 16d nails so that they form an A-frame shape like this:
A slanted roof on a shed is a fun way to add some character and style to your backyard. It’s also a great place for plants, flowers or other gardening accessories. Building a slanted roof shed is easy, and this guide will show you how to do it right.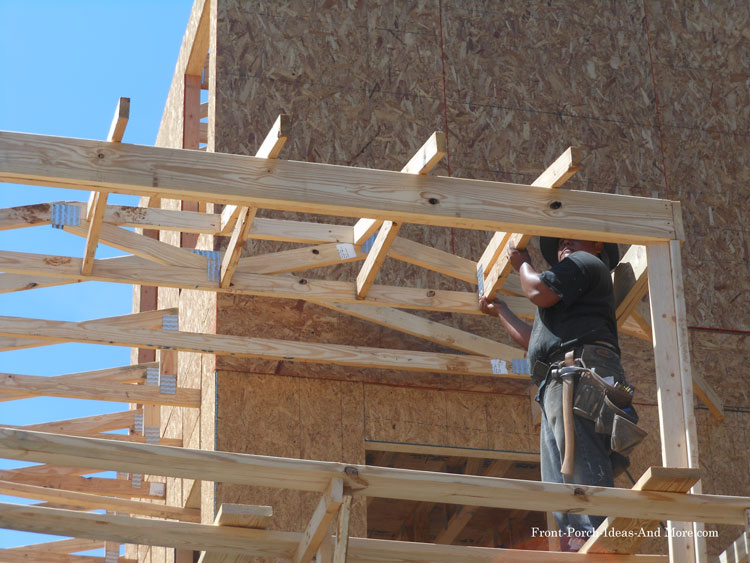
Start by laying out the base of the shed. Use 4×4 posts buried at least 18 inches into the ground and 4x4s that span from post to post. If you want the shed to be larger than 8 feet wide, make sure the posts are spaced far enough apart so they don’t interfere with each other when you add them together later on.
Cut 2×4 boards into lengths that are as long as the inside width of your shed frame (this will be about 1 foot shorter than your desired outside width because you need some space for the roof). Lay out these boards across your frame and attach them together using framing nails or screws. If there are any gaps between boards, fill them in with more 2x4s until everything is flush with one another.
Measure and mark where each rafter will sit against its corresponding wall, then cut two rafters (or more if necessary) to fit each side of