In this article I will show you how to build a shed. The first step to building a shed is to build the shed base. This is basically where you will place your timbers. The timbers should have been delivered in one piece if not then make sure you have someone on hand to help carry them from the truck or delivery address. The timber for a 12 by 8 feet shed requires eight 4 by 4 home center timbers. The best way to ensure that you do not get the wrong size timber for a shed base is to measure the area of ground where you will be placing your shed before marking out the timbers. Because sheds vary in size it might be hard to know what size timbers are required without referring to a chart.
Did you know that the average cost to build a shed can be as low as $500? If given the right instructions, almost anyone can follow a set of steps and build a shed. It’s true! I’ve built sheds before and I would like to share with you how you can build your own shed for about $500.![Cheapest Way To Build A Shed [A DIY Guide]](https://plasticinehouse.com/wp-content/uploads/2021/05/Cheapest-way-to-build-a-shed.jpg)
How to build a simple shed
The most important thing about building a shed is to make sure the ground is level and level. This makes the whole process easier and it will ensure that your shed is exactly how you want it.
Build a Shed Base
If you’re looking for an easy way to make your shed sturdy, consider building a solid metal or wood base. Then, place four-by-four posts in each corner of your base and secure them with concrete. Once they’re set, attach the floor joists to these posts using metal brackets or lag screws. Make sure that the joists are evenly spaced on each side of each post as this will keep them straight when you put up your walls.
Build Your Walls
For most sheds, simple stud walls made from pressure-treated lumber are sufficient for holding up the roof structure. You can use two by sixes for larger sheds or two by fours for smaller ones. For every two feet of wall height that you want to build, use three 16 inch long pieces of lumber. Place one piece at each end of the wall and one in between every other stud along its length (so there will be three total). Secure these pieces together using 8d nails or screws
Building a shed base is an essential part of the shed construction process. It provides a solid foundation for the shed and prevents it from sinking into the ground over time. A shed built on an uneven surface or without a proper foundation is likely to have warped doors and walls, cracked floorboards and leaky roofs.
Building a shed base can be a daunting task for some people, but it’s not as difficult as it may seem at first glance. Here are some steps that will help you build a simple shed base:
The first step in building a shed base is to dig the trench where the posts will go. The trench should be at least 18 inches deep, so you’ll need to dig down at least that far before you start laying out your post locations. Use a shovel or post hole digger to remove dirt from the area between two posts, making holes approximately 3 feet apart from one another.
The best way to build a shed is to start with a strong foundation. You should build your shed on a concrete slab or concrete piers, which will provide a solid surface for the shed and its weight to rest upon.
The building code requires that you lay your foundation in such a way that it slopes away from the house at least 6 inches for every 12 feet of run, but most professionals recommend a slope of 1 inch per foot. The slope prevents water from pooling around the foundation and causing rot.
When building your shed base, use treated wood 4×4 posts set 8 feet apart on 16-inch centers, with double 2×6 boards between them as joists. You can nail the joists directly to the 4×4 posts or use metal framing anchors to connect them together at each post location prior to installation. Then attach 2×6 boards over these joists as floor joists with metal framing anchors at each joist location.
To raise your shed off the ground, place concrete blocks underneath each post so that they sit approximately 6 inches above grade level when fully seated in cement mortar (or concrete). Position each block so that it’s level with its corresponding joist on top of it — this way there will be no gaps between
Building a shed is a great way to get your hands dirty and add some color to your yard. It’s also a project that takes less than a weekend and costs less than $500.
Here are the steps for building a simple shed:
1. Choose the site for your shed carefully. Make sure it’s level, close enough to water and power outlets, and away from trees or other structures that may fall on it during high winds.
2. Dig holes for each of the 4×4 posts that will support the walls of your shed. The holes should be about 2 feet deep by 2 feet wide by as far apart as possible without touching one another (or anything else).
3. Pour concrete into each hole until it comes just below ground level — this will form the base of your structure. Let it dry overnight before moving on to Step 4.
4. Place one end of each 4×4 post in its own hole and brace them so they don’t move while the cement dries (we used pieces of scrap lumber). Once the cement has dried enough that it won’t stick to your hands anymore (about 20 minutes), pound in remaining sides of posts — again using scrap lumber as braces until you’re
Why build a shed?
If you have a small garden, there’s no need to go to the expense of hiring a builder. You can do it yourself – and save some money in the process. It’s not as hard as it looks, either, and if you follow the right steps, you’ll end up with a great place for all your gardening tools.
Sheds come in all shapes and sizes but this guide will take you through how to build a simple shed that can be built from scratch using only basic tools. We’ll show you how to build a shed base, how to build the walls of your shed and how to make sure that everything fits together properly. We’ll also show you how to build windows into your shed so that it doesn’t feel like such an enclosed space when you’re working inside.
Building a shed base is an important step in the process of building a shed. A solid foundation is the cornerstone of any good shed.
1. Measure and mark where you want to locate your shed, then dig holes for the 4×4 posts to support your shed’s floor. The posts should be spaced about 2 feet apart.
2. Put a level on top of each post and adjust each one until it is perfectly level.
3. Pour concrete into the holes until they are filled 3/4 full with concrete, then tamp it down with a rubber mallet or hammer so that it’s level with the ground around it and no air pockets remain beneath it.
4. Let the concrete cure overnight before continuing to build your shed base
Before you start building, make sure you have all the materials and tools on hand.
You’ll need to build your shed with 4×4 posts. This is an old-fashioned method that’s been used for years, but it’s still a great way to go.
Because this type of post is made of wood, it’s important to keep them protected from the elements by covering them with a sealant or paint. You can also use pressure-treated lumber for extra protection against decay.
The size of your shed will determine how many posts you’ll need. Most sheds are built using three or four posts on each side; however, if you’re building a large shed or one with high walls, you may want to consider using more to support the structure better.
The first step in building a shed base is installing 4×4 post caps at each corner of your shed frame and attaching 2-by-4 blocks between each pair of posts with 2-inch screws. Once all those are attached, lay out two more rows of 2-by-4s between pairs of posts and attach them in place as well. These last two rows need not be secured until after all other components are installed so they don’t interfere with access while working on other parts
A shed base is the foundation that supports your shed. The most common type of base is a concrete slab or footing. You can also build your shed on top of an existing surface such as a patio or deck.
Building a shed base means pouring concrete into forms and allowing it to cure for at least 24 hours before you begin putting up the walls of your shed.
If you’re using treated lumber, you’ll need to apply pressure-treated wood preservative to all sides and ends of each 4×4 post before attaching them to the floor frame. If you are using cedar or pine, skip this step.
Use a spirit level to ensure that the 4×4 posts are all level on their bases. Screw one end of each post into place with galvanized steel screws that are long enough to penetrate through both the post and the floor frame (but not so long that they protrude from the other side).
Once all four 4×4 posts are secured, use another level to check them again for evenness and adjust as needed by removing or adding more screws as necessary until all four posts are plumb (straight up and down).
Once you’ve made sure that your posts are level, mark where they will go on the floor frame and drill pilot
Building a shed base is a fairly straight-forward project. It’s pretty much just laying down some concrete, making sure it’s level, and then setting your posts into that concrete. From there, you’ll need to add on some wood framing and then attach your siding.
Here’s how to build a shed base:
Step 1 – Lay Out the Concrete Footings
To start, you’ll want to measure out where each post will go by marking it with chalk. Then, dig holes for your posts that are as deep as the height of the post plus 2 inches and 4 inches wider than the width of your post (for example, if your post is 2×6 inch, then dig holes that are 6 inches deep and 10 inches wide).
Once you’ve dug those holes, fill them with gravel so that when you pour concrete into them later on, it won’t settle too much in the hole itself. You can also use sand or stones instead of gravel if you’d like — either will work well for drainage purposes.
When building a shed from scratch, or adding onto an existing structure, it’s important to choose the right foundation for your shed. The foundation of your shed should be able to support the weight of the structure.
The size and shape of your shed will determine what type of foundation you need. A shed with 4×4 posts requires a different kind of foundation than one made with 2×6 lumber.
What Is a Shed?
A shed is a small building used for storage or shelter. Sheds can be built from wood or metal and come in all shapes and sizes. They can range from a small tool shed that sits beside your home to huge barns that hold animals and crops.
Sheds come in many varieties including: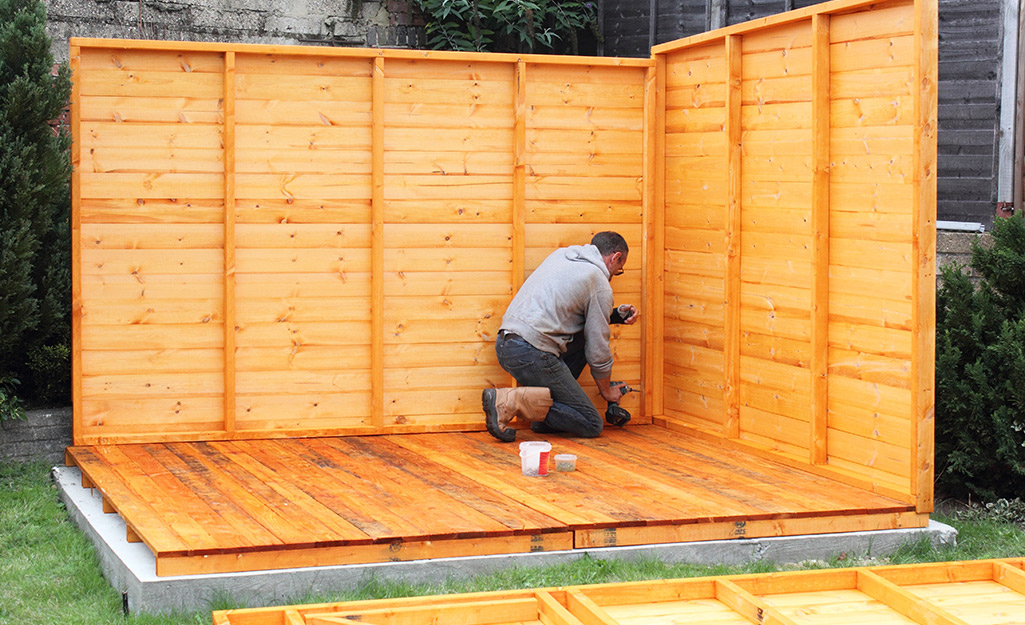
Tool sheds – these are usually small buildings that hold tools and other items used around the house such as lawn mowers, weed eaters and rakes. They’re typically attached to your home’s exterior wall or detached from it entirely but still close enough so you can easily reach them when needed. Depending on their size they may also have open space inside where you can store more items like bicycles, sports equipment or gardening supplies.