If you plan to build a bookshelf or even a table or dresser, starting with the box alone in a room by itself is not going to help. This can be dangerous as you will probably not figure out how to make the pieces fit together at all. It is much easier to start with a few pieces that are already made, so if you want to make a small bookshelf, then buy one that someone else has made first, and understand what they have done.
A bookshelf is usually used to hold books in a very neat manner. It is a nice piece of furniture which can be used in the house or in your office. There are many variations that you may choose when it comes to choosing a bookshelf. You have to keep one thing in mind that what type of books would you be going to keep inside the bookshelf. “
How to build a simple bookshelf
The key to building a bookshelf is to start with the right materials. You can buy prebuilt shelves at the hardware store, or you can make your own with a few simple tools and supplies.
Wood is the best choice for shelves because it’s strong, durable and inexpensive. Most building supply stores carry pine boards, which are fine for most projects. If you want a more refined look, choose oak or other hardwoods.
Start by measuring the length and width of each shelf, then subtract 1/8 inch from each measurement. This will allow room for expansion as the wood dries out over time. Use your carpenter’s square to draw lines on all four sides of each board; these will be your cutting guides later on when you use your saw or jigsaw (another type of saw).
Cutting boards with a circular saw is easy; just make sure you have enough room to maneuver your saw around obstacles such as electrical wires or plumbing pipes if they’re in the way. For thinner boards that might be hard to handle, use a jigsaw instead — just make sure it has an adjustable blade guard so you don’t accidently cut yourself while working on this project!
How to make a wooden bookshelf
1. Cut the plywood and MDF pieces for the base. The dimensions of these pieces are given in the diagram. Use a table saw or circular saw to cut the plywood and MDF pieces, making sure you use an accurate cutting guide to ensure that all components are symmetrical.
2. Assemble the base of your bookshelf. Attach one side piece to one end piece using wood glue and brad nails (or screws) at each joint. Make sure that you clamp these two pieces together while they dry so they don’t slip out of place while sticking them together with glue and screws. Repeat this step for the other side of your bookshelf, so that you have two identical bookcase sides ready for assembly.
3. Attach another side piece to both ends of your completed base using wood glue and brad nails or screws, once again making sure that you clamp the pieces together while they dry so they don’t slip out of place while sticking them together with glue and screws.
If you want to make a simple bookshelf, you can build a basic one from wood and it will only take a few hours.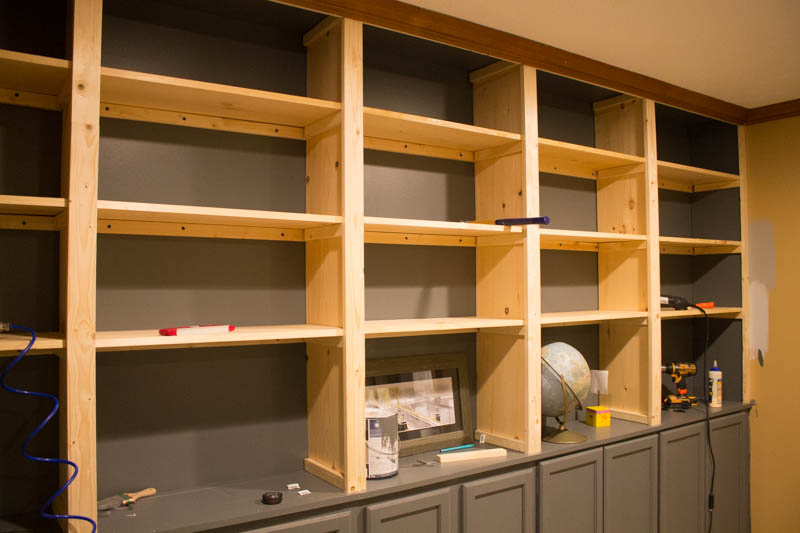
Here’s how to build a simple wooden bookshelf:
1. Measure the wall where you want to put your shelf. Measure from the top of the wall down to the bottom of where you want the shelf to end and then from side to side at that same height. Write down those measurements so you know how big to make your wood pieces.
2. Cut four pieces of wood for each side of your bookshelf, making sure they’re all exactly the same size. For example, if one piece is 3″ x 7″, then all four pieces should be 3″ x 7″.
3. Cut two more pieces of wood for each side as well (so there are eight total) that measure 2″ x 8″. These will be used as spacers between each piece of 3″ x 7″ wood so they don’t fall into each other when they’re nailed together later on in this process.
We all love to read books and magazines. But sometimes it becomes really difficult to arrange them in a proper way. So we end up with a mess of books on our table.
This is why we need to build a bookshelf for our home. These days there are so many types of shelves available in the market that you can buy according to your requirement and budget. But if you want to make this yourself then here are some DIY ideas for you:
How To Build A Simple Bookshelf
If you want something simple and less expensive then this is the best option for you. You can make it at home by using some simple tools like saw, hammer etc. You just need some wood pieces from your local hardware store or from your garage which cost very less compared to other types of shelves available in the market these days. This kind of shelf will not give you much space but still it can store all your books properly so that they do not fall down anytime soon!
This tutorial will show you how to make a simple bookshelf that you can use for any room in your home. It is a good beginner project and will give you some experience with basic carpentry skills. You can choose where to place the shelf by using the dimension marks on the plans.
This is a great project for anyone who likes to browse through books, or even if you just want to add some extra storage space in your home.
Materials needed:
-1 piece of 1x3x8′ pine board (for the sides)
-4 pieces of 1x4x8′ pine board (for the shelves)
-1 piece of 1x6x8′ pine board (for the back)
-2 pieces of 1x2x12′ pine board (for the bottom trim)
How to Build a Small Bookshelf. Building a small bookshelf is not as difficult as it might seem. This article will teach you how to build a small bookshelf using either saw horses or sawhorses and 2x4s or 2x6s. The screws used in this project are 3″ deck screws. The shelf space required is approximately two feet by three feet wide and four feet high.
Step 1: Measure and Mark the Area
Measure out the area where the bookcase will be built, then mark in pencil where you want each side of your bookcase to be placed. You can also use chalk or tape if you prefer not to mark on your walls or floor.
Make sure that there are no electrical outlets within two inches of where you plan to put your bookcase so that it will not interfere with any wires or plugs that may be plugged into those outlets.
Step 2: Place the Top Boards on the Saw Horses
Place one board across each saw horse at an angle so that when they are placed together, they form a “V” shape with one end higher than the other end. The higher end should be at least six inches above the lower end so that when you place another board on top of
In this article, we will share with you the best methods of building small bookshelves. Follow them and your books will be beautifully stored in a short amount of time.
If you want to build a small bookshelf by yourself, then you might want to consider making one from scratch. This is because it is much cheaper than buying one from the store, and it also gives you the chance to customize it according to your tastes and preferences.
The first thing that you need to do is measure the space that you have available for your new shelf. Then, check if there is enough room for all of your books and other items that need to be stored on this particular shelf. Once that has been determined, you can start planning out the design of your new bookcase by drawing out some rough sketches on paper or using some computer software such as AutoCAD or SketchUp; whichever works best for you.
Afterwards, when everything has been planned out properly, it would be advisable for you to start collecting all of the materials that are needed in order to build your new shelf such as wood planks (for example: pine), screws (for example: wood screws), nails
A simple DIY bookshelf is made of plywood and can be decorated in any way you want. Here is how you can make one using an inexpensive materials.
Step 1: Cut the plywood into pieces, each as long as you want. The length should be equal to the height of the bookshelf.
Step 2: Drill holes in the plywood at regular intervals and nail it to two sides of a wooden frame that you have already prepared earlier (see image below).
Step 3: Now, place two more pieces of plywood on top of these two and screw them in place with screws that are long enough for them to reach through all three pieces at once (see image below). This will give the bookshelf its desired shape and form, making it easier to hold books on all sides.
Step 4: Attach another piece of plywood on top of these two and screw them together using screws that are long enough for them to reach through all four pieces at once. Now your basic structure is complete!
Here are some simple instructions on how to build a small bookshelf. You can use these plans as a template for building any size or style of bookshelf. As long as you have the proper tools and materials, this project should be a piece of cake!
Materials:
Wooden board (1×6)
Wooden board (1×4)
Wooden board (1×3)
Wood screws (size 1 1/4″)
Make a small bookshelf out of wood that you can use to organize your collection. This design is simple, but it’s perfect for books that are too big for a standard bookcase.
Step 1: Cut the Wood
Cut the pieces of 2-by-4 lumber to make two vertical supports and two cross braces. The height of these pieces should be equal to the width of your bookshelf minus 5 inches (for example, if you want the shelf to be 16 inches wide, cut the boards at 11 inches). Cut two more pieces of 2-by-4 lumber for the shelves themselves; these will be 15 inches long.
/cdn.vox-cdn.com/uploads/chorus_image/image/66530547/build_bookshelf.0.jpg)
Step 2: Attach the Braces
Attach one end of each cross brace to one vertical support using glue and nails or screws. Drive two nails through each hole in each brace and into both pieces of wood on each side so they’re secure. Attach each other end of these braces onto their corresponding sides using glue and nails or screws as well. When you’re done with this step, your supports should resemble an “X” shape with two sets of braces extending from them — one set on top and one set on bottom. The tops should be even with each other