First of all, installing tile in a shower requires a waterproof substrate before any tile can be set down and sealed. So, in these instructions we’ll first cover preparing the shower floor for tile, after which we’ll discuss throughout how to build a shower from scratch.
Building a shower is a great home improvement project but it’s not as easy as you might think. You need to know what you’re doing or mistakes could be made and cause damage. Today, I will show you how to build a shower from scratch so that you don’t make any mistakes. Let’s get started!
How to build a shower with tile from scratch
Bathrooms are one of the most important rooms in your home. They are also one of the most expensive to renovate, so it pays to do your research before you begin any project.
In this guide, we’ll walk you through all the steps to build a shower from scratch, including how to prepare your shower floor for tile and build a shower pan.
Preparing Your Shower Floor for Tile
1. Start by laying down a layer of waterproof membrane. This will help keep moisture in the shower area and prevent mold growth. It also provides a nice surface for tiling later on. If you don’t have access to a membrane like this, you can use contact paper instead (although it may not be as durable).
2. Next, set up an electrical box so that you can run any necessary electrical wires through the wall or ceiling later on. You should know where these wires need to go before installing any walls or fixtures in your bathroom — otherwise, your new shower might be too small for everything that needs to fit inside!
3. Now that everything is ready for tiling, start laying down cement board on top of your waterproof membrane (or contact paper). This will serve as your base layer for tiling later on — make sure it’s
If you’re going to build a shower from scratch, the first thing you’ll need to do is prepare the shower floor. This can be done in two ways: either by using tile backer board or by applying mortar directly onto the subfloor.

Tiling over a wood subfloor will be easier than tiling over concrete. The reason is that with wood, you can attach a layer of plywood directly to the studs, making it much easier (and quicker) to install tiles on top. If you’re installing a concrete floor, then you’ll have to provide your own support for the tile backer board and mortar bed beneath it.
To start preparing your shower floor, follow these steps:
1. Install cement backer board. If you want an easy-to-clean surface that’s also waterproof, then cement backer board is what you want. Cement backer board comes in sheets and comes in both 4×8 feet and 12×24 feet sizes including half-sheets which can be cut down into smaller pieces if needed). It’s best installed on top of wood subfloors rather than concrete ones because it provides an extra level of support for any tiles installed on top of it as well as an insulating barrier between the tile and cold concrete floors underneath them
The first thing to do is remove the old flooring. Use a wire brush to scour away any loose grout, then use a hammer and chisel to break up any remaining mortar or concrete. Use a utility knife to cut through the old adhesive backing on the tiles, then use a pry bar or hammer to pop them out. If there are lots of tiles that need to be removed, you can rent a power drill with a masonry bit attachment. It’ll make the job go faster and easier.
Once you have all of the old tile removed, sweep away any dust and debris from the subfloor underneath it so that it’s clean and smooth. You may want to rent an oscillating tool if you have rough spots in your subfloor that need smoothing out; otherwise, use sandpaper on those areas until they’re as even as possible.
Next, cover your subfloor with plastic sheeting or drop cloths so that no concrete gets onto it while you’re working on your shower floor. Use a leveler tool or chalk line to mark where the drain will go; this should be located at least 6 inches from one edge of the shower floor (though it can be farther away than this without causing problems). You may also want
Prepare the shower floor
1.Use a grout pen to trace your tile layout onto the cement backer board. Use a utility knife to cut out each tile and remove them one at a time.
2.Use a hammer and chisel to remove any remaining cement board that’s in your way of installing the new tiles, such as under the tub faucets or around other fixtures.
3.Measure out where you will be placing your tile with chalk lines and then use a sledgehammer to break up any large pieces of concrete in the way of installing your tiles, including around drain pipes and shower heads.
For this project, you’ll need:
A hammer (or pry bar) and chisel or screwdriver
A utility knife or drywall saw
Caulking gun and caulk or silicone sealant
Silicone tape or silicone caulk sealant to waterproof the floor-to-wall joint (optional)
Masking tape to temporarily hold the shower pan in place during installation of wall panels.
Shower pans are a good place to start when you’re considering remodeling your bathroom. Showers tend to get a lot of use, which means they can have problems with leaks and damage. If you’re planning on remodeling, now is the perfect time to consider replacing your shower pan with a new one.
Step 1: Prepare the Shower Floor for Tile
The first step of building a shower from scratch is preparing your shower floor for tile. We used cement board as our base material and applied it over the existing flooring. We also installed new water lines and drains since our old ones were no longer functional. Once this was complete, we were ready to install the backer board for our shower pan.
The backer board is important because it helps prevent leaks from occurring within your shower pan and keeps water away from other areas of your home if there is ever an issue with your plumbing system. There are many types of backer boards available, including cement board and fiberglass mesh boards that can be purchased at home improvement stores like Lowe’s or Home Depot. No matter what type you choose, make sure that it’s installed properly before proceeding any further with your project so that you don’t end up with any problems down the road!
If you’re building a new home, or renovating an existing one, it’s important to take the time to plan out your bathroom and make sure it’s functional and beautiful.
Building a shower from scratch can be intimidating for some homeowners, but with the right tools and materials, you can create a custom shower that fits perfectly in your space.
Shower Floor Prep
Before installing tile on your shower floor, you’ll need to prepare the surface. Start by removing any old caulking or grout between tiles. Use a utility knife or razor blade scraper to remove old caulking, then use an adhesive remover solution and scrub brush to get rid of residue left behind by the old caulk. Wipe down the grout joints with a sponge soaked in mineral spirits before cleaning them with water and drying them off completely.
Next, apply a thin layer of mortar over any tile joints that need repairing so they won’t show through when you lay down tile later on.
Preparing the Tile
Once your shower floor is cleaned up and ready for tiling, it’s time to lay down some backerboard on top of the subflooring beneath your new shower base. This will ensure that moisture doesn’t seep through into the subflooring below or
Preparing the shower floor for tile can be a messy job. The most important thing is to protect your floor and surrounding areas by covering them with plastic sheeting or tape. You don’t want to have to redo this step if you have any type of concrete floor.
Once the floor has been prepared, you will need to install your studs. Most people use 2x4s, but some prefer 2x6s or even 2x8s (such as for tiled shower floors). You will want to make sure that your studs are level and spaced apart evenly so that you can hang the drywall easily later on in this project.
You should also consider whether or not you want any type of base molding around your bathtub or shower area. This is a great way to add some character to your bathroom without having to spend much money at all!
If you don’t want any base molding around your tub or shower, then simply install it as if there were no base molding at all. This will make it easier when it comes time for tiling your shower walls later on down the road!
1. Remove existing flooring. If you have tile or other materials in place, remove them to expose the shower pan and subfloor.
2. Clean the pan and subfloor. Use a pressure washer with a soap solution to clean the pan and subfloor. Rinse with clean water and let dry thoroughly before installing new shower flooring.
How to Build a Shower from Scratch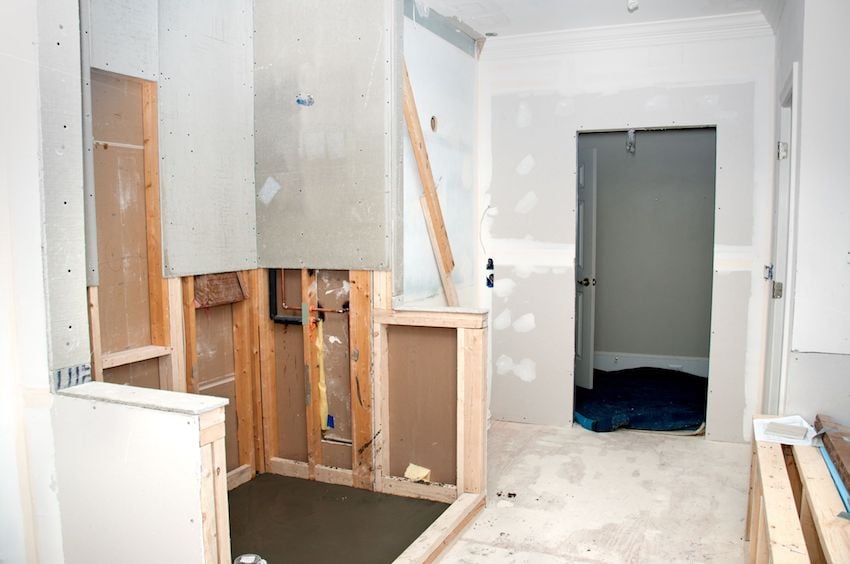
Building a shower from scratch is a great way to save money, but it can be challenging if you have zero experience. You may also discover that building a shower is not as easy as it sounds. But don’t worry—with some planning and patience, you’ll soon have a beautiful new shower!
1. Measure the space for your shower. The area should be clean, dry and free of any debris or grease stains.
2. Lay out the plumbing pipes. This includes the hot and cold water supply lines, drainpipe and vent pipe (if required). Make sure they are level with each other and that they slope toward their respective drains or vents. These pipes must be installed before proceeding with any other work on your new shower stall, or they will complicate matters later on when all of the walls are up and floor tiles are being laid in place.
3. Measure out where your walls should go based on how far apart these pipes will be placed relative to one another (remember to leave room for doors!). Use stakes made of wood or metal nails driven into the ground at each corner of where you want your walls to be placed so that you can visualize where everything will go before actually.