If you have ever wondered how to build a shower wall, then this article is for you. I will be going over the different types of shower walls and the steps to build them effectively.
I’m sure you’re here since you want to build a shower wall with tiles. Let me ask you, are you aware of all the shower wall niche out there? Do you know what it takes to build in a manageable way rather than tackling the project without any sort of plan or preparation? Building a shower wall is sometimes not that easy, but if taken step by step and with a little guidance along the process, it can be as simple as installing bathroom cabinets.:max_bytes(150000):strip_icc()/tiling-shower-wall-79c09b36-3bd45b30d42241039e033a7c98aa978e.jpg "How to build a shower wall")
How to build a shower wall
Step 1: Install the Shower Pan
To build a shower wall, you need to install a shower pan. A plywood or fiberglass shower pan is installed directly on top of the subfloor (or concrete), and then set into place with liquid nails or epoxy. If you’re installing tile in your shower, the easiest way to create a shower pan is to use a pre-made shower pan liner. The liner fits over the subfloor, and can be cut to fit any size shower.
Step 2: Install Tile for Your Shower Wall
Once you’ve got your shower pan in place, then it’s time to start adding tile! To install tile around a corner or along an angled wall, use a metal angle iron guide that is bent at the angle of your wall (ours was 45 degrees). Measure out from the corner or angle where you’d like your first piece of tile to begin and mark where you’d like your guide to be placed. Then clamp on one end of your guide and drive screws through it into the studs behind it.
Then install an adhesive backerboard on top of this metal angle iron guide as well as on any other surfaces that will be exposed once tile is installed (such
The most common way to build a shower wall is to build it out of cement board. The cement board is attached to the studs and then covered with tile.
The second method is to build the shower walls out of drywall. The drywall is attached directly to the studs, and then covered with tile.
How to Build a Shower Wall Out of Cement Board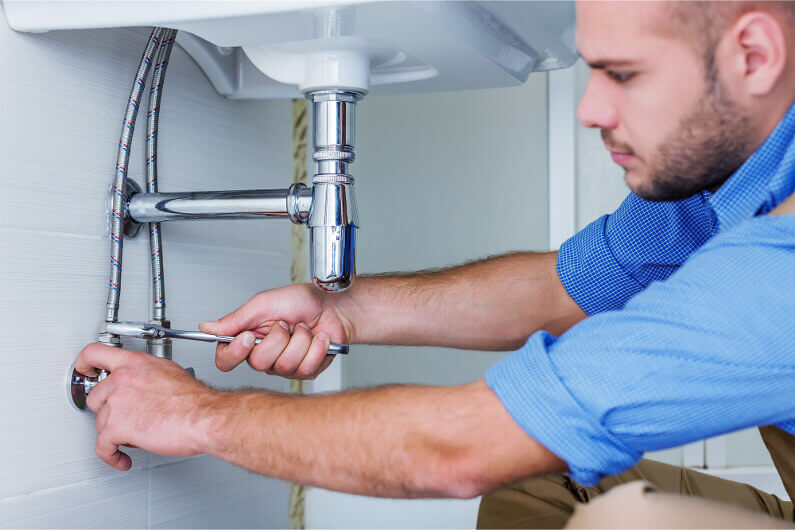
To build a shower wall out of cement board, first install the studs as directed in our article on how to frame a wall. Then, attach sheets of cement board over each wall stud with construction adhesive and nails or screws (see figure 1). If you are installing tile directly onto the cement board, make sure that the tiles are installed so that they are level with each other. This will help prevent water from leaking through the joints between tiles. You can also use thinset mortar between tiles if you want an extra tight bond between them and their support surface. For best results, apply a thin layer of thinset mortar on both sides of each tile before installing it on top of the cement board panels (see figure 2).
The first thing you need to do is prepare the wall for tile. This means removing all paint, wallpaper and any other surface treatments, as well as the existing tile. If you’re tiling over a wall that already has tile on it, make sure there’s enough room between the tiles so you can install a shower niche.
If your walls are made of concrete blocks or brick, then you’ll need to remove them and replace them with plywood or OSB (oriented strand board). Plywood is easier to work with and more affordable than OSB, but it won’t last as long in direct contact with water. Either way, it’s best if you have someone help you lift up the big sheets of plywood so they don’t break or bend while being installed.
Use a level to ensure that each sheet of plywood is level before securing it in place with screws every 16 inches along the top edge and every 8 inches along the bottom edge.
Next, install your shower niche directly behind where your shower will be located (or where you want it). The niche should be at least 12 inches deep and 18 inches wide; taller niches are better because they allow more room for storage baskets or shelves.
If possible
What is the best way to build a shower wall?
The best way to build a shower wall is with pre-cast concrete panels. They are a good option if you have limited knowledge or experience in masonry work, and they also make it easier to get a professional-looking result.
This guide will show you how to build a shower wall with pre-cast panels and how to install them in your bathroom. The process doesn’t require much time or expertise, but it does require some patience and attention to detail. You can use our instructions for building a shower wall as a starting point for your own project, but if you need more help or advice, we recommend hiring an experienced contractor who specializes in this kind of work.
Shower walls are designed to be waterproof, so they must be installed correctly. The process is similar to installing drywall, but you’ll need some specialized tools and materials. The walls can be framed in wood or concrete block; either way, they should be plumb and level before installing the backer board.
Step 1 – Prepare the Walls
Prepare the walls by removing old tile and grout with a hammer and cold chisel, then fill any holes with spackling compound or a mixture of sand and cement. Sand the area with 120-grit sandpaper before priming it with an oil-based primer sealer. Let this primer dry completely before proceeding to Step 2.
Step 2 – Install the Backer Board
Install backer board on the shower walls using screws or construction adhesive (see References). The backer board should cover all seams between 2x4s or other framing lumber. After installing one row of backer board, screw in place two lag bolts approximately 4 inches from each end of the shower wall frame to support additional rows of backer board along its length.
Step 3 – Install Shower Wall Tile
Install tile on top of backer boards using thinset mortar mixed according to manufacturer’s instructions (see References). Follow manufacturer
Step 1: Cut the side walls
The first step for building a shower wall niche is to cut the side walls. This is done by cutting two pieces of plywood that are 20 inches wide, 30 inches tall and 32 inches long. These two pieces will be glued together to form one solid piece of plywood that can be used as the side walls of your shower niche.
To make sure that you get accurate cuts, use a speed square or framing square to draw lines on your plywood sheets. After trimming down these lines using a circular saw, use sandpaper to smooth out any rough edges left behind by the saw blade.
Step 2: Attach the side walls to your studs
The next step for how to build a shower wall niche is to attach the two sides together using screws. The best way to do this is by drilling pilot holes through both pieces of wood before inserting screws into them from the backside of each panel; however, if you don’t have access to a drill, you can also use nails or staples instead.
Use at least three screws per joint and make sure that each screw goes through both layers of plywood so that it can hold everything together securely. You should also make sure that all screws are placed about 2
How to build a shower wall niche
The easiest way to get started is with the right tools. The right tools will help you to save time, energy, and money by making the job go faster and more smoothly. You’ll also be able to avoid some common mistakes that many people make when building their own shower walls.
If you are planning on building a custom shower niche, then you will probably want to start by gathering all of your materials together. This includes:
Tiles – The tiles you choose should be chosen based on the look that you want for your bathroom. You should also think about how much weight they will be able to hold up against water pressure and other forces that can affect them over time. Other things to consider include thickness, color, durability ratings on different surfaces, etc… If you have any specific requirements (like anti-slip or waterproof), then make sure that these features are included in your purchase as well.
Grout – Grout is used between tiles so that they don’t move around while they dry out after being installed in place. It keeps them from shifting around until they’re completely dry again from installation so that there won’t be any gaps between them when they’re done drying out after being installed in place.
There are many ways to build a shower wall niche. The most common is to use pre-formed cement blocks or tile backer boards.
The first step is to decide what type of material you want to use for your niche. You can buy premade cement blocks, or you can make your own by pouring concrete into molds.
You then need to decide how big you want the niche to be and where it will be located in relation to other elements of the shower such as the drain, faucets and soap dish.
Once you have decided on these things, mark out where the niche will go with masking tape or chalk. Make sure it lines up with any other features that might be in the shower such as the drain or faucets.
If you are using premade cement blocks, place them side by side until they reach the desired height for your niche; if you are making your own, lay out the blocks so that there is no gap between them once they are all laid out flat on their sides (see illustration).
Next, check that everything fits together well by putting a piece of paper between each block so that there are no gaps visible between them when viewed from above (see illustration).
First, decide how large you want your shower niche to be. If you want to install tile, then keep in mind that most standard tiles measure 6 inches by 12 inches.
Next, take a look at your existing shower wall and decide how much space is available between the tub and the ceiling. This will help you determine where your niche should go and what size it should be.
Measure the length and width of the available space between the tub and the ceiling, then use these measurements to mark out a rectangle on your drywall with a pencil. Remove the drywall from inside this rectangle using a utility knife or reciprocating saw.
Sand down any rough edges inside the rectangle until they’re smooth enough for tiling purposes (you don’t need to sand so much that you expose wood underlayment). Then install metal lath (or 1/4-inch plywood) over top of your new niche’s walls, leaving about 2 inches of space between them and the ceiling for insulation purposes. Secure these boards with nails or screws if necessary so that they won’t pull away from their positions when you start laying tile mortar over them later on.
The simplest way to frame out a shower niche is with a stud wall. It’s strong, easy to construct and looks great. But there are other options that may be more suitable depending on your needs.

Here are some of the most common ways to frame out a shower niche:
1. Framing with wood studs
2. Framing with metal studs
3. Framing with concrete blocks