In this how to guide I will share with you the most common way to build a shower stall. The materials and tools we will need to complete this project are tile, cement board, plywood, ceramic tiles and cement.
If you have a stall shower in the basement, it is great and functional when it’s new. But over time, especially if you don’t wipe down the walls and ceiling, soap scum starts to build up. This makes your shower look dirty and uninviting, which is not a great way to start the day. To make your bathroom look better, and more importantly help keep it clean longer…
How to build a shower stall from scratch
Building a shower stall is like building any other room in your house. You need to plan, prepare and work step by step. This tutorial will show you how to build a custom shower stall with tile, but the same principles apply whether you’re building with glass, stone or just plain old concrete.
1. Plan Your Project
Before you start any project, it’s important to plan out what you want to do and how you want it done. For example, if you’re building a custom shower stall with tile, then make sure that all of the tiles are going to fit together well and be able to support each other while they’re being installed. If not, then you might have some problems down the road when the water starts running and gravity takes over!
2. Prepare Your Site
You’ll need plenty of room for this project because there will be lots of materials coming in and out of your home during construction time. Make sure there’s enough space for everything including cabinets and storage areas if needed as well as extra room for any plumbing or electrical needs that may come up during this phase of construction (e
Building a shower stall is not as hard as it might seem. It is not a complicated project and you can do it on your own. The only thing that you need to do is to follow the instructions carefully. A few days after you start the project, you will have a beautiful and functional shower stall ready for use in your house.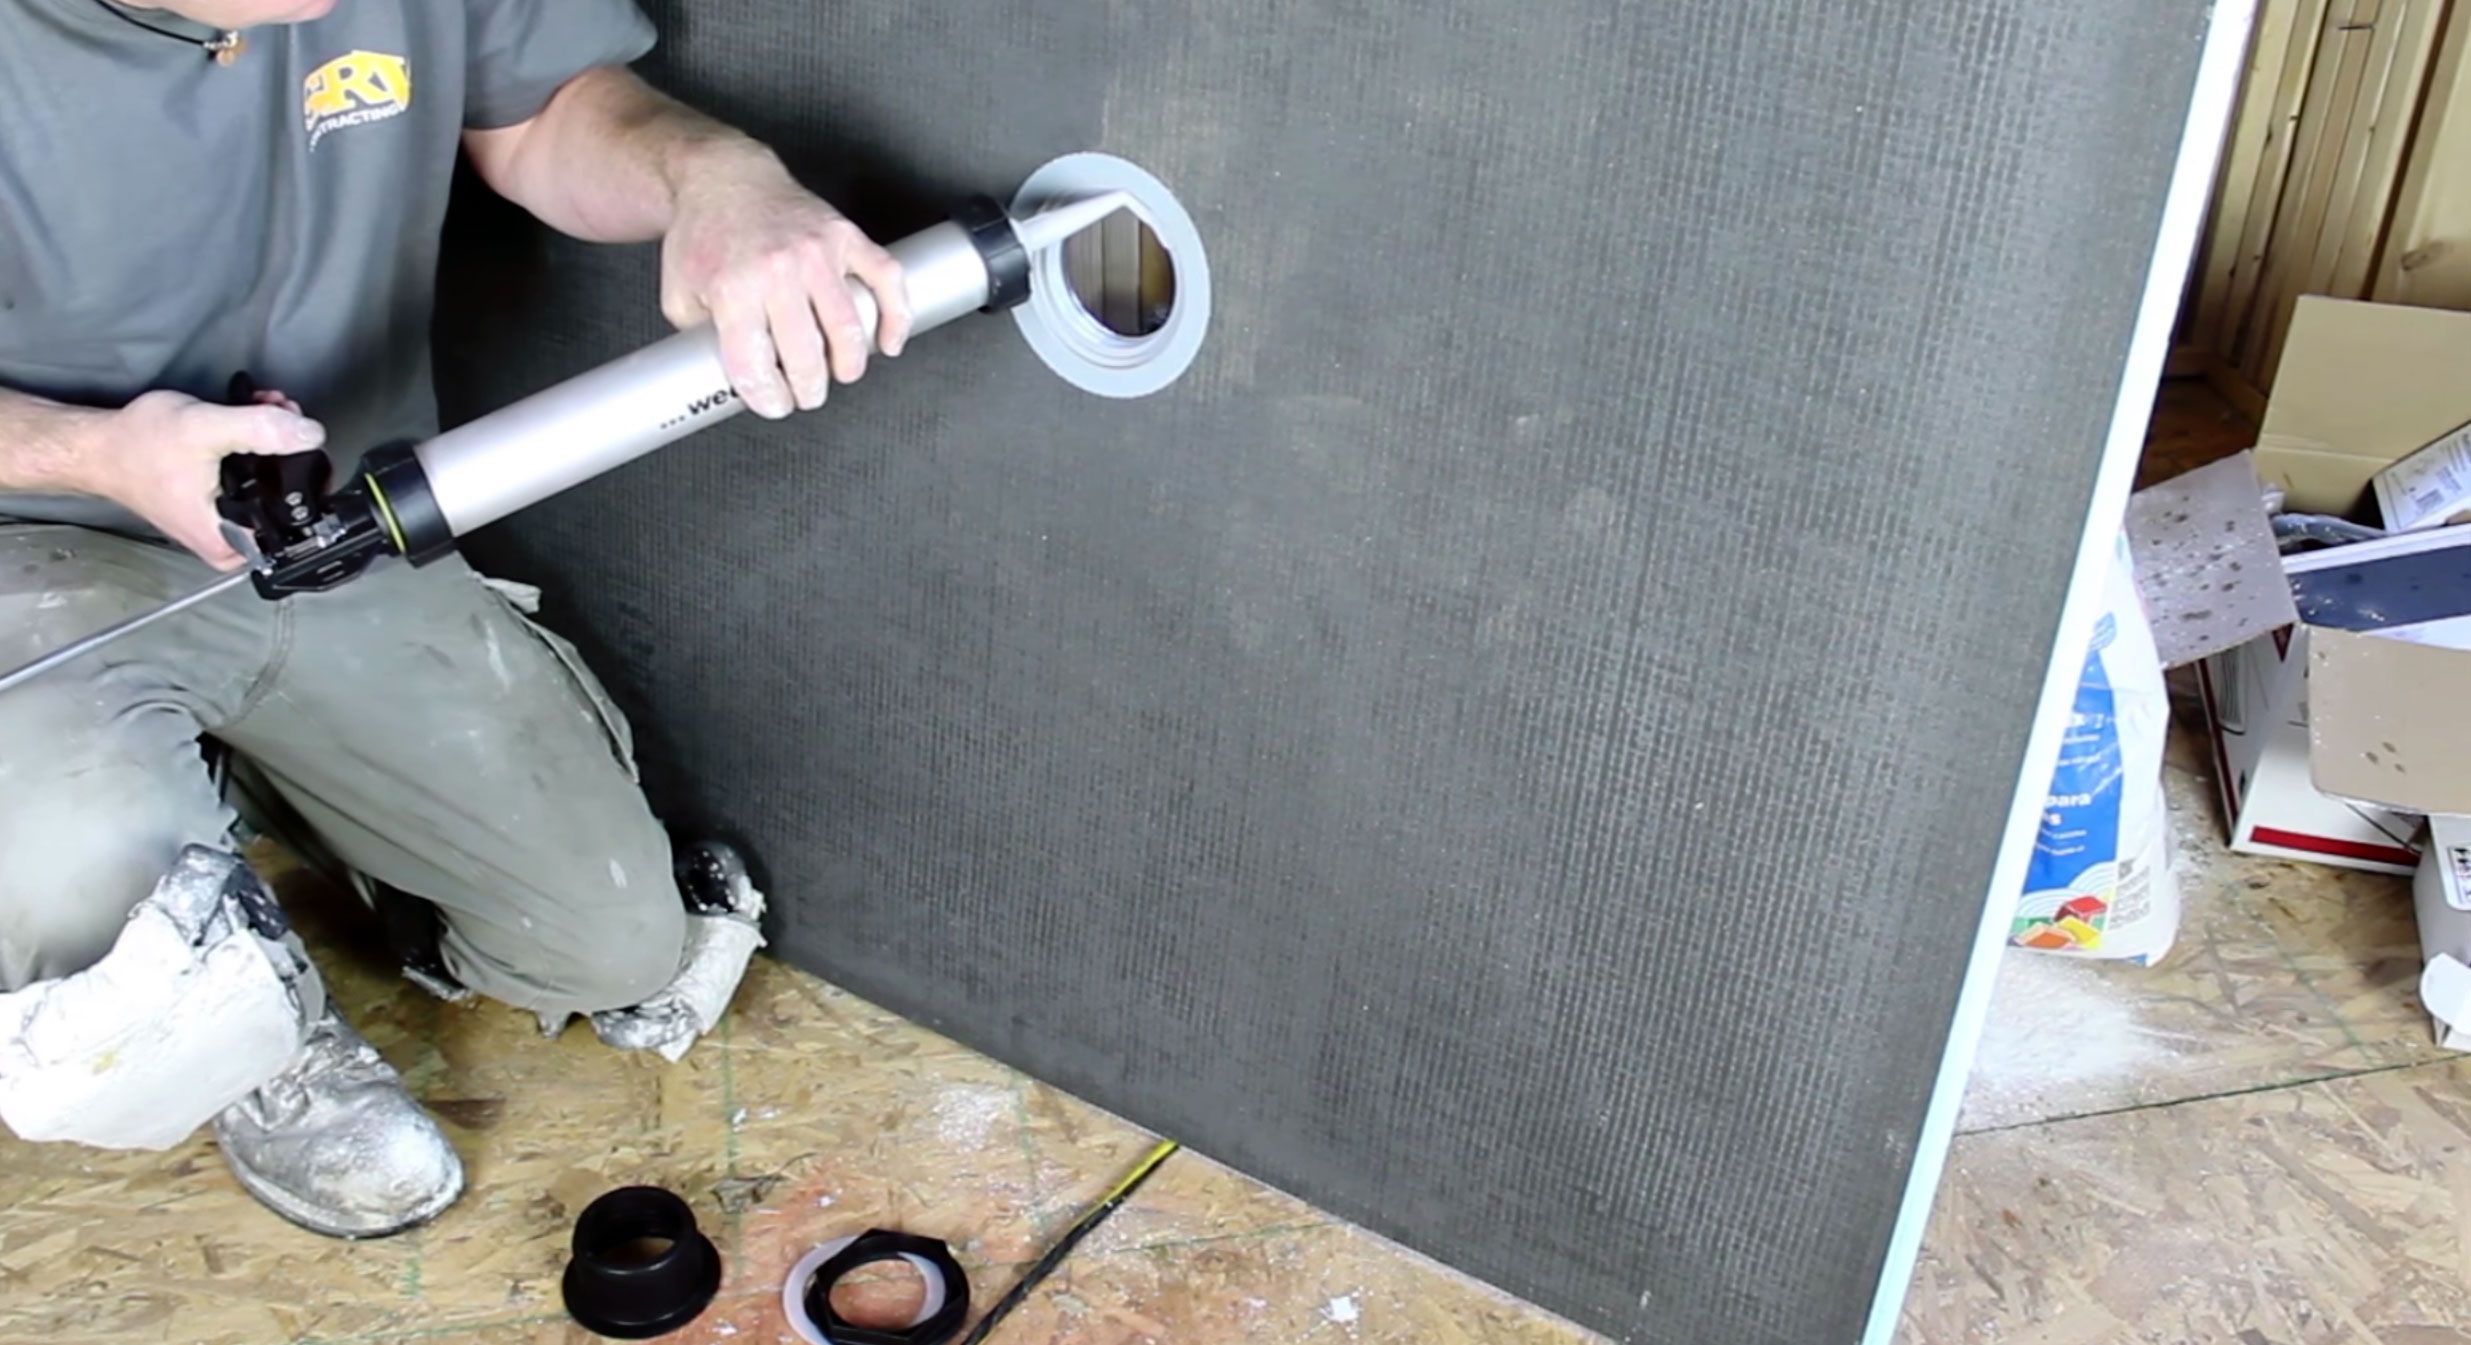
The first thing that you need to do is to prepare the place where you want to build the shower stall. You need to make sure that there is enough space available in order for you to work comfortably without bumping into any objects or people while working on your project.
After this, draw a design for your new shower stall on a piece of paper so that you can see how it will look when completed. This will help you decide on what materials and tools are needed for this job so that there are no surprises later on when it comes time for making the actual construction.
Then measure the dimensions of your bathroom and make sure that there is enough space available for all of your materials and tools before starting any kind of construction work for your new shower stall. Once this has been done, then move on to building your new shower stall with tile from scratch!
If you’re looking for a way to increase the value of your home, take a look at what you can do with your bathroom. From installing tile floors to building a shower stall from scratch, there are plenty of ways to improve the look and feel of your bathroom.
One project that’s sure to impress guests is creating your own shower stall from scratch. Once you’ve finished the initial work, you’ll enjoy years of use from this beautiful addition to your home.
The first step to building a shower stall from scratch is determining whether it will be built in or out. Most people prefer outside showers because they’re easier to access and maintain than indoor ones. If you choose an outside shower, make sure you have enough space for it in your yard or garden area.
If you want an indoor shower, then you’ll need more room than just a large tub would provide. That’s why many homeowners prefer walk-in showers because they give them more space while still allowing them easy access into the shower itself
A custom shower is a great way to add value to your home. It’s also a great way to get exactly what you want. But if you’re not sure where to start, we’ve put together this guide to help you figure out how to build a shower stall from scratch.
We’ll walk you through the process of planning and building an affordable shower stall that looks like it came right out of the showroom. This guide will cover everything from buying materials and laying out your space, to installing tile and choosing fixtures.
The first thing you’ll need to do is measure the space where you want your new shower. You can find a free printable floor plan template here, or use one of these other options:
Measure the distance between two walls in inches (or feet) with a tape measure.
Double check that all pipes are capped or disconnected before starting work on your new shower stall!
Draw a rectangle around the walls where you want your new shower stall, paying special attention to door hinges and electrical outlets. Leave at least 4 inches between the side walls and the adjacent wall for plumbing lines. Use this diagram as reference when picking out materials for your new shower stall later on!
The first thing you need to do is decide what type of shower stall you want. There are three main types of shower stalls:
1) Half-sized shower stalls are typically used in small bathrooms or powder rooms, or as an addition to existing showers. They’re usually installed on an existing wall or in a corner, and they don’t require any extra space for plumbing.
2) Standard-sized shower stalls are the most common type of stall, and they’re typically installed in master bathrooms, hall baths and other large spaces where there’s plenty of room for plumbing.
3) Exposed-sill showers have a built-in curb so that there isn’t any gap between the bottom of the tub and the floor. This style is popular because it makes cleaning easier, but it also takes up more space than other styles.
Building a shower stall in the basement is not as difficult as it may seem. The main thing to remember when building a shower in the basement, is that you need to make sure that the water drains out of your shower area and into the floor drain.
The first step in building a shower stall in the basement is to build the walls. You will want to frame up two walls and then frame up one wall that is going to be between two studs on each side. This will give you a place where you can install your drain pipe and allow for drainage.
Once you have framed up your walls, you can begin installing tile on them. You should use tile nippers for this job so that you can cut pieces of tile with straight edges, making it easier for you to install them over your framing members.
Once all of your tiles are installed and grouted, it’s time to install your toilet and sink fixtures in place. Make sure that everything fits properly before securing anything down with screws or nails so that everything is level before securing anything down with screws or nails so that everything is level later on down the road!
The best way to build a shower stall in the basement is to start with the right materials.
You’ll want to use a waterproofing membrane. You can either buy it at your local hardware store or you can use a roll of self-adhering flashing tape. Either way, you’ll need to apply it to all of the joints between the floor, walls and ceiling before installing your shower pan.
The next step is to install the drain, which should be located in the center of one corner of your shower stall. The drain should be mounted on top of a perforated pipe that allows wastewater to flow out into your home’s main sewer line.
After that, it’s time to install your walls and ceiling. You can build them out of 2x4s or plywood sheets, but if you want something more durable and attractive, consider using cement backer boards instead. These boards are easy to cut with a saw and they’re waterproof as well as fireproof!
Next comes tiling! You might want to consider using ceramic tile for this part because it’s easy to clean and durable enough for everyday use; porcelain tiles are also popular choices but they’re more expensive than ceramic ones so keep that in mind
Your bathroom can be a place of relaxation and rejuvenation, but also a place to get clean. If you’re renovating your home or building a new one, building a shower stall is an easy way to add functionality.
Build a Shower Stall With Tile
A tile shower stall will give your bathroom an elegant feel while still being practical. The installation process is straightforward and doesn’t require any special tools or materials. If you have some DIY experience, this is an easy project to take on.
Step 1: Measure the Space for Your Shower Stall
Before you begin installing your shower stall, it’s important that you measure the space in your bathroom carefully so that you know exactly how big it needs to be. This will ensure that your finished product fits perfectly into its designated spot without leaving any gaps around the edges or having too much extra space in one area of the room where there’s little use for it.
Step 2: Build a Frame for Your Shower Stall
The frame around the perimeter of your shower stall should be built out of wood with 2x4s or 2x6s spaced evenly apart with screws driven through each piece at regular intervals along its length and width. The thickness of the boards will depend on whether
The first step in building a shower stall is to determine whether you want to build your own or buy a prefabricated model. If you are building a stall that will be used by multiple people, then it may be better to buy one that has been professionally constructed.
If you decide to build your own shower stall, the best way to do this is by using a kit that comes with everything needed for installation. The kits are available at many home improvement stores and come with all the tools necessary for installation.
The best material for a shower stall is ceramic tile because it withstands moisture well and is relatively easy to clean. However, if you want something that looks more like marble or granite, there are many choices available at your local home improvement store.
You should also consider installing an exhaust fan in your basement bathroom because this will help prevent condensation from forming on the walls and ceiling of your bathroom.
If you’re looking for a new place to relax, consider building a shower stall in the basement. It’s a great way to add room to the house and can be just as nice as any other bathroom.

1. Lay out your plumbing. Before you start building, make sure that there is enough room for the pipes and drains for your new shower stall. Your plumber should be able to help you with this step if you aren’t sure how much space you need or where it all needs to go.
2. Build the walls of your shower stall. The easiest way to do this is by framing out two walls with 2x4s or 2x6s and then attaching sheetrock on both sides of the framing material. This will create the walls of your stall, but they won’t be waterproof yet since we haven’t installed any insulation or drywall yet.
3. Install insulation in between each stud on both sides of your stall’s walls before attaching sheetrock so that moisture doesn’t seep through them into your home’s insulation and cause mold issues later on down the line when we install our tiled floors! You can use batting.