Time for a blog post about something that may be a little bit out of the ordinary. Today I’m building a shelf, instead of writing about my regular topics. The reason why? Because it’s fun! And because I haven’t got much to write about on my site right now. And also because it’s important to dream big and challenge your strengths sometimes. Not just your weaknesses – which will always be there anyways, so no need to worry
Have you ever thought of building some kind of shelf before? I know sometimes we get these random ideas in our head and aren’t sure how to go about them. This is especially true when we feel like we are at a loss for what to do with all of the stuff that’s around us.

How to build a shelf bracket
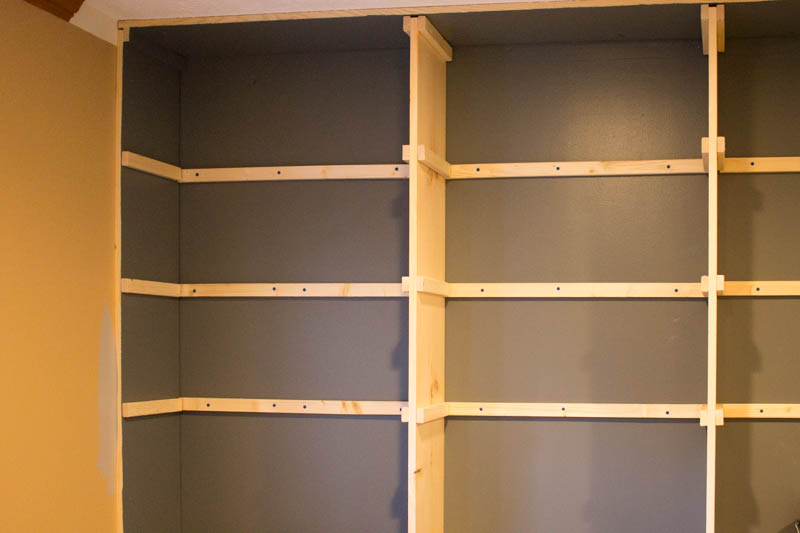
Build the frame for the shelf by attaching two pieces of 1×4 lumber and two pieces of 1×2 lumber. You will also need two more pieces of 1×4 lumber for the top rail. Use nails or screws to secure the pieces together.
Next, cut three 2-foot boards into four inch lengths using a circular saw and miter saw. These will be used as supports for both sides of your closet shelf. Make sure they are at least a half inch shorter than the depth of your closet so they don’t stick out too far when installed.
Use wood glue and screws to attach the supports to both sides of your shelf frame. Space them evenly apart and make sure they are level with each other before nailing them in place.
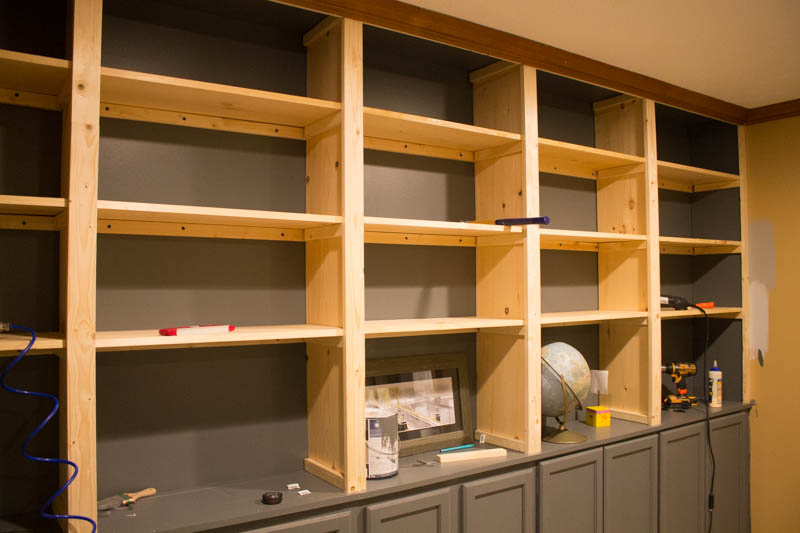
Now it’s time to install your new closet shelf! Use L brackets or equally strong fasteners to secure it from underneath your baseboards or flooring where you want it installed
You can build shelves of all shapes and sizes, but this article will focus on a basic shelf that is about two feet wide and two feet high. The length of the shelf depends on how much space you have in your closet or cupboard.
Building a simple shelf is easy if you have basic tools and skills. These instructions show you how to build a simple shelf out of wood. You can build the same type of shelf out of any material — plywood, particle board or even concrete blocks.
Measure and cut the wood
Measure the space where you want to put your shelf, making sure there are no obstructions (such as pipes or wires) that might get in the way once it’s installed. Use a level to make sure everything is even before marking your cuts on each piece of wood (Photo 1). You’ll need two 2x4s for the sides (these will be cut into three pieces), one 2×4 for the top and bottom front edge, one 2×4 for the top and bottom back edge, one 2×2 for each end cap and one 1/4-inch plywood sheet for the front panel (you can use 3/8 inch plywood if you want extra rig
How to Build a Closet
Maintaining organized and accessible storage can be challenging in a small space. A shelf is a great way to organize and store items, especially if you need to use the space above a washer or dryer. You can also use shelves to keep things off of the floor and out of sight. Here are some tips for building your own custom shelf:
1. Measure the area where you want to install your shelf. Make sure that the measurements are accurate so that the finished product will fit properly into place.
2. Purchase any materials that you need for the project, such as wood or other building materials. Make sure that these items will work with your design before making any purchases.
3. Assemble all of your tools before beginning construction on your new shelf. This will make it easier for you to complete the project without having to stop frequently and go back through steps because a tool wasn’t available when needed while working on another step in your project plan or design sketchbook or something else related or unrelated but still important that could have been done at any time during construction
How to build a shelf
Building a shelf is a great way to make use of any space in your home. Shelves are also easy to install and can be customized to fit any need you have. This article explains how to build shelves, including how to install them on walls or in cabinets.
1. Choose a location
The first step in building a shelf is choosing where you want it. If you have an empty wall, or an open space in your room, this is the best place for a shelf. If not, consider other options such as under your bed or behind doors and windows. The location should be accessible but out of the way so people don’t trip over it constantly.
Building your own shelf is a simple and cost-effective way to add storage space to any room. You can build shelves out of wood or metal, depending on the look you’re going for. If you’re working with an existing wall, you’ll need to plan the size and location of each shelf before installing it.
If you’re starting from scratch, measure the area where you want to install your shelf. Then calculate how many shelves will fit in that space by dividing the width by 24 inches (60 centimeters). For example, if you want a 12-inch shelf in an 8-foot-wide wall, divide 12 inches by 24 inches and multiply by 8 feet: 12 divided by 24 = 0.50 multiplied by 8 feet = 4 feet of shelving space per shelf.
Once you’ve determined how many shelves will fit into the area, design your own layout in a CAD program or on graph paper. The most popular sizes for wall shelving are 18 inches and 24 inches wide, but there’s no limit on length — as long as your wall can support it!
how to build a shelf in a cupboard
Build a shelf in a cupboard. A shelf in a closet is an easy way to add extra storage space and display items you don’t have room for elsewhere in your home. Shelves are also commonly used over washers and dryers to help keep laundry supplies organized and off the floor.
You can build a shelf out of wood, metal or plastic. All three materials have their pros and cons, but wood is usually the best choice if you’re going for something that looks nice and that will last for years without being treated with chemicals.
Metal shelves are strong and won’t need to be maintained, but they might not fit in with your decorating scheme or be heavy enough to support large items like books or boxes of cleaning supplies. Plastic shelves are lightweight and relatively inexpensive, but they tend to scratch easily and can be damaged if exposed to extreme heat or cold. Wood offers a nice finished look while still being sturdy enough to support heavy items, but it requires regular maintenance in order to maintain its appearance over time.