Much of the root cellar building community is focused on those with access to a hillside or bank. But I couldn’t find any information for those living on flat ground. I thought to myself, “We need some kind of guide for people in my situation.” That’s when I started researching and wrote my step by step eBook: How to Build a Root Cellar on Flat Ground .
although there are a number of ways to build a root cellar on flat ground it is not the easiest or quickest way to build a root cellar. Anyone that has ever tried building a root cellar on flat ground knows that you will save time and money by building a root cellar in the hillside, or planting trees to cover your root cellar.
How to build a root cellar on flat ground
How to build a root cellar: Building a root cellar is a great way to store your own produce, especially if you have an area where the soil is too rocky or hard for digging. A root cellar can be built into the side of a hill or on flat ground.
Root cellars are easy to build and require no special equipment or construction skills. After you know how much space you want for your root cellar and what type of material you want to use, you can begin building.
This article will show you how to build a root cellar on flat ground, how to build a root cellar in the south, how to build an underground root cellar and how to build a root cellar with concrete blocks or bricks.
How to Build a Root Cellar in a Hillside
Building a root cellar in a hillside is more common than you might think. The land sloping away from your home is an ideal place to build a root cellar, and with just a few modifications, you can make the space your own.
The first step is to find the right spot on your property. You’ll want to choose an area that’s out of sight and has plenty of sunlight. Make sure that there are no trees or other obstructions in the way so that you can get full sun exposure during winter months.
If you have a hillside on your property, this should be easy to find. If not, you can create one by digging out part of the ground with shovels or other tools until it’s deep enough for storing food items such as potatoes and carrots.
Once you’ve found the perfect location for your root cellar, it’s time to build it!
There are two ways to build a root cellar. The first is to dig into the side of a hill, which provides natural insulation and protection from the elements. The second is to build your own outbuilding, which can be above or below ground.
Root cellars can be built in the north or south, but they work best when placed on a north-facing slope in order to capture maximum sunlight and heat during the winter months. The ideal location for your root cellar is one that has good drainage but also has some type of natural protection from the elements (such as trees or rocks).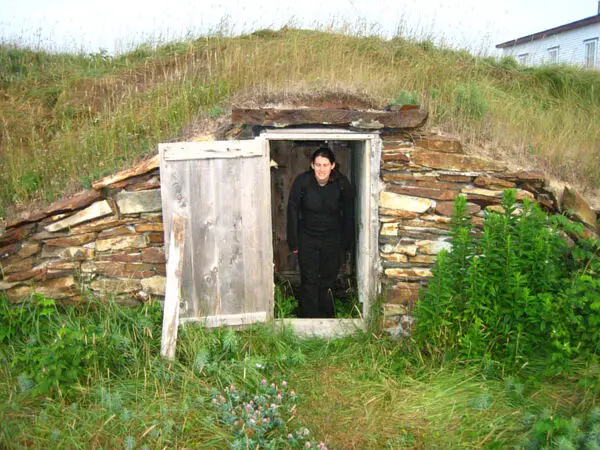
If you’re going to build a root cellar into the side of your hillside, follow these tips:
Dig about 3 feet into the ground so that it’s below frost level when finished. This will allow the roots to stay cool during hot summer months and warm during cold winters.
Cover exposed dirt with straw or leaves before backfilling with dirt to keep moisture levels high inside this area.
Place a door at waist height so that it’s easy to reach while working inside your root cellar. You may even want two doors — one on each end — so you can reach items stored deep within without moving items in front or behind them
Root cellars are the perfect way to store foods and keep them fresh. There are several ways to build a root cellar, but the easiest is to dig into the side of a hill. This way, you don’t need to worry about keeping it level or even building a door frame for your door.
Root cellars are very easy to build and can be done in almost any climate. They also require minimal maintenance after they’re built. If you’re looking for an easy project that will save you money on food costs, consider building your own root cellar today!
Building A Root Cellar In The South
Root cellars are the perfect way to store foods and keep them fresh. There are several ways to build a root cellar, but the easiest is to dig into the side of a hill. This way, you don’t need to worry about keeping it level or even building a door frame for your door.
Root Cellar Construction
You will need:
A shovel (with long handle)
A pickaxe (optional)
This is a great way to build a root cellar in the cold climate.
The idea is to insulate the space from below and from the sides. The easiest way to do so is to dig down into the earth, which will help insulate from the cold ground, and then use straw bales as insulation on all sides. Straw bales are very cheap and easy to find, and they provide excellent insulation for your root cellar.
You want to make sure that your root cellar has a good roof that sheds water well, otherwise you’ll be in trouble when it rains outside!
You can build a root cellar in the ground, but it is more difficult to keep it cool and dry. It is better to build your root cellar into a hillside or other earth shelter.
Root cellars in the south should be built underground, even if they are not built into a hillside. If you live in an area that gets hot and humid during summer months, you will want to build your root cellar with thick walls, concrete floor and ceiling, and possibly a cooling unit.
The best way to build a root cellar in the South is by digging into a hillside or other earth shelter. You can also use any kind of outside walled area such as an old barn or shed for this purpose.
The best way to make sure that your root cellar stays cool and dry is to build it into a hillside. The soil acts as insulation, and the earth acts as a heat sink. In other words, the ground will absorb heat from the air around the root cellar and radiate it back out, keeping your food cold.
To build a root cellar in this way, you’ll need to dig out an area for your storage space. Your goal is to create a space that is about half underground and half above ground, with an entrance door at grade level (ground level). You can use any kind of material for the walls: stone, brick, concrete blocks or wooden planks. Wood will let some humidity through but not much heat. Stone or concrete blocks are better if you want them more secure against intruders and moisture intrusion.
The roof should be built with at least two layers of shingles or slates so that water doesn’t collect on top of it and drip down into your root cellar when it rains. The roof should slope slightly inward toward the center so that water drains away from the entrance door instead of collecting inside your storage area.
If you have enough space around your house or cabin, consider building multiple storage areas
Root cellars are great for storing vegetables, but they can also be used to store fruits and other food items. In this article, we will discuss how to build a root cellar in the south.
A root cellar is basically a hole in the ground that you can use to store your root crops during the winter months. Root cellars were commonly used by farmers and homesteaders in the past. They were also used by Native Americans as well as early pioneers who settled here in America.
The best way to build a root cellar is to dig out an area in your yard that is slightly below ground level. You don’t want it too deep because it will be hard for you to get into it when it’s time to harvest your vegetables or fruits. Once you have dug out this area, you will need to line it with some type of waterproof material like plastic or wood. You could also use straw or hay if you like but make sure that whatever material you use does not allow air flow through it too easily because this could cause mold growth which will ruin your food! Also make sure that whatever material you choose does not have any sharp edges sticking out so that no one gets hurt when entering and exiting
You can build a root cellar in the South by following these steps:
1. Find a spot that gets full sun and has good drainage. The ideal spot is slightly sloping, so water will drain away from the building.
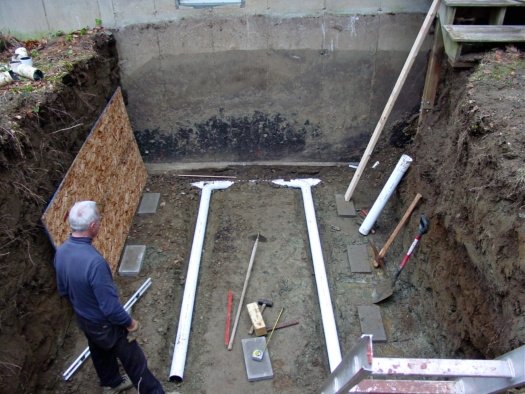
2. Excavate a hole for your root cellar at least 12 inches deep and wide enough to accommodate the size of your proposed structure (8 x 8 feet or larger). Make sure you have enough room around it for ventilation, too.
3. Build a wooden frame for your root cellar using 2 x 4s or 2 x 6s and attach them together with screws or nails (do not use glue). This can be as simple or elaborate as you want it to be; I built mine using plywood because that’s what I had on hand, but cedar works well too because it resists rot and insects better than other softwoods like pine or fir.
4. Cover the frame with tar paper or roofing felt to protect against moisture getting into the wood from below through capillary action (this won’t keep out moisture if it rains hard directly on top of the wood though so make sure there’s at least 18 inches of soil between your frame and ground level). You’ll probably need some help here since this is probably
There are many ways to build a root cellar, but I’ve found that the best way is to dig into a hillside. The easiest way to do this is by using an auger, which can be rented from any home improvement store.
The first step is to find a spot for your root cellar. It should be located in an area where there is good drainage and at least four feet of overhang from the top of the hillside. The hill should also be as stable as possible — meaning no steep areas or loose soil. If you have doubts about the stability of your hill, hire someone with experience in building on hillsides to inspect your site before you start digging.
Once you’ve found a suitable location, clear out any rocks from the area and make sure there are no large roots or branches above where you’ll be digging. Then mark off where you want your root cellar entrance to be and how big it will be by measuring out with string and marking down with stakes. You can either use tape measures or simply estimate distances based on how far apart stakes should go based on how big your entrance needs to be in order for you to fit through it comfortably (usually between four and six feet wide).