Tutorial on how to build a roofed pergola, how to build a pergola for beginners, and how to build a pitched roof on a pergola, from construction of the wood frame and rafters, to installing PVC pipe bracing and latticework for the roof
A pergola is an arched structure that sits either above or at the side of a door or a window, or even the front or back door of your home. It can be constructed out of several designs, including wood, sheet metal, concrete block and even bamboo.
How to build a roofed pergola
The roofed pergola is a great choice for anyone who wants to add shade and shelter to their yard. It provides privacy and protection from rain or snow, but also allows for some light to pass through the lattice panels. This project can be done by a beginner — just follow our step-by-step guide.
1. Lay out your design
Before you begin building the pergola, you’ll need to determine where it will go and how it will be constructed. The most common sizes are 6 x 6 feet or 8 x 8 feet, but they can be built larger by adding more panels (see Step 6). You’ll also need to consider how high above the ground it should be placed; this is typically between 4 and 6 feet tall, depending on how much shade you want and how far away from your house your site allows.
2. Install posts
The first step in building a roofed pergola is installing the posts that will support its weight. Use pressure treated lumber for posts that will receive direct sunlight, like cedar or redwood; use regular untreated wood if you plan on covering the posts later with lattice work or vines.
3. Install rafters
Next, install your rafters using screws
The first thing you need to know about building a pergola is that it’s not as complicated as it looks. Pergolas are surprisingly easy to build and offer a lot of advantages over other types of structures.
This guide will help you understand how pergolas work, what materials are used to build them and how to build one yourself.
Pergola vs. Arbor
The terms “pergola” and “arbor” may be used interchangeably when referring to arched gazebos or pavilions. The main difference between the two is that an arbor can be freestanding while a pergola must be attached to a wall or structure.
A pergola is a great addition to any yard or garden. It can be used as a shade structure, a place to store pots and flowers and even an outdoor dining area. If you are thinking about building a pergola, here are some tips to help you get started: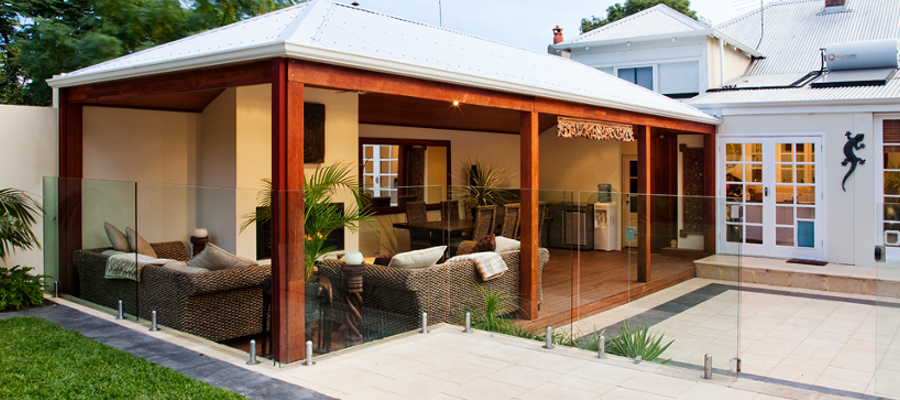
1. Check with your local building department to find out if there are any restrictions on what type of pergola you can build. If you live in an area where earthquakes are common, you may need to build it out of reinforced concrete or steel instead of wood.
2. Choose the right location for your pergola. It should be close enough to the house so that it doesn’t block views from inside but not so close that it blocks windows or doors when people come and go from the house.
3. Decide how many posts will be needed for support and how tall they should be based on the size of your yard and whether you want overhead shade or just some privacy from neighbors, etc., depending on where you live and what kind of climate you have
4. Build a post hole digger using four pieces of angle iron cut into squares with one side at least 12 inches long (or whatever length it takes
Pergolas are a great way to add shade, privacy and style to your yard. They can also serve as a focal point for the landscape. Pergolas can be simple or ornate, but all of them have one thing in common: an open structure that allows light and air to pass through.
Pergola designs range from simple square structures with posts and beams to elaborate multi-tiered designs that feature curved wood arches or lattice panels. You can start small by building a simple pergola over your patio, or you can go big by designing an elaborate structure that will cover half your backyard.
The two most common types of pergolas are sloped roofs and flat roofs. The advantage of slope is that it shades more area than a flat roof would, which helps reduce heat gain in the summertime. But it also reduces the amount of usable space underneath.
Flat roofs are easier to build because they don’t require any rafters or trusses like sloped roofs do; however, they don’t provide as much shade because there’s nothing blocking the sun from hitting the ground directly underneath them
A pergola is a beautiful way to extend your home and enjoy the outdoors. It can be used as an arbor or a covered patio. Pergolas are easy to build and offer a number of benefits:
Pergolas can be used for shade, privacy and decoration
They provide an appealing space in which to relax and entertain
They help reduce the heat in your home by shading your yard during hot summer days
They are perfect for growing vines, flowers and plants
How to build a pergola for beginners, how to build a pitched roof on a pergola, step by step instructions
A pergola is a great way to add shade and style to your garden. They can be used as a focal point or just as an extra room in your garden. The best thing about them is they are so easy to make yourself, you don’t need any special skills or tools. Here we will show you how to build one for yourself.
Step 1: Get the materials you need
You will need:
– Enough timber for the sides and ends (8 x10 inch). You can buy this at most DIY stores, but it’s best if you can find some that has been cut down into shorter lengths so it’s easier to handle and transport.
– Enough timber for the posts (6 x 6 inch). Again this should be easy enough to find at most DIY stores or builders merchants. You may need a few different lengths depending on where you want your pergola positioned in your garden. If you have any unused wood from previous projects, then this would be ideal!
– A good quality hammer drill with masonry drill bits (for drilling holes into concrete).
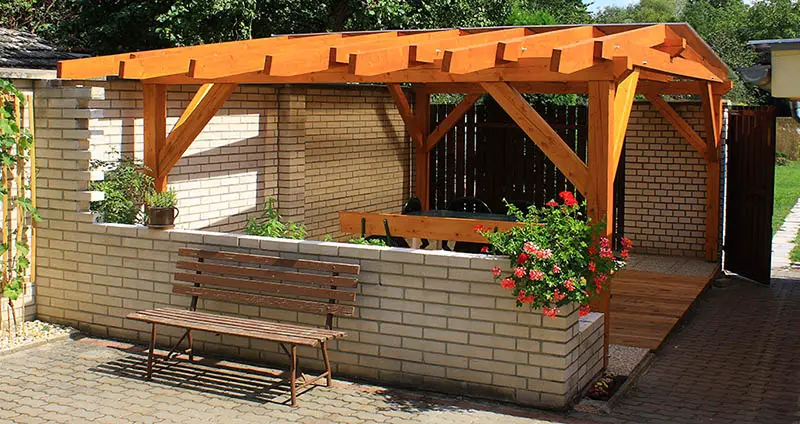
How to build a pitched roof on a pergola
If you’re looking for a patio project that is doable by the average homeowner, then building a pergola may be the way to go. The concept of this structure is simple: two posts support beams that support rafters and then another set of beams that support another set of rafters. However, there are some things to consider when it comes time to build your own pergola. Here are some tips on how to build a pergola for beginners.
How big should your pergola be?
This really depends on how much space you have available in your yard or garden area; however, most people choose somewhere between 6 and 8 feet wide as this provides ample room for walking under the canopy without feeling claustrophobic. 10 feet is also common as it allows plenty of room for sitting underneath without worrying about being too close together but still provides protection from the elements such as rain or snowfall. Of course, if you want more space then you can always opt for 12 feet or even 14 feet if needed!
You can make a pitched roof on your pergola with simple tools and a little help from a friend or two. The easiest way to build a pitched roof is to use plywood, but you can also use metal, like metal flashing.
To build a pitched roof on a pergola, attach 2x4s to the front of the structure. These will act as rafters off of which you will attach plywood or metal to create the roof.
You will need about 5 feet of 2×4 for each side of your pergola. You can cut them down if necessary, but it’s best if they’re the same length so that everything fits together evenly.
Once you have the rafters in place, attach plywood to them using screws or nails (depending on what type of material you have). Use at least three screws per piece of plywood to ensure that it stays in place during high winds or storms. If you’re using metal instead of plywood for your roofing material, follow instructions for installing metal flashing found here: http://www.wikihow.com/Install-Flashing
Once all of your roofing materials are installed, seal them with caulk around any joints where wood meets wood or wood
A pitched roof is a type of roof with a sloping plane. The angle of the slope is known as the pitch. Roofs with a low pitch have a smaller angle of incline and are covered with less material. A shallow angle results in less headroom below a pitched roof than in other types of construction such as flat roofs or gabled roofs.
A pergola is a great addition to any backyard, providing shade and shelter from rain and sun. But if you want to add an even more attractive feature to your outdoor room, consider adding a pitched roof to your pergola. Here’s how:
The first step in building your pergola is deciding whether or not you need roof trusses. You can build one without them, but they make the structure much stronger and more durable. If you have an existing pergola already built, it may already have trusses installed under the decking boards so check before starting construction on this step. If not, read through these instructions before starting work on this project
A pergola is a great addition to any yard. It provides shade, privacy and can be used as an umbrella for entertaining guests. It also makes a great backdrop for plants and flowers. In this article, we will show you how to build a pergola using basic tools and materials you may already have on hand.
Before you begin building your pergola, it is important to plan out exactly what you want it to look like. You may want to sketch out your design or draw it out using computer software such as AutoCAD or SketchUp. This will help you visualize what you are trying to achieve and make sure that everything fits correctly before you start building. It is important that you make sure the dimensions of each piece are correct before cutting them out of plywood or other materials. If one piece does not fit into another properly, then this could cause problems later on in the project when it comes time to install them permanently in place on your property.