If you’re looking to build a shed roof with an overhang, or a gable end roof with an overhang, you’ve come to the right place. Sheds can be an inexpensive way to expand your home. Some people consider them a type of storage while others consider them an addition when they set up separate areas inside the shed. One thing that causes some confusion is how to build a shed roof with an overhang. There are several ways to increase the amount of space you have in your shade.
Do you want to know how to build a shed roof with an overhang? Then you’ve come to the best place! In this article, I’ll walk you through everything from choosing the best wood for your wood overhang to building your own gable end installation. I’ll also tell you about the parts and tools required for your project. If this sounds good, then let’s get started!
How to build a roof overhang over an exterior door
Building an overhang is a great way to add some shade to your home. The best part? It’s super simple and affordable! Here are some of the main types of overhangs you can build.
The shed roof overhang is one of the most common types of overhangs people choose to build. It’s easy to construct, inexpensive and provides a decent amount of shade for your home.
Gable End Roof Overhang
A gable end roof overhang is another popular option for homeowners who want additional shade outside their home. This type of overhang can be made using plywood or other materials that will provide adequate shelter from the sun and rain as well as protect against wind damage.
A-Frame Roof Overhang
The A-Frame roof overhang is perfect if you’re looking for something unique to add some curb appeal to your home. This type of structure doesn’t offer much in terms of protection from rain or wind damage but it does offer a lot of visual appeal!
If you want to add a roof overhang to your building, here’s how to build it.
This article shows you how to build a shed roof with overhang. The project is simple and can be done in a day or two using common tools and materials.
Before you start, check with your local building authority for any restrictions on roof overhangs in your area.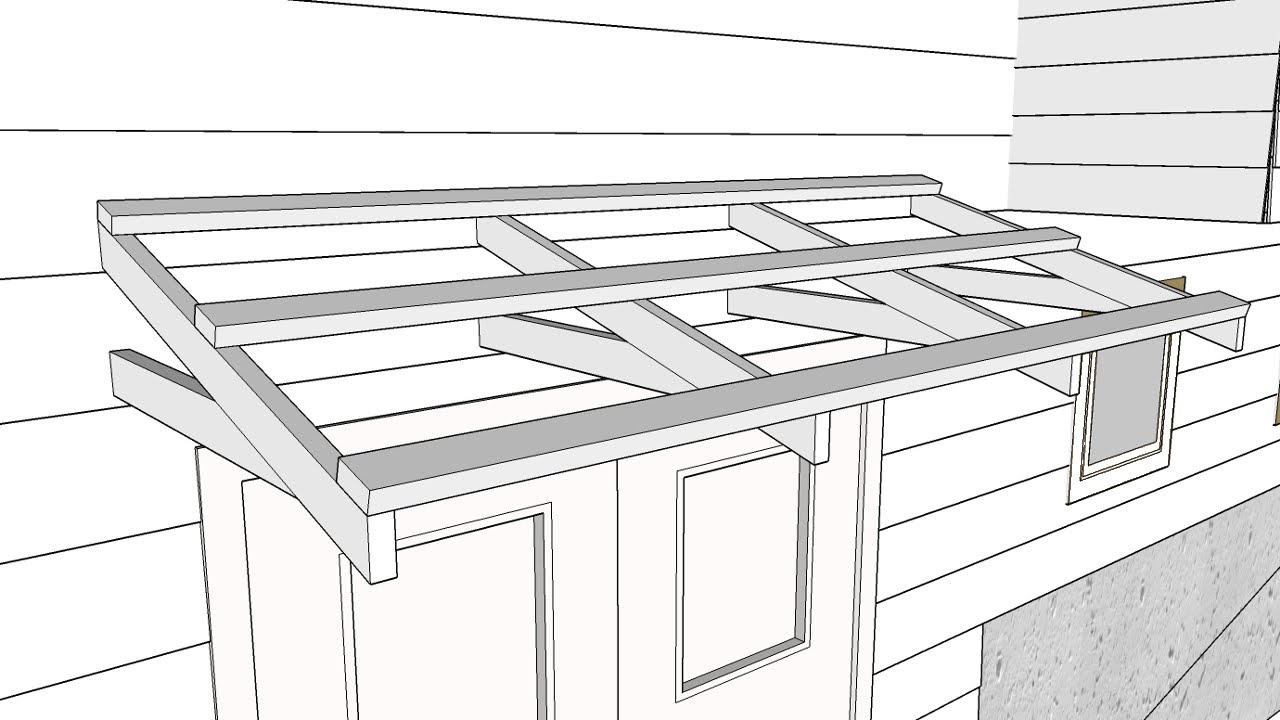
You’ll need:
4 x 2 (102mm x 508mm) lumber for rafters
Roofing nails or screws (for construction)
14″ (356mm) length of exterior plywood (for fascia board)
5/8″ (16mm) exterior plywood (for fascia board)
3/4″ (19mm) exterior plywood (for fascia board)
The best way to build an overhang is to make it part of the existing roofline. And that’s what we’re going to do in this article.
Building a gable end overhang is easy because you can use the existing rafters as the support for the new overhang. You will need to add some additional framing at the front edge of your gable end so that you can attach it to your existing rafters.
In this example, we’re adding a 12″ x 12″ shed roof overhang on each side of our garage door. Here’s what it looks like from above:
From below, you can see how simple it is:
A roof overhang is a great way to add more space and shelter to your exterior door. A roof overhang can be as simple as a small shed roof or as elaborate as an entire second story addition to your home.
Build a Shed Roof Overhang
If you’re looking for something quick and easy, start by measuring the distance between the top of your door frame and the ground. Then use this measurement to cut two pieces of 2×4 lumber to length. This will be your header board that forms the top edge of the overhang.
Next, measure down from each end of your header board 4 inches (or whatever distance you want). Mark these measurements with chalk or pencil so you know where to drill holes for the bolts that will support your rafter boards.
Now place one piece of 2×4 lumber on top of another so it sits at a 45-degree angle from horizontal, then drill holes through both pieces using your masonry bit (or whatever bit you’re using). These holes should be 3/4-inch in diameter so that they’re large enough for bolts or screws to fit through them easily without splitting anything apart.
You’ll need three more rafters that are shorter than those used on a traditional gable
Roof overhangs are the most common way to shade your front door, but they can also be used to shade windows and awnings. The best materials for an overhang are cedar, redwood or pressure-treated lumber. They should be flagged with pressure-treated poles or 2 x 4s. The height of the overhang should be about 1 foot for every 6 feet of door width. The pitch should be between 10 and 15 degrees.
A shed roof is the simplest type of gable end roof, with two vertical sides and a slanted ridge board that runs between them at a 45-degree angle. To build one, you’ll need to cut two rafters out of 2 x 6s and attach them to each other at the top by connecting them with a collar tie that runs from one side all the way across to the other side.
Most building codes require a minimum of 3 feet of overhang on the front and back of your shed, but you can make it bigger if you want. If you’re planning to build a roof overhang, here are some tips:
How to Build a Shed Roof with Overhang
Choose the right materials.
Use strong lumber for the rafters, such as 2-by-6s or 2-by-8s. These will support the weight of the roof, and they’re easy to cut in two places so they’re easier to install on top of the walls. Use 1-by-4s or 1-by-6s for joists and rafters; these are usually part of the same board at hardware stores.
Add insulation if needed. Add insulation between the top plates and rafters if there’s room for it (this is called an R-38 attic). You’ll have plenty of space if you have an unfinished attic above your shop or garage, but if not, add it around the inside perimeter of your shed as well as between rafters above where people walk through their sheds’ front doors.
Install plywood or OSB sheathing on top of your subframe (the frame made from 2×4’s that supports
Building a gable end roof overhang is a great way to add architectural interest and function to your shed. It can also be used as an entrance or as a place for gardening equipment.
The best part about this project is that it’s very easy and quick to build.
You’ll need:
2x4s or 2x6s for rafters – 4-6 depending on the size of your building and how much overhang you want
Junction boxes – 4 depending on the size of your house
Furring strips – one 4’x8′ sheet should be plenty
This is a simple and easy roofing project that can be completed in a day. The instructions below will guide you through the process of building a shed roof that has an overhang on one end.
The materials required are:
Roofing felt (or other material)
2 1/2″ nails or screws
Gable end kit (available at any home improvement store)
A simple shed roof with overhang can be one of the easiest structures to build. The process is similar to building a shed roof without an overhang, but there are some important differences.
Step 1: Measure the Length and Width of Your Shed
Measure the length and width of your desired structure and draw it on the plywood baseboards using a straight edge and pencil. This will be your reference point for laying out your rafters later.
Step 2: Cut Rafters to Length
Cut each rafter to length by lining up one end against one of your lines on the plywood and cutting along that line with a circular saw. Make sure you keep your saw blade at least 1/8 inch away from this line so that it doesn’t cut through when you’re making multiple cuts. Repeat this step until all rafters are cut to size.
Gable end roofs are common on both houses and barns. A gable end roof is a simple, yet attractive addition to any building. You can build a gable end roof overhang in several ways.
The most common method of building the gable end is with a prefabricated shed roof kit. Many of these kits come with all of the materials necessary to assemble it and instructions on how to do so. If you have access to power tools and basic carpentry skills, this is likely your best option.
If you don’t have access to power tools or don’t know how to use them safely, you can build a simple gable end out of 2-by-4s. This requires that you cut each 2-by-4 into two halves and then nail them together lengthwise with 8 penny nails per joint. Once you have the four sides nailed together, lay them on their side perpendicular to the ground with their top facing towards the house or whatever structure they will be attached too. Measure up from the bottom by about 1 foot and mark where you want your roof line to be using chalk or pencils so that both sides match up properly once installed on either side of your structure’s wall