Asking how to build a roof over patio is not easy, especially when you’re planning to save money at the same time. However, if you’ve planned early enough and have picked a good contractor, you should be able to achieve both by following these 5 steps:
Shed roofs are useful for protecting valuable tools and keeping them out of sight. Sheds can help hide a bike from curious eyes, shade dainty plants from the sun, or protect delicate hobbies like model boats from being damaged.
How to build a roof over patio
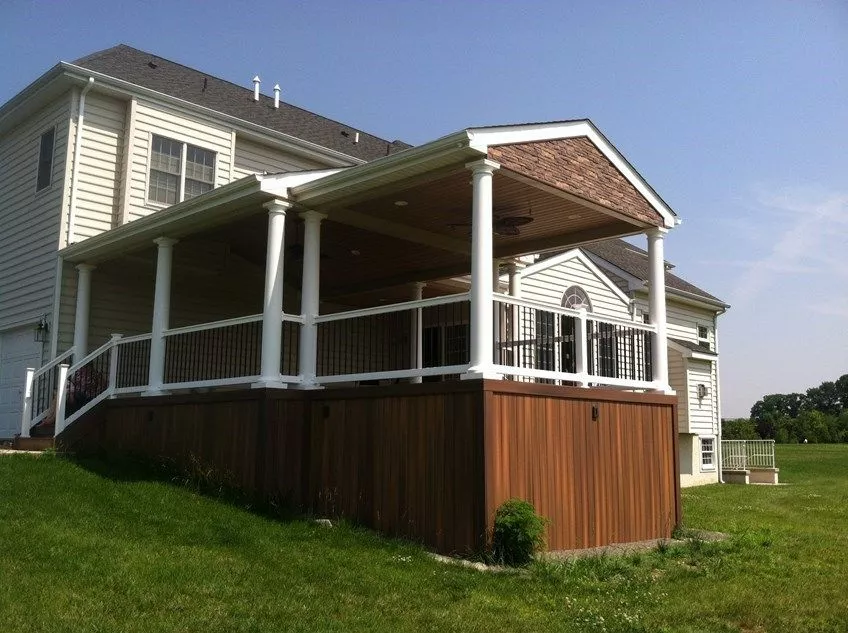
Have you ever wanted a roof over your patio? A roof over patio can be a great way to extend the living space of your home, add more shade and protect your patio.
There are many different ways to build a roof over a patio. This article will help you decide which is best for your needs.
The easiest way to build a shed roof over a patio is to use pre-fabricated materials such as:
Plywood
Flat sheets of metal like corrugated steel or galvanized steel
This method is easy but it does not look very nice. It also blocks out light from above so it is not the best choice if you want an open space. If you want some shade though and don’t mind looking at ugly materials then this method will work just fine!
You can also use pre-made kits that come with all of the materials needed for building a shed roof over existing patios like this one from Home Depot:
This kit includes everything needed to build a shed roof including lumber, shingles and nails! The only thing it doesn’t include is the tools needed to build it (nail gun etc.).
The first step in building a shed roof over your patio is to make sure that you have the right tools and materials. You will need to get some lumber at your local hardware store. This will include 2x4s for framing, sheet rock for insulation and plywood for the roof. You can also use brick or stone if you prefer.
Start by building the framework for your shed roof. This will consist of 2x4s that are 8 feet long each and these should be nailed together into a rectangle shape. The best way to do this is by nailing them together at an angle so that they overlap each other like bricks on top of each other. This will give you more stability than just having them lay flat against each other like normal wood would do when nailed together. Make sure that all of your corners are square so that they don’t sag or wobble when you put weight on them later on down the road after everything is done being built properly with no mistakes made during building it! Now take two 2x4s that are 8 feet long and lay them across each other in parallel fashion and use nails or screws to attach these two pieces together at their ends so that they become
Build a Shed Roof Over a Patio
The best way to build a shed roof over a patio is to build it as part of the foundation. This way, you can construct the roof frame during the initial stages of building the patio, and then cover it with siding or another material. You should be able to attach the rafters directly to your home’s existing walls or siding, eliminating the need for additional framing members and making it easier to construct the roof.
The first step in building a shed roof over an existing patio is to mark out where each rafter will go. Make sure that you leave at least 6 inches of space between these marks so that you can install insulation between them later on.
Next, cut some 1-by-4 boards into lengths that are long enough for each rafter plus some extra length for connecting them together using metal brackets or nails. Attach these boards to your home’s siding using screws so that they form 90-degree angles when viewed from above (see picture). Make sure that there are no gaps between them, as this will allow water to collect inside the roof cavity and cause damage in time.
To create an easy access point for installing insulation later on, install a small access hatch in one side of
Building a roof over your patio is a great way to expand your living space and add value to your home. A covered deck can be used for entertaining, cooking and relaxing. The project can be completed in as little as one weekend, so long as you have all the materials on hand before starting the job.
Step 1 – Choose Your Materials
Before you begin building your roof, you’ll need to decide what type of material you want it to be made of. You can choose from traditional shingles or metal panels that are much more durable than wood. You’ll also need to determine how large your roof should be based on the size of your patio.
Step 2 – Create Support Structure
The next step is building the support structure that will hold up your new roofing material. The easiest way to do this is by installing posts at each corner of the new structure and attaching them together with steel beams that are spaced evenly apart throughout the length of each post. Once this step is complete, you’ll need to add joists onto which you can attach plywood sheets for support and insulation.
Step 3 – Install Roofing Material
Once everything has been laid out properly, it’s time to install
Before you start building a roof over your patio, you need to decide what type of roofing material you want to use. There are many options, including:
Roofing materials
Wood (cedar) shingles
Asphalt shingles
Metal roofing (vinyl or steel)
Solar panels
The best choice for your particular situation will depend on several factors. For example, if you live in a climate that gets lots of snow, then asphalt shingles are probably not going to work well for you. Metal roofs can be expensive and difficult to install if you don’t have experience with them. Wood shingles are beautiful but also need regular maintenance and upkeep. You could also consider solar panels as an alternative energy source for your home — but keep in mind that these may not be the best fit for everyone either.
The good news is that there are plenty of good choices out there for building a roof over your patio. The only question is which one is right for you?
If you are trying to build a shed roof over an existing patio, the first thing that you need to do is to make sure that the patio is level. It’s also important that the patio is large enough for the shed that you want to build. You should also check with your local building code department to see if there are any regulations in place regarding the height of your shed because some states have laws against building high sheds near residential areas.
If you want to build your own shed roof over an existing patio, then here are some tips:
First, measure the distance from one side of your patio to the other. This will give you an idea of how big your new shed should be.
Next, measure how far away from each side of your patio you want your rafters to go in order for them not to be visible from outside or inside when viewed from above. You can do this by putting stakes into the ground that indicate where each rafter will go and then marking them with paint or chalk so they can be seen more easily later on down the road when you’re ready to start working on them.
Now take a look at some pictures online of other people’s sheds that have been built over patios and try out different designs until you find one
Patio roofs are a great way to extend your home and add more living space. Building a shed roof over an existing patio is not difficult, but there are some steps you should follow to ensure the roof will be safe and secure.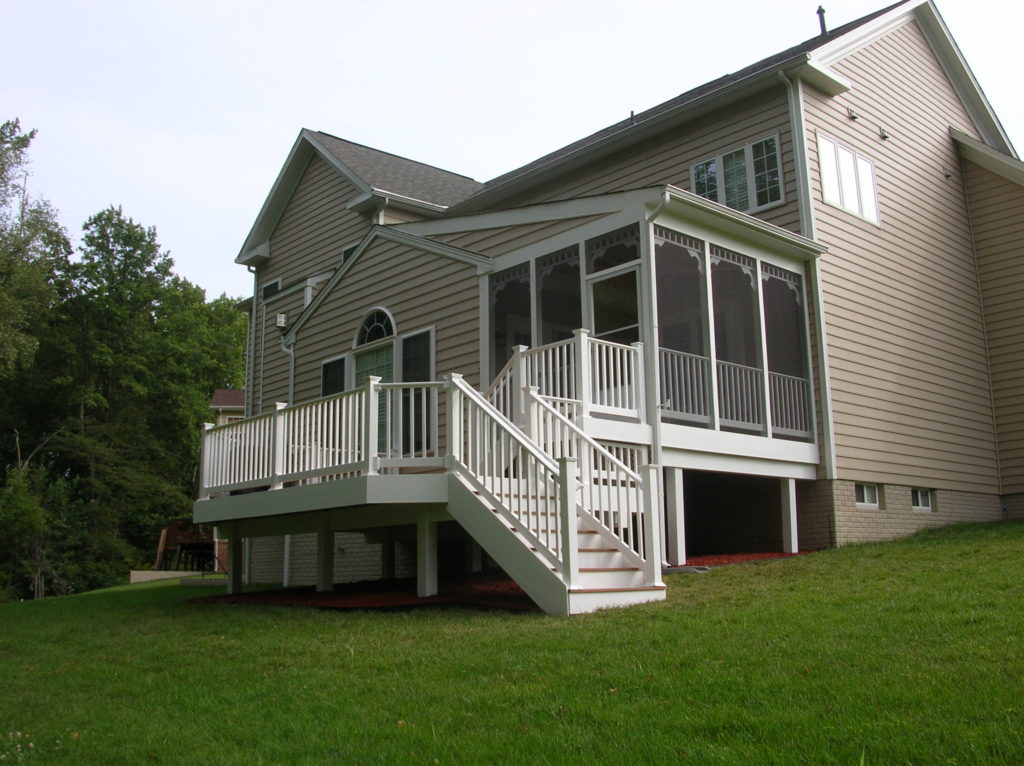
Building a roof over an existing patio is easy once you have the right tools and materials. Here’s how to do it:
Step 1 – Remove Any Necessary Supports
Before you begin your project, make sure you remove any supports that may interfere with your new roof plan. This includes posts or beams that might be in the way of where your new roof will be positioned.
Step 2 – Lay Out Your New Roof Plan
Once you’ve removed any obstructions, lay out your new roof plan on the ground so that it covers the entire area of your existing patio. Make sure it follows all necessary safety regulations by using safety rails wherever necessary and keeping stairs over 30 inches wide at all times.
Step 3 – Build Your New Roof Frame
To build a shed roof over an existing patio, use two metal brackets for every support beam that goes across them (these can be found at most hardware stores). Place one bracket at each end of each support beam with equal distance between them (this will vary depending on
How to Build a Shed Roof Over an Existing Patio
A shed roof can be used in many ways. It can be used as a patio cover or as a shade structure for an outdoor kitchen. The first step to building a shed roof is to determine what type of material you will use to build the frame. If you are going to build the frame out of wood, you should install 2×10 lumber vertically between posts and horizontally across them at 16-inch intervals. You can also use metal studs if you want a more durable structure.
Once you have your frame in place, cover it with plywood. Once again, if you want this project to last for years, make sure that you use plywood that has been pressure-treated with chemicals that prevent rot and decay from occurring. Then install your shingles over top of the plywood sheets so that they overlap each other by about 1/2-inch on either side. When installing shingles, always stagger them so that they do not line up perfectly with one another and create gaps between them where water could accumulate and cause damage to your new roofing system over time
You can build a shed roof over an existing patio with the right tools and materials. The best way to do this is with trusses, which can be purchased at most lumberyards. Trusses are manufactured in standard sizes, so you’ll have to measure your patio first to determine what size trusses you need.
Step 1 – Check for structural integrity
Before beginning any construction project, it’s important to make sure that the structure underneath is structurally sound. If there are any signs of rot or damage such as termite infestation or water damage caused by flooding, you should consult with a professional before proceeding with your project. Even if there are no signs of structural damage, it’s still a good idea to have a contractor come out and give an opinion on whether or not your deck can support additional weight from a shed roof.
Step 2 – Measure your patio deck
Measurements are critical when building anything; they help ensure that all pieces fit together properly and last longer than expected. When measuring for a shed roof over an existing patio, you’ll want to measure each side of the deck separately so that each side matches up correctly when installed together. To
I would make sure that the existing patio is level and build the shed roof over it. This way, you don’t have to dig out any more dirt than necessary. Use a level to make sure it is flat, and if not, use shims under the foundation blocks to level it out.
Once it is level, you can build up the shed roof on top of it. You may have to dig down into the ground in some spots to make room for rafters, but this should be no more than a few inches at most. If you need more height than what your existing patio provides, then you will need to excavate more dirt from underneath the patio so that you can build up higher.
You can use treated lumber or dimensional lumber for framing if desired. I would recommend using 2x4s for studs and 2x6s for joists or trusses depending on how much weight you want to put on your roof structure. You can also use plywood as sheathing material if desired (like OSB or CDX).