How to build a retractable roof on a house in Minecraft. Steps to make a modern chunky house with glass windows and a retractable roof in Minecraft using command blocks.
A roof is the covering above the central space in a building, containing its entire rafters and ceiling. A pitched roof has two sides sloping up from opposite sides of a building; a hipped roof, has four sides. A pent roof is a small version of an H-shaped roof that rises from two walls or gables.[1] A rood is the central beam of timber in a medieval timber framed house.
How to build a roof on minecraft
Roofs are an essential part of any decent house. But what if you want to build a place that’s more than just a wooden shack? You need a roof that is not only functional, but also looks good. Here are the steps to build a retractable roof on your Minecraft house.
Build the walls of your house with wood planks or other materials. Make sure that there’s enough space for the roof above it.
Place the blocks for the roof over the walls you built in step 1. Make sure they’re facing up so that sunlight can reach them easily.
Place glass blocks on top of these blocks and place more glass blocks on top of them so that they form a dome shape over your base.
Create an entrance into your house by placing two doors next to each other with two wooden planks in between them. This way, you’ll be able to enter and exit through one door without having to worry about turning around every time you want to go inside or outside of your home!
The first thing to do is to build the walls and the roof. For example, if your house is square, then you need to build four walls and a flat roof. You can use wood or stone blocks. Then you should put stairs on one side of the house so that you can climb up onto it.
Now we will talk about how to make a retractable roof on Minecraft PE. First, we need to make a hole in the ceiling of our house. Then we need to get some torches and place them inside it. Now we have to connect these torches with redstone dust so that when you activate them using buttons or pressure plates, they will light up and turn off automatically after some time.
If you want to make your house more interesting, then you should place some plants on top of it as well as some paintings and other decor items that will make your house look nicer from outside as well as from inside!
Roofs are an essential part of building a house in Minecraft. They can be used to keep your home safe from rain, snow and other weather effects. There are several types of roofs that you can build for your house in the game.
How to build a roof on a house in Minecraft?
The easiest way to make a roof is by placing blocks on top of your house walls. However, this will not protect your house from rain or snow. You need to use slabs instead of blocks when making your roof, as they have a higher resistance against water than ordinary blocks do.
You can also create a retractable roof for your house by using pistons and redstone circuits. This will allow you to open up the roof whenever you want so that you can enjoy the view or take out items from underneath it easily without having to destroy the whole thing first.
This tutorial will show you how to build a roof on a house in minecraft. It’s very simple and easy to do.
First things first, you need to make sure your place is ready for the roof. If you don’t want it to fall off, then use wooden planks or stone bricks.
Next, you need to make sure that the walls are strong enough so that they won’t fall off when the roof is on top of them. To do this, place some support blocks underneath each side of the wall so that it won’t fall off when you put the roof on top of it.
Now, go inside your house and place some blocks where you want your roof to be. Once done, make sure that they’re not touching anything else except for their sides (or any other material).
Step 1: The first thing you want to do is build the frame of your roof. You can do this by placing dirt blocks on top of each other and then placing solid blocks of wood on top of them. This will make for a nice, sturdy frame.
Step 2: Next, you will want to place your wood blocks so that they form a square shape over the top of your house and the tops of the walls. Make sure not to leave any gaps between the wood and dirt because these will be an entry point for bugs and animals who may enter your home while you are away from it.
Step 3: Finally, place some torches all around your roof so that they light up all areas where light is needed. These torches can also act as a defense mechanism against mobs such as zombies or creepers as they cannot pass through flames in Minecraft without being damaged by them.
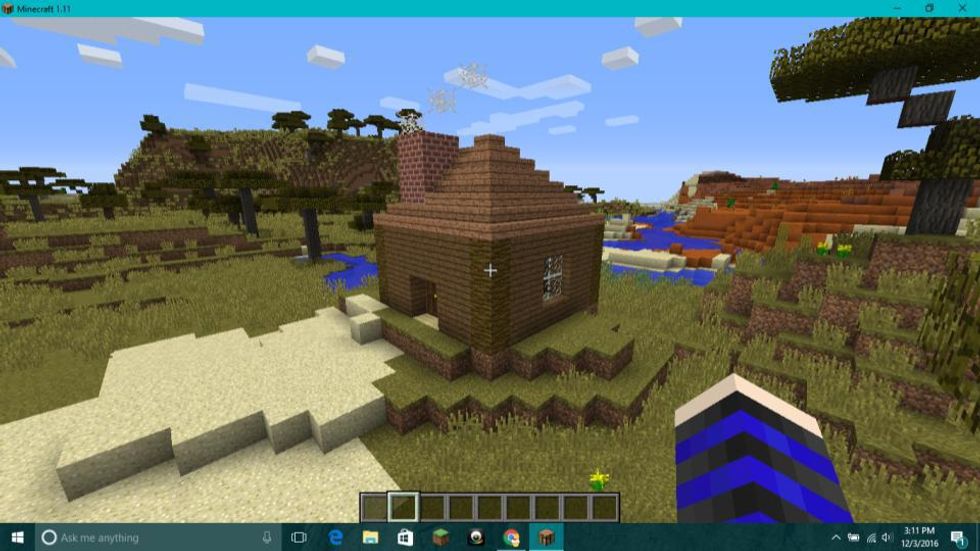
Building a roof is easy. You can make it out of wood, stone or iron. Roofs are mainly used to protect your house from rain and snow. They also help keep mobs like creepers away from your house. If you want to make an awesome looking house then you can use this tutorial to learn how to build a retractable roof on minecraft.
To build this kind of roof, you will need two blocks of wood, one block of stone and one redstone repeater. You might also need some sticks if you don’t have enough wood or stone blocks in your inventory at the moment. Here’s how it looks:
First, place one block of wood down on top of another one so that they form an ‘L’ shape (one block should be placed on top of the other with its bottom side facing up). Then put another block of wood on both sides as shown above until all four sides have been covered by two blocks each (they should all be facing up). Next place a redstone repeater down in the middle so that it connects with all four walls (make sure it’s facing away from any wires). Now put another piece
How to build a retractable roof on minecraft
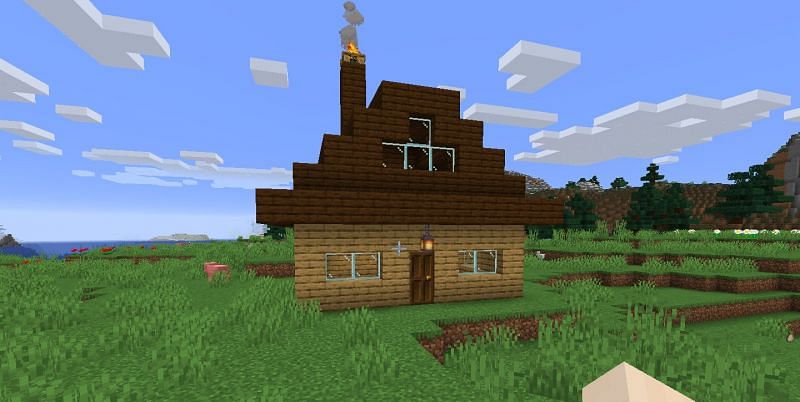
In this tutorial I will show you how to make a retractable roof for your house in Minecraft. The video below shows the completed project. This is one of the most advanced tutorials on this site but it is not too difficult if you follow along with me.
To start off, we need to make a frame for our roof. The frame will be made out of glass blocks (2×2) and stone bricks (3×3). First place two blocks of glass on top of each other. Then place two blocks of stone on top of the glass. Finally place another block of glass on top of this stone brick layer. You should now have something like this:
Next we need to add another layer onto our roof so it looks like this:
Then we need to take out our ladders and replace them with stairs going up one block high and down one block high as shown below:
Now that we have our basic frame built, let’s work on adding some windows! For each window you want in your house, place two blocks of glass next to each other vertically like so:
Building a retractable roof in Minecraft is one of the best ways to show off your creativity and building skills. This is an advanced tutorial that requires you to use Redstone and some basic crafting materials that you can get from mining or buying them from the store for money. It will take about two days to complete this task, but it’s worth it!
Step 1 – Prepare Your Materials
You will need:
A bunch of iron bars (16)
2 glass panes (20)
4 redstone circuits (32)
A wooden pressure plate (1)
You can buy these items at any crafting table or store. Once you have them all, head over to your house and start building!
Building a retractable roof is really easy. First, you need to build your house as you normally would.
Then, on top of that house, you need to build a square platform. This will be your roof “base”. Then, you need to build another platform above that one, this time making it smaller than the one below so there’s a gap between them (there should be at least one block of space between the two platforms).
Now we need to make sure that the two platforms are connected so they move together when we open or close our roof. Make sure that all the blocks are aligned perfectly with each other, so that when we move them horizontally, they also move vertically together as well. We can achieve this by using pistons and sticky pistons.
Next, make sure you have some redstone ready and then place some sticky pistons around the edge of your roof’s base platform where it meets your wall (make sure they’re facing toward the inside of the house).
After this step is done, it’s time to test out our retractable roof! Place a lever next to your retractable roof and then push it down once so that our piston moves all the way back into place (making
There are many different ways to build a roof on a house in Minecraft. One way is to use an existing structure as a base and then build on top of that. This can be done by using the /setblock command to place blocks where you want them, then using the /fill command to fill in the rest of the area.
The /fill command can be used in conjunction with other commands to create a roof shape. For example, if you wanted to create a flat roof, you could use the following:
This would fill out the space above ground level with stone blocks and make it so there is no ceiling inside the building. If you want glass windows in your building, you can also use this command with glass blocks instead of stone: