It’s true – there are a lot of different roof framing techniques, but I’m going to show you the way to build a roof frame, and how to frame a roof overhang.
This guide will explain everything you need to know about how to build a roof frame. It’s designed for anybody who plans to build a simple shed roof on their house, or for a carport, barn or similar. But, if you’ve never built a roof before, don’t feel intimidated by this guide – the instructions are very detailed and easy to follow.
How to build a roof frame
This article will explain how to build a roof frame for a shed or other small structure. It will also show you how to frame an overhang for the roof. This is a very basic project and can be done with just a few tools.
We will use 2×4’s for the rafters, but if you are looking for something stronger, you can use 2×6’s instead.
You will need:
2 x 4’s (enough for your side walls)
2 x 4’s (enough for your front and back walls)
1/4″ plywood sheets (enough for your side walls)
1/4″ plywood sheets (enough for your front and back walls)
Roof framing is the process of constructing a roof structure which supports the roof covering. A framed timber-framed building has a wooden frame built from structural timbers, and covered with a roofing material such as thatch, tile or shingles. It is made up of rafters, purlins and ceiling joists. The space between the rafters is called the ‘roofing void’.
/kingspan-timber-frame-roof-truss-en-ie-2090.jpg/jcr:content/renditions/cq5dam.web.1280.1280.jpeg)
The rafters are joined at their ends by another piece of timber called a ridge board. Ridge boards are usually placed on top of the highest rafter in each course, so that they sit parallel with one another. They may also be used to increase the distance between two adjacent rafters without increasing their height (called an overhang).
A purlin is a horizontal beam that spans between two rafters at right angles to them. The purpose of purlins is to support the weight of the roof covering, particularly when it extends beyond the building’s walls (i.e., in an overhang).
How to Build a Roof Overhang
Framing out a roof overhang is one of the most versatile and useful applications of trusses. A properly designed roof overhang allows for additional storage, a covered patio or an outdoor living space. It also creates additional living space on the interior of your home when constructed with trusses.
Trusses come in a variety of styles, but for this tutorial we will focus on gable roof trusses. Gable roof trusses are designed to cover an area by forming two triangular shapes at each end of the roof. The gable ends of these triangles are called gables, which is why these types of roofs are commonly referred to as gable roofs.
The size and shape of your overhang will determine how many trusses you need to build it and how they should be positioned relative to one another. For this tutorial we will assume that all our measurements refer to the width of your building (in feet).
Step 1: Calculate Lengths and Angles
The first step in building a roof overhang is calculating its length and angles. To do this we will use simple geometry formulas that correspond with each type of angle found on a truss:
The most basic framing construction is the rafter. It is typically composed of two pieces of wood cut to the same length and joined together at their ends with a metal or plastic connector called a plate. The plate prevents the two pieces from bowing outward.
Rafters are used in roofs with hips, valleys and dormers. The length of each rafter depends on the pitch of the roof, which determines how far each foot of rafter extends past the wall surface. Roof pitches range from 2/12 to 12/12, meaning that for every two feet of horizontal run there is one foot of vertical rise. For example, if you have a 6-foot-long run then your pitch would be 3:12 (2/3), which means that every 12 inches of horizontal distance there is one inch of vertical rise.[1]
1. Mark the rafters
Measure the distance between the plates and mark the ends of your rafters. The top plate will be at the same height as your ridge board, while the bottom plate should be set back from the end of the rafter by 1/16th of an inch to allow for flashing.
2. Cut rafters
Use a circular saw to cut each rafter to length, being careful not to cut too close to your markings. If you have a miter saw or table saw, use those instead for cleaner cuts. You can also buy precut 2x4s that are already sized properly for this project; they’re available at home centers and lumberyards. Or you can use a jigsaw or handsaw if you prefer not to invest in power tools just yet (or if you just want a good workout).
How to Frame a Roof Overhang
A roof overhang is an extension of the roof that projects beyond the exterior walls of a house. It can be built on either the front or back of a house, depending on its design. Roof overhangs are usually constructed for aesthetic reasons, but they also protect windows and doors from rain, snow and wind.
To build a pitched roof frame, you will need to get the correct materials in place before you start building. These include:
Lumber: The lumber should be at least 2×6″ thick and 8′ long for each rafter in your roof structure. You may need more lumber if you have a complicated design or want a larger overhang.
Nails: You will need at least 100 nails per rafter to hold it together properly once it has been attached to the house. You’ll need more nails if you are using thicker boards or if your roof has many angles and cuts in it.
A roof overhang is a section of roof that extends beyond the exterior walls of a building. The overhang protects the wall from rain and sunlight, and it provides additional space for outdoor living.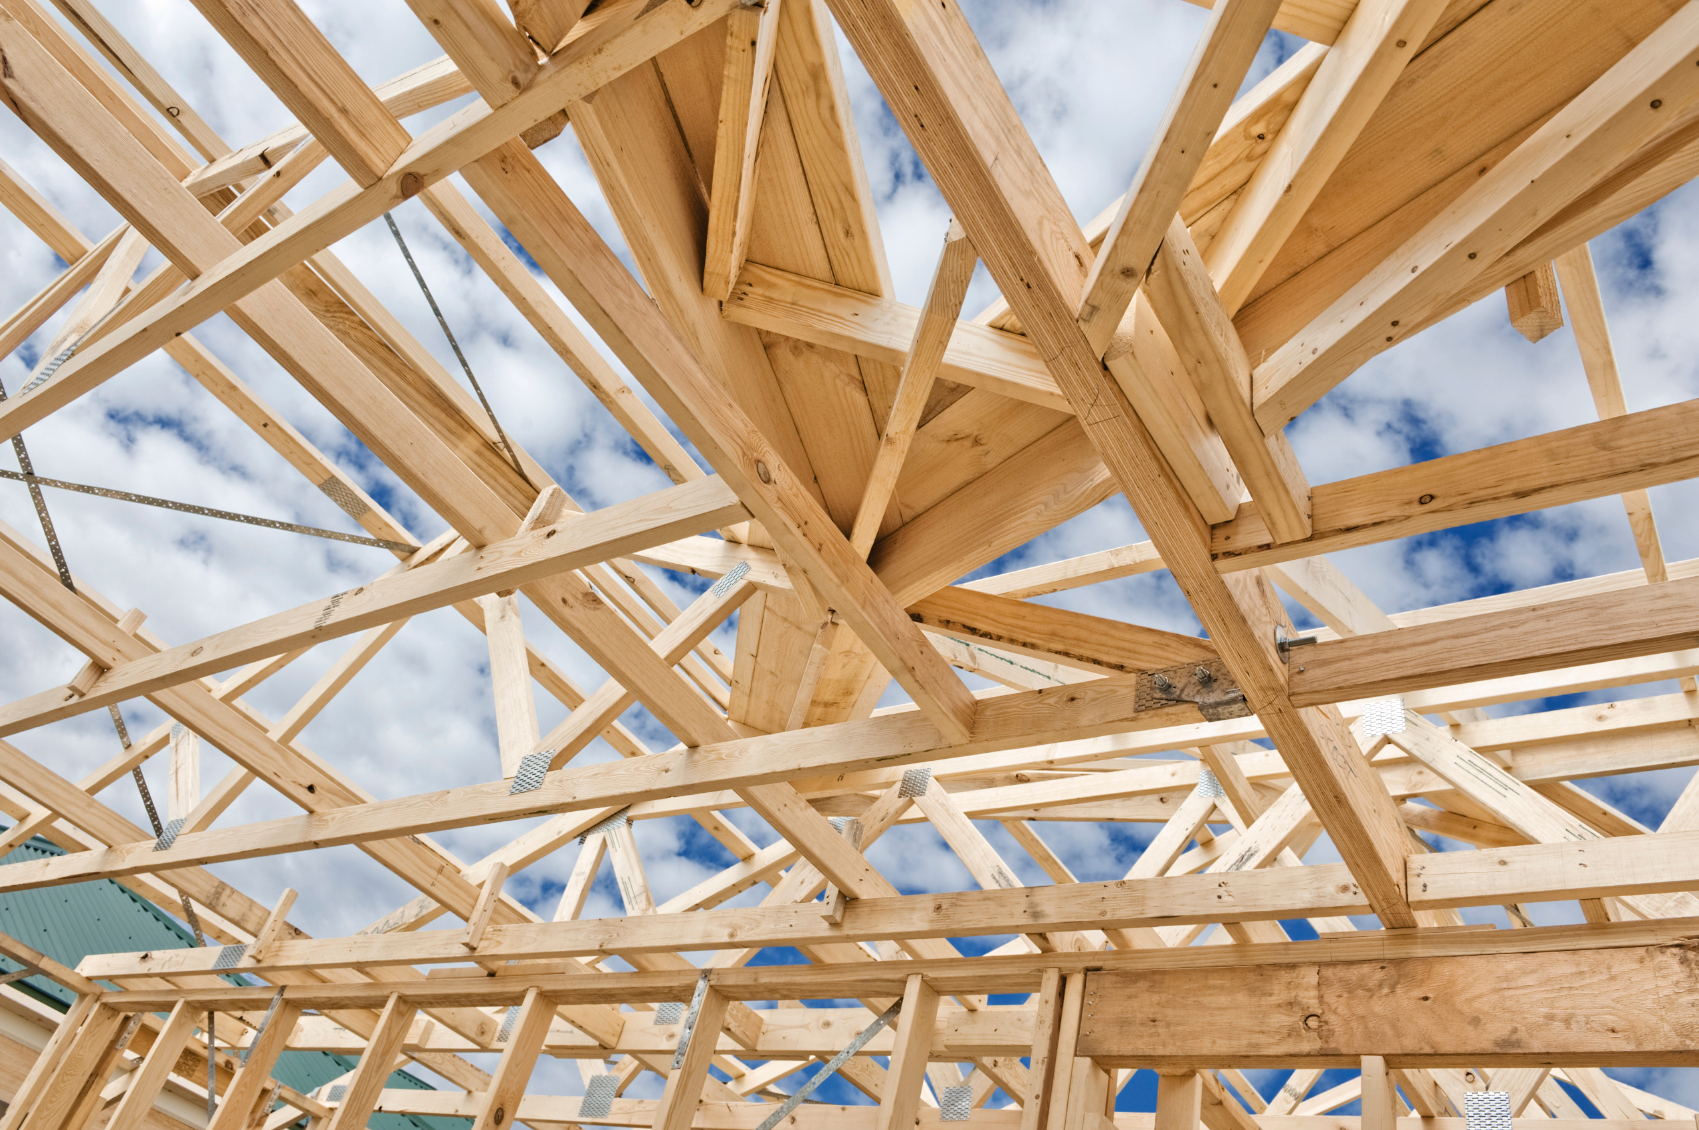
Build a pitched roof frame, then nail plywood sheets or OSB panels to the frame.
Add rafters to support the overhang, then install sheathing on top of them.
Before you put up your roof overhang, you need to make sure that it is free of any obstructions. If there are trees or other structures near the house, you will have to trim them back so that they don’t interfere with the installation. You should also check for any wires or cables that may be in the way of your project. Once all obstructions have been cleared away, you can start framing your roof overhang.
1) Install the trusses on the walls where they will meet the end wall of your structure. Measure out from this end wall and place each truss flush against it. The ends should be parallel with each other and extend past the wall by at least one foot on each side. There should be a gap between these ends and the side walls for drainage purposes later on in the process.
2) Secure each truss by using two screws through its top section into each stud in its respective wall (see diagram). Make sure to place these screws at least 12 inches apart from one another so that they do not interfere with any electrical wiring within this area of your structure.
3) Once all trusses have been secured onto their respective walls, measure out from
This video is about how to frame a roof overhang. The video shows the steps involved in framing a roof overhang and the materials required for this.
The video also explains how to calculate the pitch of the roof using trigonometry.
The video also shows how to make a simple template for cutting rafters.
There are two basic types of roof framing: gable roofs and hip roofs. A gable roof is formed by two sloping sides that meet at the ridgepole or peak. A hip roof has three sides, with two slopes meeting at the center. In both cases, the end walls are vertical.
Gable Roofs: The framing for a gable roof begins with the rafters, which provide support for the weight of the roof and are attached to the top plate at an angle. The rafters are usually 2x4s or 2x6s, depending on the span needed. The rafters must be installed so that they sit flush against each other on top of the plates and extend beyond them on each side by at least 1/2 inch. This creates a nailing surface for attaching sheathing to cover the roof frame — plywood or OSB (oriented strand board) panels.
Hip Roofs: Hip roofs have more complex framing because they have three sides instead of two, but it’s still easy to do yourself if you follow these steps: