One of the main components to any Minecraft world is redstone. Redstone allows you great freedom and results in spectacular designs. A similar type of design exists in real life. I am talking about clocks! Clocks rely on small mechanisms such as rods, wheels and levers in order to display the time of day accurately.
Redstone circuits are a complicated part of Minecraft. I published a post earlier this week that describes how redstone clocks work. In this post, I thought it would be fun to demonstrate how they work using screenshots and the in-game command block

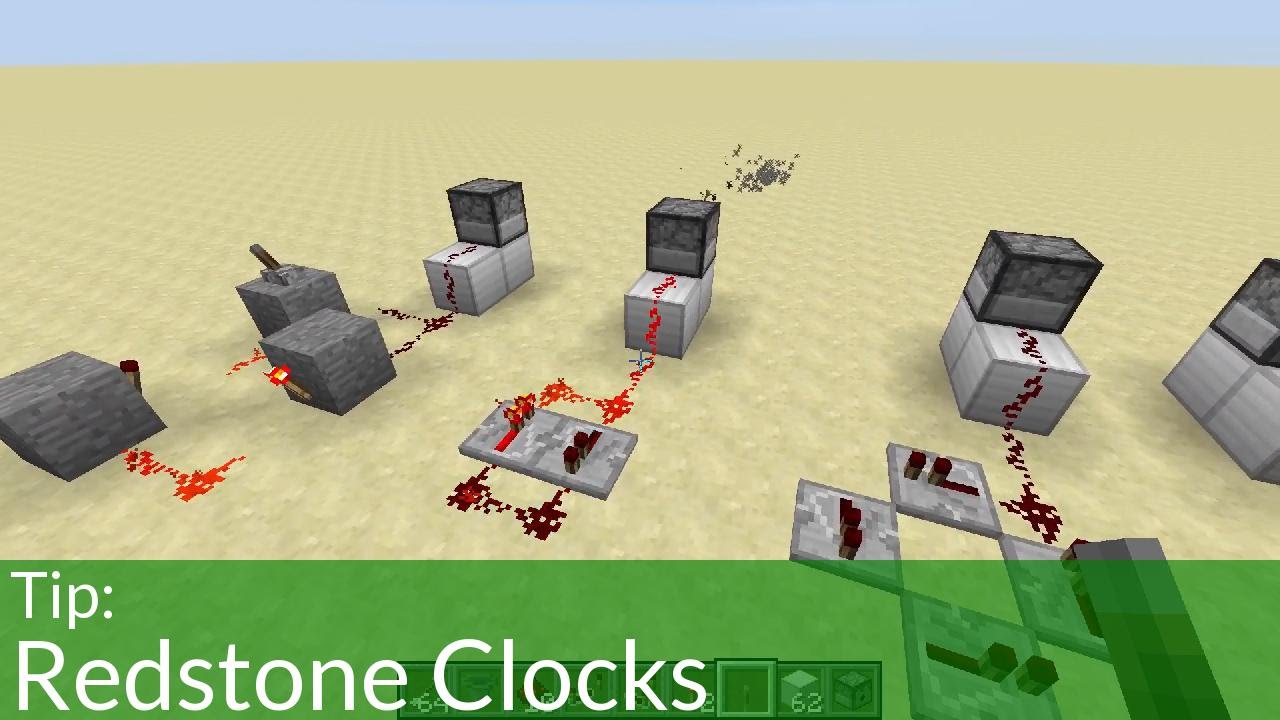
How to build a redstone clock
Redstone clocks are important for timing events and creating other complex devices. They can be used to create a Minecraft alarm clock, a countdown timer, or even an automatic door opener.
Redstone is a material that can be found in the environment. You can also craft it by combining one stone block with four red wool blocks. This will produce one redstone dust as well as four more wool blocks.
You’ll need redstone dust to make a redstone clock, so you should gather some if you don’t have any yet. To do this, simply mine some stone blocks and then craft them into redstone dust at your crafting table (see image below).
The next step is to place down a block of redstone on the ground and right-click it with a stick in hand (see image below). This will create a redstone wire in front of you that goes both up and down along its length (see image below). The wire will automatically connect to other wires around it when they are within 2 blocks of each other (see image below). If two wires touch but don’t connect due to distance or a solid block being placed between them.
![Minecraft: How to make a Simple Redstone Comparator Clock [1.11 Tutorial] - YouTube](https://i.ytimg.com/vi/ZD_BmNYloiw/hqdefault.jpg)
how to build a redstone clock in minecraft
A redstone clock is a device that uses redstone to keep track of time. It can be used for many different things, such as keeping track of the time in your world, or even for telling you when to get up in the morning! This guide will teach you how to make a basic redstone clock in Minecraft.
The first thing that you need to do when making a redstone clock is find some blocks of wood and place them on top of each other vertically. Then, go into creative mode and place some blocks of sand (for this tutorial, we will use 5 blocks). Place some more blocks of sand in between each layer of wood. Once all your layers are complete and you have placed 20 pieces of sand inside each layer then it is time to add an extra layer on top (making it 21 layers high). Add another layer on top with another 20 pieces of sand inside each layer again.
Now we need to make a hole so that we can place our lever inside our tower. To do this we need to break all the blocks above the first layer with our pickaxe until there’s nothing left.

how to build a redstone clock in minecraft bedrock
A redstone clock is one of the most basic and useful machines you can make in Minecraft. It’s essentially a timer that runs on redstone power. They’re useful for all kinds of things, like making doors open and close at specific times or spawning monsters when it’s night.
Building a Redstone Clock
Here’s how to build a basic redstone clock in Minecraft:
Step 1 – Make a T-shaped track with four blocks wide by three blocks long. Place a rail on each side of the track. You’ll need two rails on each side because they will be wired together with redstone dust as shown below:
Step 2 – Place a second rail on top of the first one so that they are parallel to each other (not perpendicular). This will act as your main rail for sending power to different parts of your machine.
Step 3 – Remove all but two blocks at either end (one block on each side) and replace them with repeaters facing outward from the center of your track (see image below). The blocks removed should be facing each other across the tracks so that they can connect properly with the repeaters’ backsides.
Step 4 – Wire up your main rail by placing redstone dust between every other block along.
how to build a redstone clock 1.18
If you want to make the most out of your redstone knowledge, then building a redstone clock is a must. A clock is one of the most useful devices in Minecraft, due to its ability to keep track of time and thus help you keep track of day and night cycles. You can use it for many different things in your world, from automating farms to keeping track of when it rains or snows.
In this guide we will show you how to build various types of clocks, including digital clocks, analogue clocks and other interesting designs. We will also explain how they work, so that you can build your own version at home.
The first thing that we need is a power source – this is usually going to be some sort of battery or generator. This can be anything from an old minecart placed under pressure with sand or gravel above it (like this one), or even just some TNT primed with gunpowder! Once our power supply is ready, we need some form of timer device – this could be anything from an actual clock built into the design itself or just a simple lever-operated system like the one below:
We will be using the following materials:
1. The first thing that you need to do is build a piston door. For this purpose, you can use any block that has been previously placed in the game world. The only requirement is that it has one empty side and one side that is connected to another block.
2. Next, place two repeaters facing each other on the other side of the piston door from each other and connect them with an iron bar or another solid block of your choice.
3. Now place a dispenser facing away from the piston door with some redstone dust inside it for powered blocks and set it up so that it dispenses the powered blocks into the other side of the piston door where they will fall down into its place on top of each other until they reach their limit which should be around five or six blocks high but no more than seven because any more will not work properly with this design due to lack of space as well as making it harder to see what’s going on inside which