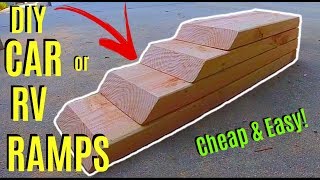
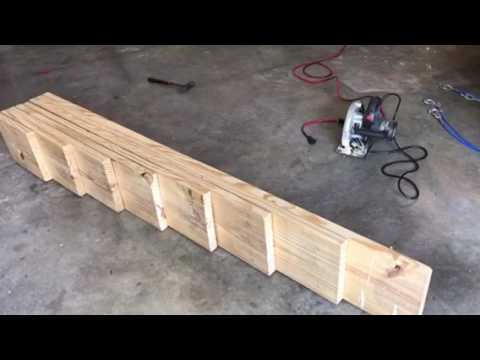
Building a ramp for an RV is a lot easier than it first appears. They can be built using many materials, some of which you’ve likely seen before. I even used recycled wood from old pallets, to make my ramps with. I recommend these ramps mainly because they are sturdy, extremely low cost and easy to build! I love making these ramps out of pallets, because doing so gives me the ability to freely decorate the ramps as I see fit.
Rv ramps are helpful devices invented to help vehicles easily climb elevated land. An rv ramp is a lot like the ones used to access bus loading platforms, except much smaller with custom dimensions that are compatible with your vehicle.

How to build a ramp for an rv
The easiest way to build a ramp for your trailer is to use plywood. First, cut the plywood into strips that are the same width as the tongue of your trailer. Make sure they are long enough to extend at least two feet past the back of your trailer. Next, nail two of these strips together at right angles to form an “X” shape. This forms a ramp that will slide under your trailer and provide secure footing for it to hitch up to your tow vehicle.
Using wood as a material for ramps is not recommended because it is heavy and could cause injury if someone were to step on it or walk off of it onto uneven ground below.
Another option is to use a rubber matting material similar to what you’d find on playgrounds or in gymnasiums for basketball courts. This type of material is lightweight enough that it can be stored easily on top of your RV or stored inside once you’re finished using it, but durable enough that it won’t tear or wear out quickly while being used outdoors in inclement weather conditions such as rain or snow.
how to make a curb ramp for rv
If you own an RV, chances are you’ve had to use a curb ramp at some time. Curb ramps are useful for getting in and out of parking spaces, as well as allowing people with disabilities to get into and out of their vehicles.
RV curb ramps can be purchased pre-made, but if you are handy with tools and have basic carpentry skills, it’s fairly easy to build your own. Here’s how:
Step 1 – Measure the height of the curb
Measure the height of the curb in front of where you want to park your RV. You can use a tape measure or a laser level. If you don’t have either of these items, simply estimate how high the curb is by looking at other cars parked on the street or using your own height as a reference point.
Step 2 – Build your frame
The first thing that you need to do is build a frame that will hold up your ramp when it is not in use. This will also allow it to be portable so that you can take it with you wherever you go. Use 2x4s for this project; they are strong enough for most applications but lightweight enough for one person to carry around easily when needed. Cut them down into lengths that fit inside.
A curb ramp is a ramp designed to accommodate the height of an RV. A curb ramp helps a person in their RV enter and exit their vehicle with ease. The following steps can help you build your own curb ramp:
Step 1: Find the right material for your project. You’ll need lumber and plywood, as well as screws, nails, and paint.
Step 2: Measure your home’s curb height and cut the wood according to that measurement. If you don’t have someone who can help you measure the curb height, use a tape measure and a level to get it right.
Step 3: Lay out two pieces of plywood on top of each other so that they are in line with each other at all times. Make sure that both pieces are straight before nailing or screwing them together using nails or screws.
Step 4: Attach the two pieces of plywood together using nails or screws so that they form one piece of plywood measuring about 28 inches by 48 inches long. This will be used as the base for your ramp design.
homemade rv ramps
If you’re planning a trip in your RV, it’s important to make sure that you won’t have any trouble getting into or out of the campsites. You don’t want to be stuck outside with nowhere to park your rig.
There are several ways to build your own RV ramps. Many people use wood, but concrete is also an excellent option. You can also use steel or aluminum for the surface of the ramp itself, and then place concrete on top of it for additional support and durability.
The best type of ramp depends on where you’re going and what kind of terrain you’ll be driving over. If you’ll be staying near major cities and driving on paved roads most of the time, then it’s probably best to go with a wooden or concrete ramp with metal rails along the side for added stability.
If you’re headed off into more rural areas where there may not be paved roads, then aluminum might be better because it’s lighter weight and easier to carry around than other materials. However, remember that aluminum can become corroded if left outside for too long in damp conditions so you’ll want to keep it covered up when not in use if possible.
Ramps that you can use to drive your RV up are necessary if you want to park in places that don’t have level ground. You can build your own curb ramp using a few simple tools and supplies.
Curb ramps are a necessity when parking in areas with street curbs and no level ground. They allow you to drive over obstacles like curbs or other barriers without damaging your vehicle. The easiest way to make a curb ramp is with wood; however, you can also use metal if you want something more durable.
Step 1: Cut the Wood
Measure out the length and width of your curb ramp in inches or centimeters, whichever measurement is easier for you. Allow room for the thickness of the wood pieces, but keep them thin enough so they’re easy to cut with a saw or jigsaw (1/4 inch thick). Cut your wood into two pieces for each side of the ramp, which should measure about 8 feet long by 30 inches wide.
Step 2: Attach the Wood Pieces Together
Place one piece of wood on top of another so their edges line up perfectly. With both pieces facing down, screw them together at every four inches along each edge with two screws per