Gardening has long been a hobby for homeowners and residents from all around the world. From simple flower beds to elaborate vegetable farms, indoor or outdoor gardening has become an important method for people with limited space for food to grow their own vegetables and obtain organic food in a safe way.
Building a raised garden bed is a great idea if you don’t have the space for an outdoor garden, or your area has poor soil conditions. A raised bed will have better soil, be easier to tend and maintain, and protect your plants from pests and weeds. I’ll show you step by step how to build your own garden in a weekend using materials you can find at any hardware store;how to build a raised garden bed,how to build a raised garden bed cheap,how to build a raised garden bed with legs and how to build a raised garden bed with sleepers.

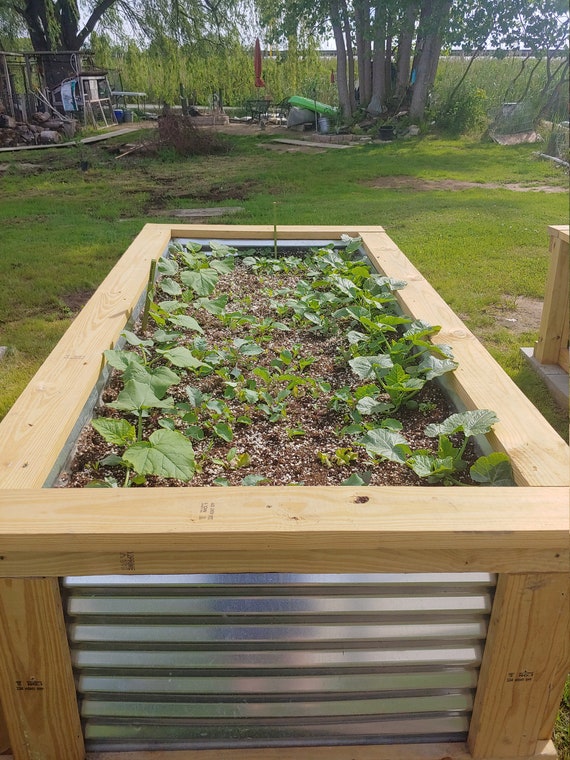
How to build a raised garden bed
Raised garden beds are easy to construct and can be built from a variety of materials. They can be used to grow vegetables, herbs, flowers or even fruit trees. The soil in raised beds warms earlier in the spring which allows for earlier planting. They also retain moisture better than ground level beds, making them more suitable for growing plants that require high amounts of water such as tomatoes or squash.
The first step when building a raised garden bed is deciding what type of material you want to use for the frame. Most people choose wood because it looks nice and lasts longer than other types of materials. You can buy pressure treated lumber from your local home improvement store or use untreated lumber from your local lumberyard if you want to save money but make sure that it will not rot over time if it is left out in the weather or covered with mulch or straw. If you plan on building a large garden then make sure the wood is thick enough so that it will not split when it gets wet or when you hammer nails into it while building your frames.
When choosing lumber there are two options: standard size (not oversized) or precut framing lumber (oversized). Standard size boards are usually.

how to build a raised garden bed cheap
Build a raised garden bed cheap with these tips. A simple DIY project can save you money, improve your soil and let you grow more plants.
A raised garden bed is an easy way to improve your soil and grow more plants in a small space. It’s also a great way to keep your children engaged in the process of gardening, which is both educational and fun! Here are some tips on how to build a raised garden bed that won’t break the bank:
Make sure the soil is prepared properly before planting. The best way to do this is by digging in compost or manure before planting anything else. You can also add some topsoil if needed, but make sure it’s free of weeds so they don’t come back later on down the line.
Choose plants that are appropriate for your climate zone and only buy what you need at first – don’t overstock your beds! This will help prevent overcrowding, which results in poor growth and less yield overall from each plant.
If possible, add some shade-tolerant plants such as herbs or berry bushes along with some taller ones like tomatoes or corn.
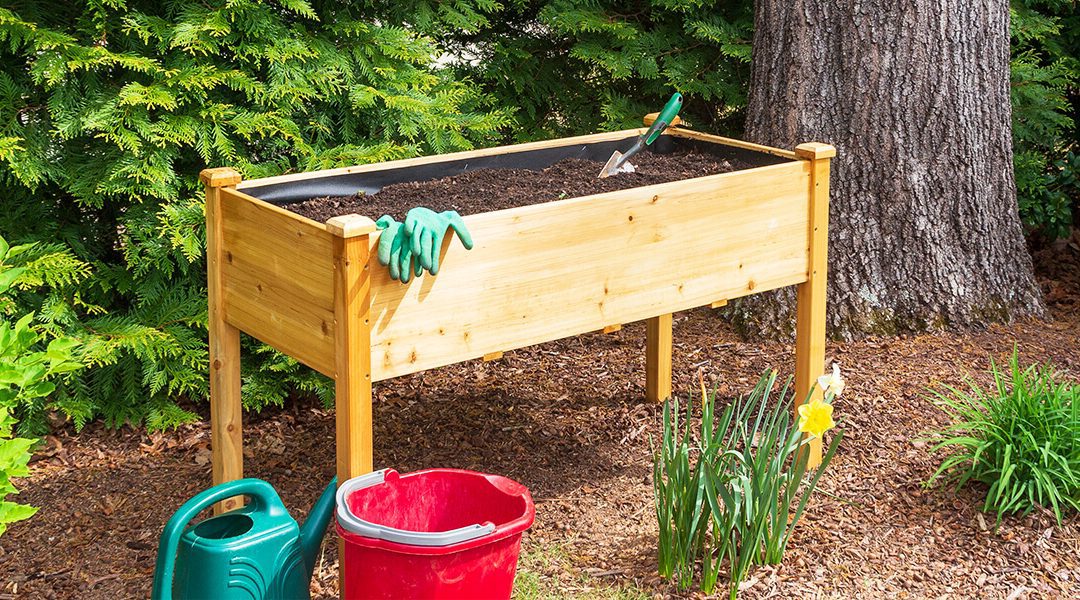
how to build a raised garden bed with legs
Raised garden beds are a great way to add more growing space to your yard. They’re also a great way to get your hands dirty and get into gardening, if you haven’t done it before. If you’re thinking of starting a raised bed garden, consider these ideas:
What type of soil do you have?
If the soil is heavy clay or too rocky and hard, making a raised bed can be helpful. Raised beds are easier to plant and take less effort to maintain. You can also place them on top of existing grassy areas, which makes them ideal for urban spaces where there isn’t much room for large gardens.
How will you level out the area?
If you have an uneven surface, it’s important that your bed is level so that water drains evenly from the beds at all times during the year. This will prevent waterlogged soil and encourage healthy root growth as well as better drainage through the entire growing season.
how to build a raised garden bed with sleepers
Raised garden beds are great for growing vegetables, but they can be expensive to buy. If you’re looking to save money, or if you just want a project that will give you some hands-on knowledge of home construction and landscaping, you might consider building your own raised garden bed. You can build a raised garden bed with wood sleepers or railroad ties, or even with bricks or stones.
A sleeper is a piece of railway track that has been removed from service. A sleeper is usually made of concrete and steel and has holes for the rails to be inserted into. Sleepers are often used as the foundation for raised garden beds because they are sturdy and inexpensive to purchase. They come in various sizes so you can find one that is perfect for your needs.
Railroad ties can also be used in place of sleepers in order to make a raised garden bed. These are also called crossties and they are often used as fencing material as well because they are easy to cut down into smaller pieces if necessary. The only downside to using railroad ties is that they aren’t quite as sturdy as sleepers when placed directly onto the ground.
1. Choose a site for your raised bed.
2. Lay out the perimeter of your bed about 2 feet from your house or fence, and mark it with stakes or string. This will help you to visualize how large your bed will be when it’s completed.
3. Measure and mark out the width of your timber sleepers at whatever length you’d like them to be (usually 3′ or 4′). Use a spade to dig holes in which they’ll sit flush with the ground so that they won’t rock back and forth or move when you walk on them.
4. Place the first sleeper in position, making sure that it sits flush with its neighbour as well as with the edge of the future garden bed. Mark where each sleeper needs to go, making sure that there’s space between them for pathways between rows and for watering cans etc., then use a trowel to create holes for the nails that will hold them together tightly enough so that they don’t move around underfoot (this is important if you’re going to walk on them). Once all of your sleepers are in place, check again to make sure there are no gaps between them.