Building a raised garden bed with sleepers is one of the most rewarding DIY (do-it-yourself) projects you can undertake. I remember the time I did it. It was just before planting season. The days were getting warmer and it was time to get my hands dirty. Raised garden beds are not only great for your physical health and work up a good sweat in the process, they also allow you to create a more fertile growing area.
Raised garden beds are an attractive solution to Melbourne’s lack of space, with the benefits they reap in terms of health and convenience. However, they’re also notoriously time-consuming to build correctly — and therefore costly.

How to build a raised garden bed with sleepers
Raised garden beds are a great way to grow vegetables and herbs. They’re also a great way to use your yard for more than just lawn. Raised beds can be built in a variety of ways; this article focuses on building them with sleepers, or railway ties.
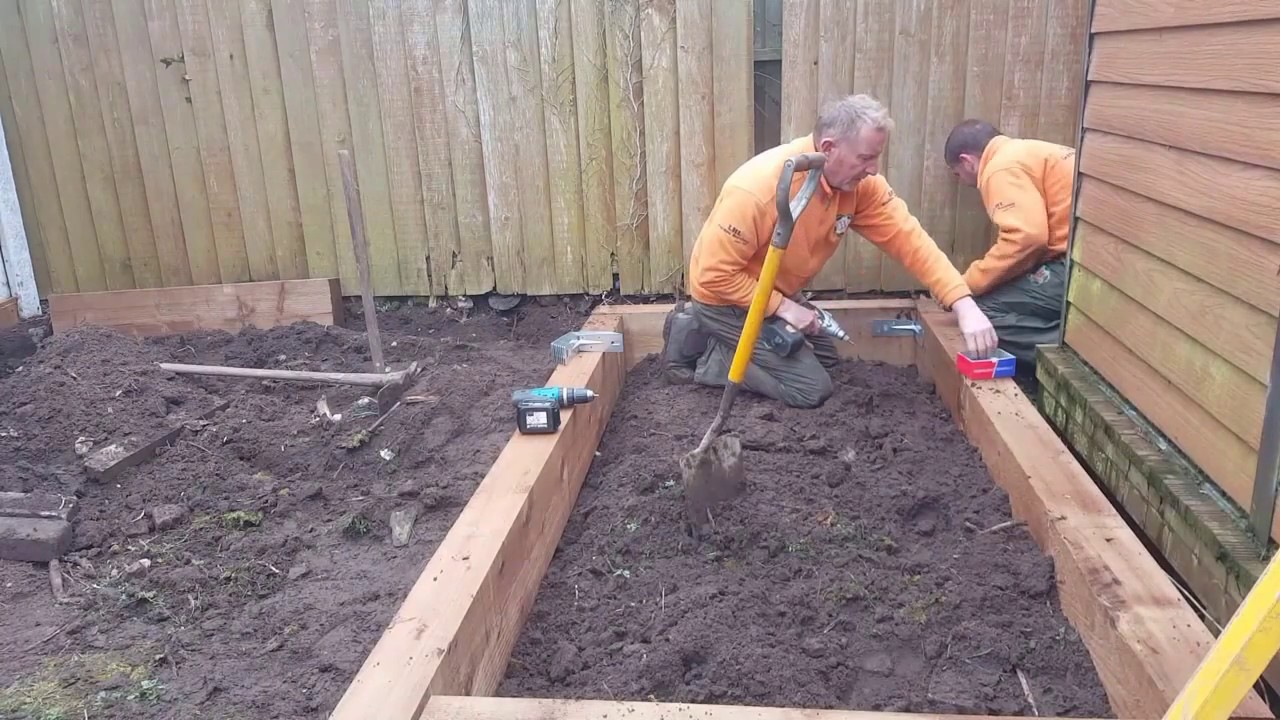
The first step is to decide what size you want your raised bed to be. The standard size is 1m by 1m (3′ x 3′), but it can be any size you like. Next, measure the distance between each sleeper and mark out the area where the bed will go on top of the sleepers. If you’re building your raised bed on an existing lawn, make sure there’s enough room between each sleeper so that you can walk around it comfortably when it’s finished.
Next, remove all sod from inside the marked area using a spade or sod cutter until you reach bare soil. If there are any roots remaining in the ground after removing the sod, cut them off as well using pruning shears or loppers before laying down your first layer of sleepers.
You’ll need at least one layer of sleepers for every metre in height that your raised bed will be (e.g., if you want a 2-metre high.
how to build a raised garden bed with sleepers on a slope
A raised garden bed is a great way to grow your own food. It’s also an easy and economical way to add colour and character to your yard. If you have children or pets, this can be a great solution for keeping them safe from lawn chemicals.
When building a garden bed, it is important to choose the right materials for the job. There are many ways to build raised garden beds, and what works for one person may not work for another. Here are some tips on how to build a raised garden bed using sleepers:
Choose your sleepers carefully
The first step in building a raised garden bed is choosing which type of sleeper you want to use. Sleepers come in many different shapes and sizes, so look around before making your choice! You can usually buy them from hardware stores or plumbing supply shops. If you live in an area prone to flooding, make sure that you buy sleepers that are designed for use in these conditions (see Resources).
How to build a raised garden bed with sleepers
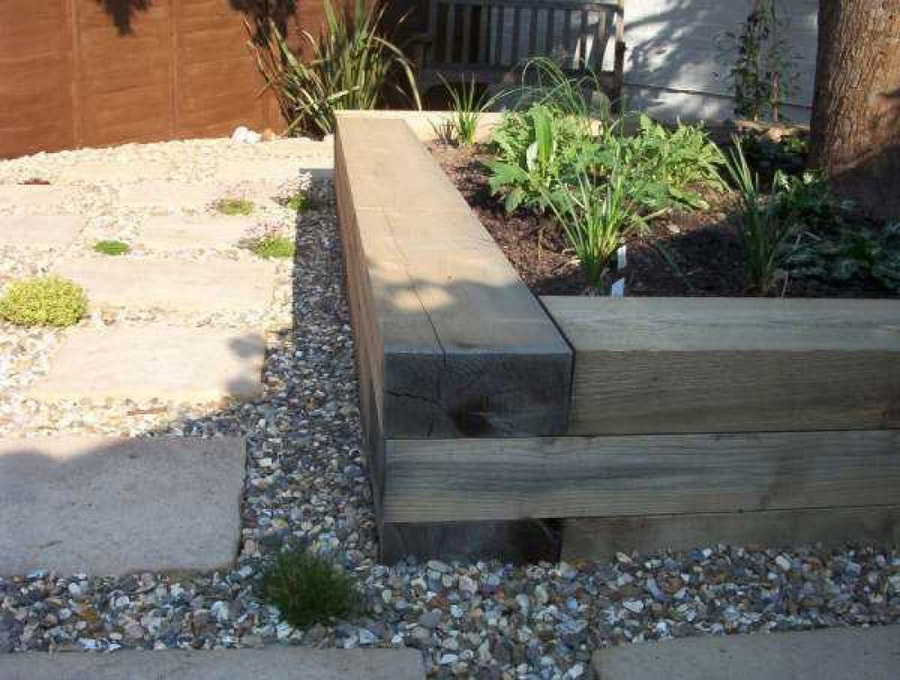
A raised garden bed is a great way to grow vegetables and flowers, but it can be tricky to build on sloping ground. Here are some tips for doing it yourself:
1. Lay out the footprint of the bed on the ground and mark the corners with string or pegs. Use stakes to hold down the strings and make sure they’re level.
2. Use a spirit level to check that all sides of your raised garden bed are at right angles to each other and make any adjustments needed before digging in.
3. Dig out an area slightly larger than your footprint so you have plenty of room for planting and pathways around it. If you’re building a permanent structure, dig down below frost level so it will be strong enough to withstand winter weather conditions (approximately 300mm). If you’re planning on making your raised garden bed movable, then dig down just deep enough so you can move it without damaging any roots underneath it (approximately 150mm).
4. Lay sleepers across the top of each corner post and secure them tightly with screws or nails from both sides so they stay in place during construction (if using wooden

how to build a raised garden bed with sleepers bunnings
When you’re ready to build your raised garden bed, there are a few steps you’ll need to take before you can get started. First and foremost, measure the area where you want to build the bed. You may need to adjust the size of your bed if you have limited space or don’t have enough wood for larger sizes.
Next, decide what kind of material you’d like your raised garden bed made out of. There are many different options available, including cedar and pressure-treated lumber. Cedar is naturally resistant to rot and insect damage, while pressure-treated lumber is treated with chemicals that help prevent rot and insect damage.
If you choose pressure-treated lumber for your project, be aware that it will require additional maintenance once installed because it won’t last as long as cedar or other woods that aren’t treated with chemicals. The chemicals used in treatment can leach into surrounding soil if left untreated after installation; this means that regular maintenance will be required until all chemical residue has been washed away.
A raised garden bed is a great way to grow your veggies and flowers. They’re easy to build, and you can make them as big or as small as you like.
The best thing about raised beds is that they’re a lot easier on your back. You don’t have to bend over to tend the plants, and you can walk right up next to them without having to worry about stepping on them.
If you want to build your own raised garden beds, here’s how:
Start by choosing a site where they will get plenty of sun exposure. This will give your plants the most energy they need to grow strong and healthy!
Next you need some materials. You can use any kind of wood for this project – cedar or pine are good choices if you want it to look nice, but cheaper woods like pine are fine if all you want is something functional. Don’t forget the nails and screws! You’ll also need some soil – preferably something light like potting soil so it doesn’t weigh down your raised bed too much.