How to build a pantry shelf may not be a read that comes to mind when you first think about blogs. However, there are blog topics that are normally boring, that can be made very interesting with a well-written blog post. That’s what I want to show you how to do.
In this article, we are going to look at some of the most attractive pantry shelves currently available on the market. This way, you’ll be able to get inspired and make your house look a lot more attractive than it would otherwise.
How to build a pantry shelf
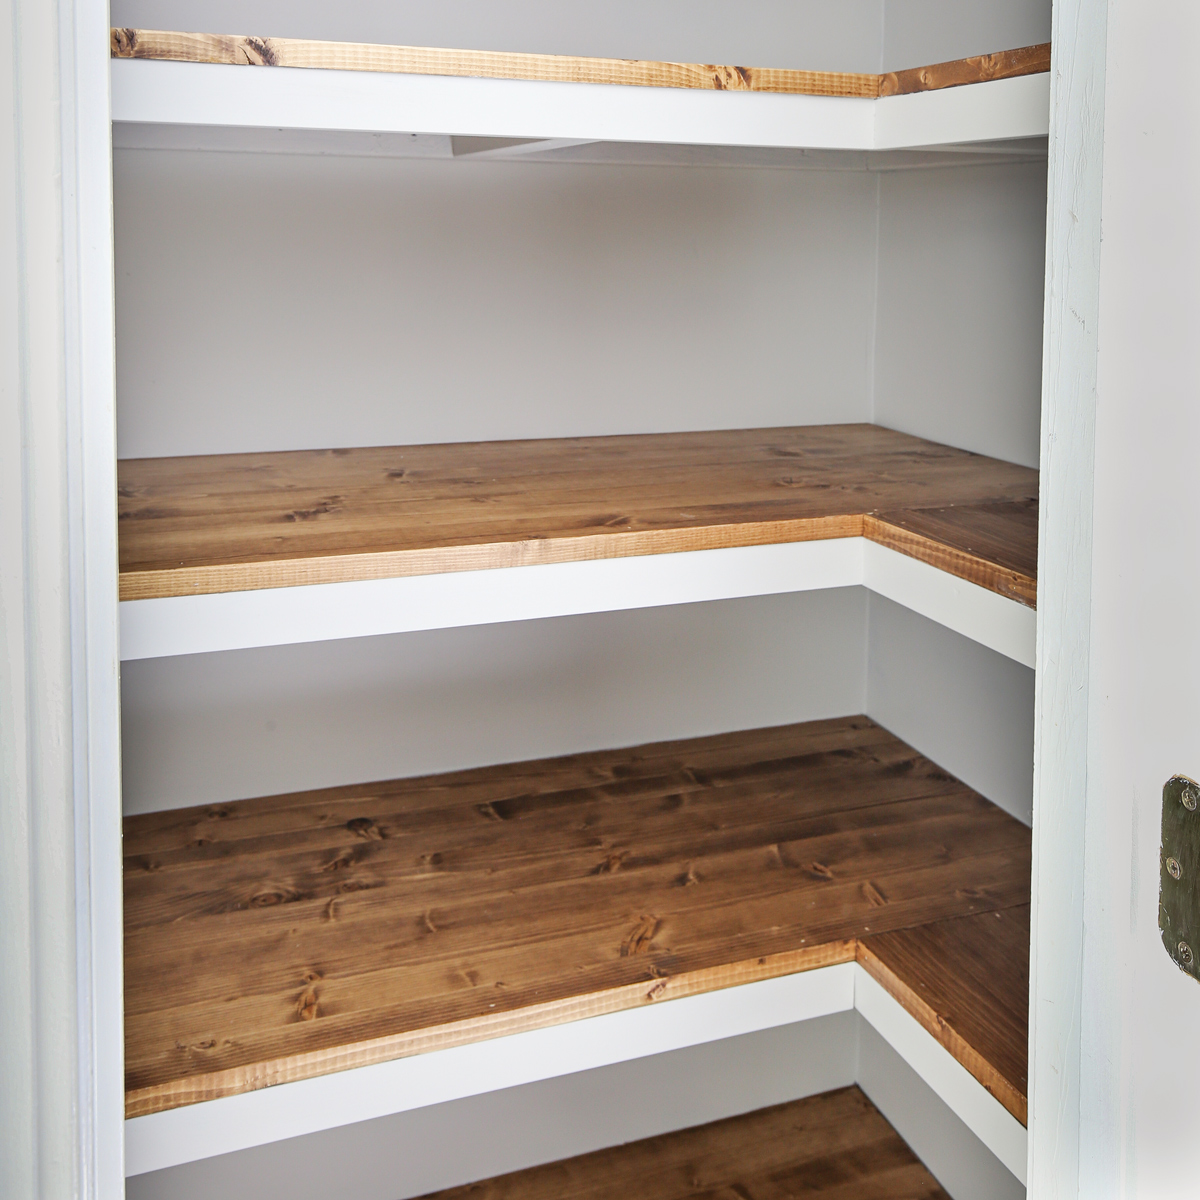
Pantry shelving systems are great for creating storage space in any room of your home. They can be used to store anything from food to clothes, but they’re also great for hiding things you don’t want in plain sight. Here are some tips and tricks on how to build your own pantry shelving system, from easy DIY projects all the way up to professional-level installations.
If you’re looking to add some extra storage space to your home, consider building a pantry shelf. A DIY pantry shelf is a great way to store cans, boxes and other items in an organized and efficient manner. This can be especially helpful if you live in a smaller space or want to make the most of your limited kitchen real estate.
Most people decide to build their own pantry shelves after realizing that it’s cheaper than buying them from a store. You might also want to consider making your own if you want something unique that fits in with your decor better than anything you’ll find at the local hardware store.
If you’re ready to tackle this project yourself, here’s how:
Measure the wall where you want to put the shelves. Make sure there is enough space between studs so that they are secure and won’t fall down over time.
Cut wood pieces into the right sizes for each shelf using a circular saw or table saw (if available). If not, use a hand saw instead. All wood pieces should fit snugly together so they don’t slide around when stacked against each other.
Drill pilot holes through each piece of wood where screws will go into studs underneath them (if available).
If you’re looking to add some extra storage space to your kitchen, a pantry shelf can be the perfect solution. These shelves come in many shapes and sizes and can be made from a variety of materials.
If you’re a do-it-yourselfer, building your own pantry shelves can be a fun and rewarding project.
Here are some tips on how to build pantry shelves:
Measure the space where you want to install the pantry shelf. This will help determine what size shelf you’ll need to purchase, as well as how many shelves you’ll need for your particular space.
Choose the type of material for your pantry shelf. Wood is an excellent choice because it’s durable, but if you’d like something with more color options or are just not interested in cutting wood at all, look into PVC or acrylic plastic sheets.
Build frames to hold up your new pantry shelf using 2x4s or 2x6s as needed depending on how wide you want your shelf to be (typically 12 inches). Make sure that whatever frame materials you choose are thick enough so that they won’t bend when loaded with heavy items like canned goods or other groceries. You can also make use of reclaimed wood if
Building your own pantry shelves is a great way to save money and add storage to your home. These shelves can be built with basic tools and materials, so you’ll be able to get the job done in no time.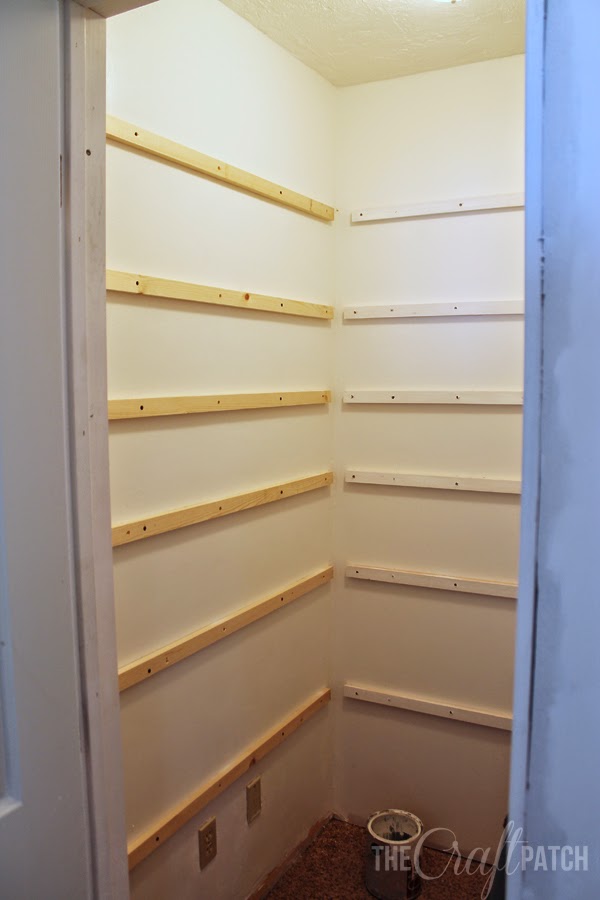
To build pantry shelves, gather the following materials:
Plywood sheets (2) — 1/8-inch thick, at least two feet wide and three feet tall
Corner braces (2) — 2 x 4 inches by 6 feet long
Finish nails (1 box)
In this article we will show you how to make a pantry shelf with a built in door. This project is simple and easy to do, and it can be done with just a few tools. We will also share some tips on how to build pantry shelves.
Materials Needed:
– 2x4s for the frame (4).
– 1x4s for the shelves (4).
– Wood glue.
– Screws 3″ (6).
– Wood stain or paint color of your choice.