Oven building may seem like a complicated and daunting task, but it is a very simple process. Building an oven is fun, cheap and easy to do.
I have been looking at building a brick oven to either build into a brick barbecue pit or just on a stand, and after reading articles and forum postings I decided to create my own article on the topic,how to build a mud oven how to build a clay oven for bread and try to help others understand some of the issues they might find while trying to source local materials.
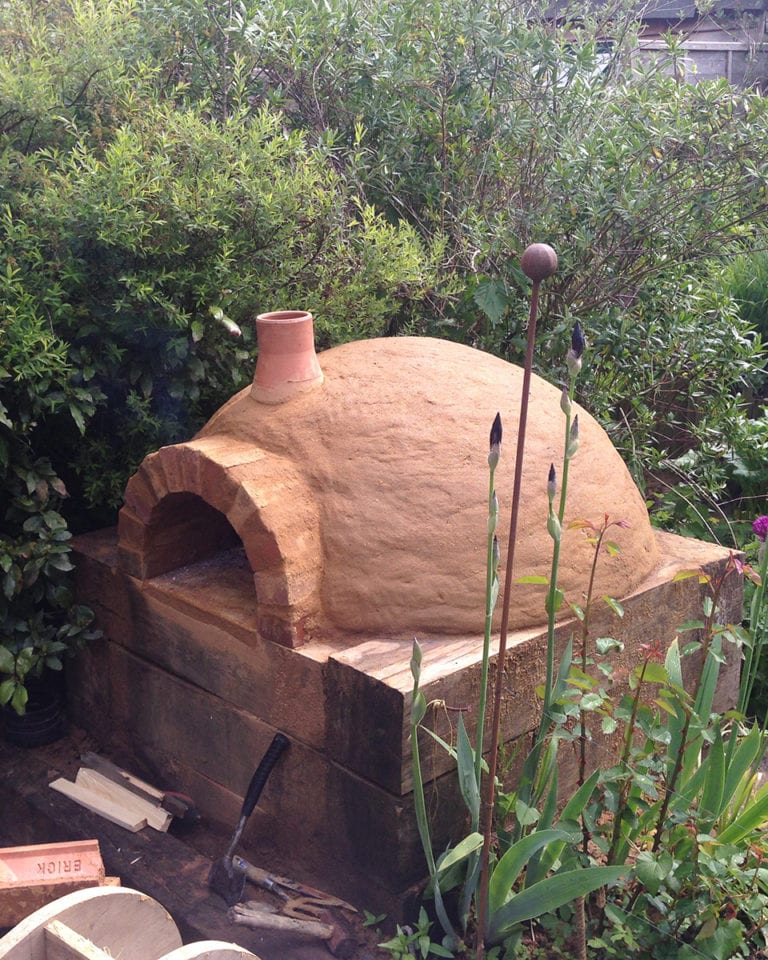
How to build a oven
This is a great way to build your own oven in your backyard. It will give you everything you need to know about building a mud oven, including how to build a clay oven for bread, pizza and more!
Ovens are great for cooking food, but they also have many other uses as well. If you want to build your own oven, the following step by step guide will help you make the most out of this project.
Step 1:
This is the most important step in building an oven. You need to find out how much space you have available for the project. The size of your oven will depend on how much space you have available in your yard or garden. You should also consider how much time it would take to clean up after using an outdoor oven as opposed to using an indoor one.
Step 2:
Make sure that there are no obstructions near where you want to build your outdoor oven so that there is easy access to it whenever necessary. You should also make sure that there are no trees or bushes nearby who might catch fire when using your new outdoor cooker!
Step 3:
Decide what type of materials you want to use when constructing the walls of your new outdoor cooker – bricks, concrete blocks or
A mud oven is a simple, non-electric cooking device that can be built using natural materials. The process of making a mud oven is very basic, but the finished product will provide you with years of cooking enjoyment.
Step 1: Find a good location for your oven. A dry spot is best, but if you are building it near water, make sure there are no animals in the area that could get into the water and drown. Step 2: Dig out a pit for your oven. Make it about 2 feet deep and 4 feet wide, with sloping sides. It should be large enough to accommodate the fire and your bread or whatever else you intend to cook in it. Step 3: Line the bottom of the pit with rocks to keep it from becoming too soft or collapsing when you build your fire inside it. Step 4: Build a small fire inside your pit on top of the rocks; let it burn down until only coals remain. Then cover these coals with ashes or sand so they will not flare up when you add more fuel later on during cooking time. Step 5: Shape some clay into bricks; then stack them one on top of another until they reach all four walls of your pit (you may need
You can build a clay oven in your backyard. It’s easier than you think.
A simple clay oven is a great addition to any backyard, patio or deck. A properly built mud oven can produce some of the best bread you’ve ever tasted and it’s easy to do.
In this article I’ll discuss how to build a mud oven and what tools are required. If you’re looking for more information on baking with a wood fired oven, check out my article “Baking Bread with a Wood Fired Oven”.
What You Need To Build A Mud Oven
Oven Construction – The first thing you need is an idea of how big your mud oven will be so that you can construct it properly. This means determining how much space you have available for it and what type of shape will work best for your needs (round, square or rectangular). The best way to do this is by measuring out the area where you want to place the oven and deciding what shape would fit best within that area. For example if you have room for an 18 inch round pizza stone then make sure that is what size your oven will be as well. If not then consider something else such as a square shape where two 18 inch round pizza stones would fit perfectly together side by
How to build a mud oven,
Building a basic hearth oven is not a difficult project, but it does take some time. If you want to make pizza or bread, the oven will be worth the effort. The best way to build an oven is with help from someone who’s done it before and knows what they’re doing. But if you want to learn how to build one for yourself, here are some tips:
Find out what materials are available in your area. You’ll need clay, sand and rocks for building materials. You may also need tools such as shovels and rakes.
Decide how big you want your oven to be. Ovens can range anywhere from 3 feet by 3 feet up to 10 feet by 10 feet or larger depending on how many people you expect to feed and how much time you have on your hands!
Start by building a form using rocks or bricks that will hold up the sides of your oven. This form should be about three feet tall so that when it gets filled with dirt it will rise at least another foot above ground level.
A mud oven is a wonderful addition to any backyard. They are easy to build and can be used for cooking, baking, and even heating water.
A basic mud oven can be made with just a few materials, but there are some things to consider before you get started. The first thing is that the earth will have to be dug out in order to create the walls of your oven. This can be done by hand or using a shovel, but it is important not to damage the roots of any nearby plants or trees. Once you have dug out your hole, place some firebricks at the bottom and cover them with clay.
Next, add more bricks around the edge of the hole and cover them with more clay until they are completely covered and sealed inside the wall of your oven. You should also add a layer of sand on top of all of these bricks so that when you bake anything in your oven it will not stick to them or leave behind any marks on their surface.
Finally, cover everything up with dirt again (but make sure there is still some sand showing) and put some stones around it so that it looks like a stone wall instead of an earthen one!