Building a workbench is a great way to get your garage organized and make it more functional. It’s also an opportunity to learn some valuable carpentry skills.
This blog post will cover all the steps in building a garage workbench, from start to finish. You’ll learn how to select the right wood, cut it into pieces, assemble those pieces into one piece of furniture, sand it down smooth, stain or paint it to match your decor, and add hardware to make sure your bench stays together over time. If you’re looking for tips on how to build a garage workbench or just want some inspiration for your own project, this blog post can help!
The garage workbench is a must-have tool in any garage. It provides a sturdy, how to build a solid workbench
workbench for garage durable surface that can be used for work or play, and it can also be customized to fit your specific needs and preferences. If you’re looking for inspiration, check out our guide to building your own garage workbench!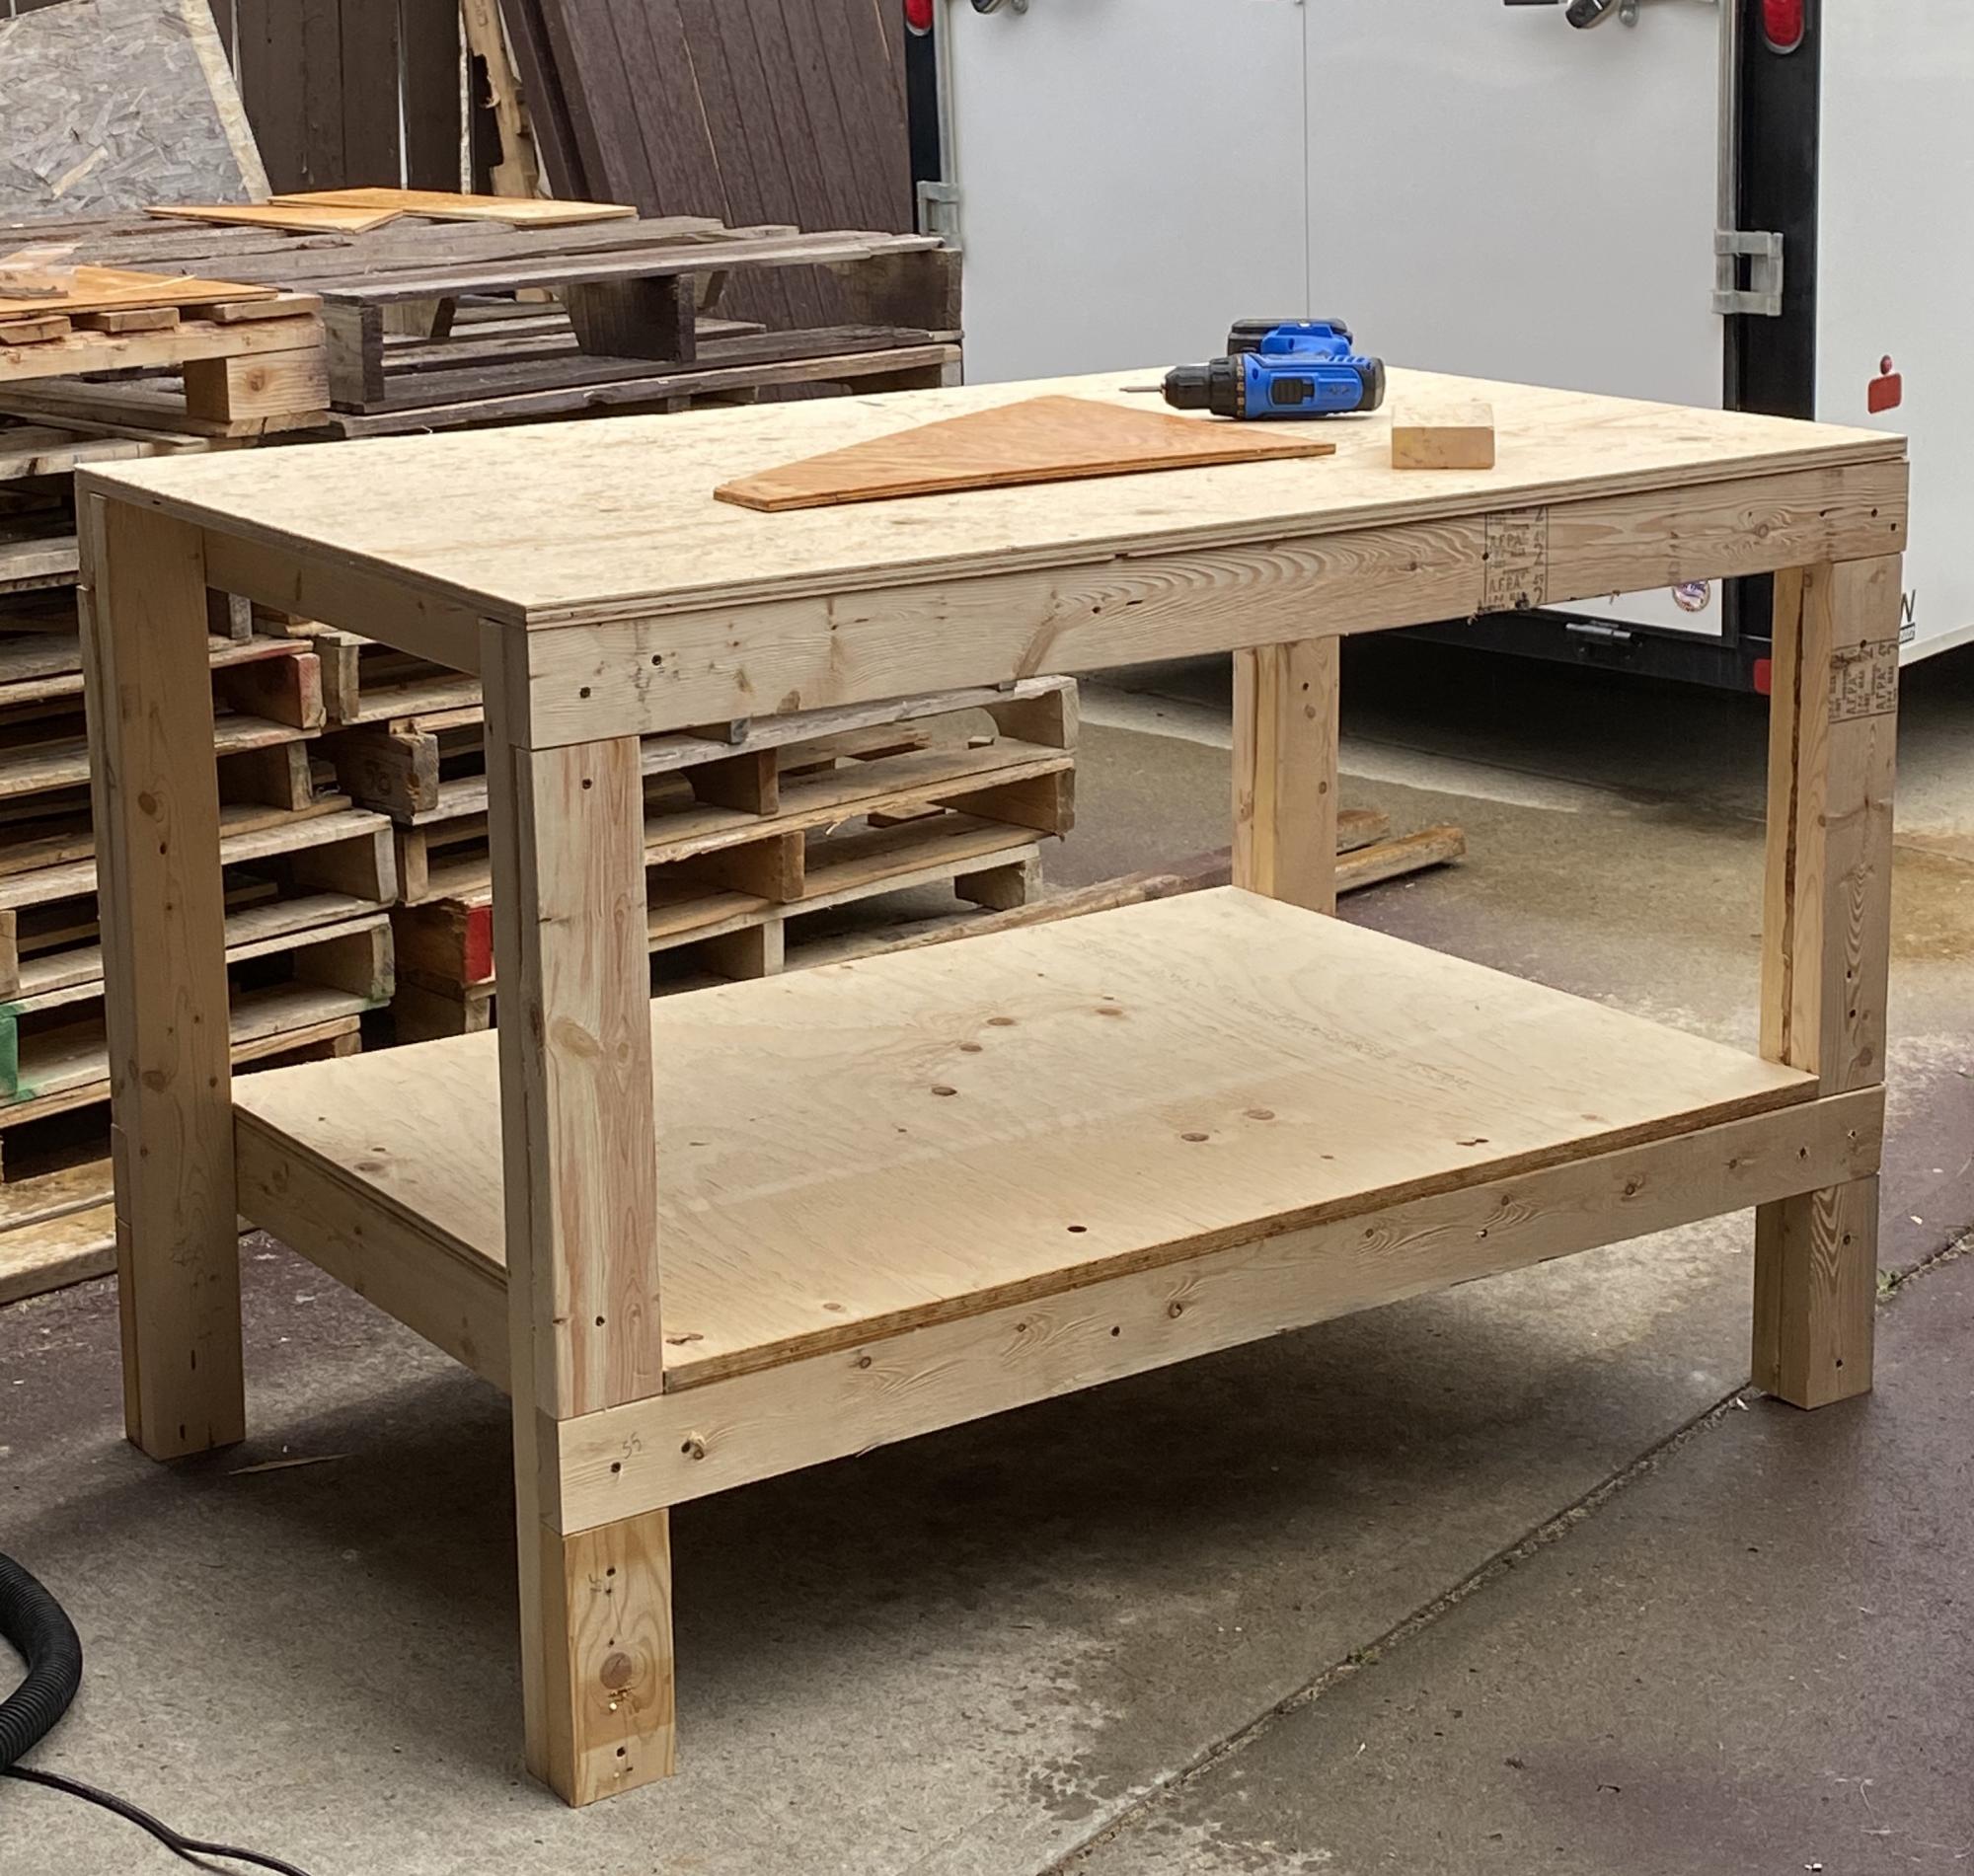
How to build a garage workbench
If you’re looking for a solid workbench for your garage, here’s how to build one.
First, measure out the dimensions of the space you want to fill with your new workbench. Make sure that it fits in the space you’ve selected and that there is enough room around it for your tools.
Next, decide whether or not you want a benchtop vice. You can choose between an end vice and a middle vice. Both have their advantages: an end vice is smaller than a middle vice but can be used on both sides of the bench; a middle vice is larger but only works on one side of the bench at a time.
Once you’ve decided which kind of vice will work best for your needs, mark out where it should go on your workbench. Make sure there is enough room under it so that if someone leans against it while working they won’t hit their head on anything underneath it!
Now take all those measurements and start measuring out the length of lumber needed for each piece of your bench frame: legs, supports underneath them (called cross-braces), braces between legs (called stretchers), etc. Once
Building a workbench is one of the easiest and most rewarding DIY projects you can do. It’s not just useful, but it will look great in your garage.
If you are looking to build a solid workbench for your garage, this guide will show you how to do it. The best part is that it doesn’t require any special skills or tools. In fact, if you have a few basic tools and some woodworking experience, then you can easily build a workbench for your garage.
If you want to build a workbench for your garage, you need to do a few things.
First, you need to decide what size it will be. You don’t want it too big or too small; you want it just right. The best way to do this is to think about how much space you have in your garage, and how much space the bench will take up when you’re working on it.
Second, measure out where on the wall or floor of your garage you want to put the bench. Draw a rectangle that’s at least two feet wider than whatever length of wood you’re using as legs, and at least four inches longer than whatever length of wood you’re using as seat boards (or another piece of wood that will sit on top). If the walls are uneven or sloped, adjust accordingly—you don’t want your bench to rock back and forth when someone sits down!
Thirdly, cut all of your pieces according to size and shape with power tools if possible—it will save time! Make sure all edges are smooth before taking them out into your garage or building site; otherwise they may splinter later on during use. And finally: enjoy!
1. Determine the size of your workbench
The first step is to figure out how much space you have in your garage, and what kind of work you plan to do on it. You may want to include a workbench in your garage’s design when you build it or set it up for the first time, but if not, you can always add one later.
2. Choose materials for your workbench
You’ll need at least two pieces of wood for your workbench: one board that will form the top and another that will form the base. You can use any type of wood that’s available—pine is cheap but won’t last as long as oak or maple; however, plywood is also an option if you want a sturdier surface without having to invest in solid lumber.
If you don’t have enough room for a full-size workbench and want something smaller, consider building a foldable model instead; this might be easier to store when not in use since it takes up less space than traditional models do! If possible though, consider adding some extra storage space underneath so that items like tools aren’t just sitting around during those times when they’re not being used.
1. Use a framing square to make sure your 2x4s are perfectly square.
2. Screw the 2x4s together using two 3-inch deck screws per connection. For extra strength, space the joists at 24 inches on center.
3. Cut the plywood sheet into two pieces that are 28 inches wide by 96 inches long each (you can use a circular saw), and then screw them to the top of the frame using 3-inch deck screws spaced 12 inches apart. You might need to countersink some or all of your screws so they don’t stick up above the surface of your workbench later on—just remember to take that into account when you’re measuring for materials!
4. Paint your new workbench with two coats of primer and one coat of paint (or stain if you prefer).
Building a workbench for your garage is a great way to make sure you have a sturdy surface to work from. With the right materials and some basic DIY skills, you can create a workbench that’s as comfortable and reliable as it is attractive. Here are some tips for creating your own workbench.
Materials
The first thing to consider when creating your own workbench is the materials you’ll need. You’ll want to make sure that you’re using lumber that’s strong enough to support whatever weight is placed on top of it, but also light enough so that it won’t be too heavy for you or any guests who may use it. Joists are often used for this purpose because they’re strong enough to support heavy loads while also being relatively lightweight in comparison with other types of wood such as boards or planks.
It’s also important to consider how many people will be using the bench at any given time and what kinds of projects they’ll be doing on it so that you can select materials accordingly (such as whether they should be painted or stained). If there are multiple people who will regularly use the bench at once, then consider adding extra supports under each end so that no one gets hurt if someone accidentally stands on one side without realizing there isn’t any support
It’s never too late to start building a workbench that will hold up your garage for years to come. These tips will help you build a sturdy workbench that will last for years to come.
A workbench is a must-have for any garage. It’s where you can make repairs, build projects, and do all the other things that need to get done when you’re working in your garage. But if you’ve never built one before, it can be intimidating.
Here are some tips to help you build a solid workbench:
-Make sure the bench is wide enough. You’ll want it to be at least 2 feet by 4 feet. If it’s too small, there will be less room for tools and materials, and you’ll have trouble getting things done on such a small surface area.
-Use sturdy materials like hardwood or even better, sheet metal. If you use weaker materials like plywood or particle board, they could warp or rot over time causing the entire structure to become unstable and unsafe for use in your garage.
-Make sure there are no gaps between each piece of wood so that moisture cannot get inside and cause damage over time; use glue or screws to secure them together so nothing moves around during use which could cause injuries from falling objects such as saw blades etc…
A workbench is a very useful tool for a garage. It can be used to complete many tasks, including hobbies, repairs, and other projects. Workbenches are available in many different sizes and styles, but they all share certain features that make them useful in the garage.
A good workbench must be strong enough to withstand heavy use and abuse. The surface of the bench should be made of wood or metal so it can withstand repeated hammer blows without damaging the bench’s integrity. A good workbench also has legs that are attached firmly to the floor or wall so you don’t have to worry about your bench falling over if you lean too hard on it while working on a project.
If you want your workbench to last for years then choose quality materials for construction such as solid wood instead of particle board which is less durable than natural materials like oak or pine boards because they tend not hold up well over time due to exposure from moisture from rainwater getting inside through cracks around windows or doors during storms when water gets inside causing damage like rot or mildew growth due to moisture buildup around windows etc, which causes them rusting out from
Step 1:
Before you begin building your workbench, you need to have the proper tools and supplies. You will need a saw, hammer, screwdriver and nails, wood glue and some wood boards. You need to make sure that the wood boards are at least 2 inches thick so that it does not break easily under pressure. The wood boards should also be made out of strong materials such as oak or pine for added durability.
Step 2:
The next step is to lay down the flooring for your workbench so that you can measure how much space you need to cut out for each piece of wood. Use a pencil to mark where each piece will go so that there is no mistake when placing them into place on top of one another later on down the road when you start putting everything together at once instead just one piece at a time like now because then everything might not fit properly anymore if not done right first time around which could cause problems later down the road with any mistakes made earlier then corrected later on down further into construction process too late now since already