Rain is coming and you need to put a new roof on your cabin. If the cabin has a gabled roof, it’s an easy task. However, I’ll wager that it’s not your first rodeo and you already know that a gable roof is only one style of many different kinds of roofs out there.
Have you ever had to frame a roof, how to frame a roof overhang, how to build a pitched roof frame, how to frame a gable roof If you have, I’m sure you’ve discovered that building a frame roof can be difficult. Frame roofs have stiffeners which are very important for the strength of the roof. How do you build a frame roof properly? What are the right steps you need to take? Are there any tricks that make this easier?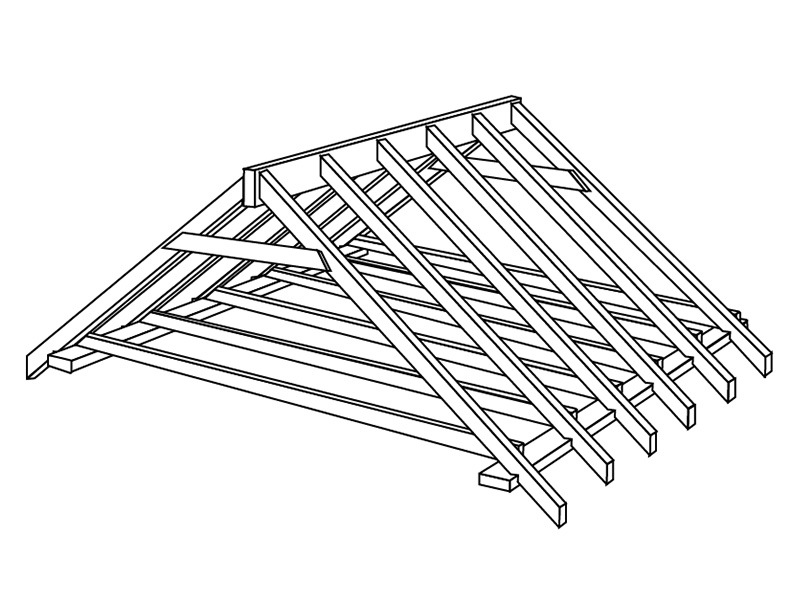
how to build a frame roof
Building a frame-roof is an easy DIY project that anyone can do. You can even buy pre-cut framing lumber and make it look like you hired a pro!
In this article, we’ll show you how to build a frame roof overhang, how to frame a pitched roof, and how to frame a gable roof.
Frame Roof Overhangs
The simplest type of overhang is the box gutter system. These are installed on homes with vinyl siding or brick veneer and have about 3-4 inches of overhang from the wall line. The box gutter system is made up of several components: steel brackets (usually galvanized), aluminum fascia boards, and gutter hangers. The brackets attach to the bottom edge of the fascia board (about 1 inch below the top), spaced about 8 inches apart vertically. The brackets hold the fascia board at an angle so that water drains off into the gutter hangers below them.
A roof overhang is a good way to add architectural interest to your home. The overhang can be as simple as adding an awning above the front door or it can be more elaborate. Before you begin framing, you need to decide on the size of your roof overhang. You also need to know where it should end on each side of the house so that there is no interference with windows or doors.
The first step in building a roof overhang is attaching joists and rafters to your existing deck or porch. Make sure that the rafters are spaced evenly and all have proper support from underneath, such as posts or beams. Then use nails or screws to attach plywood sheathing to both sides of the rafters. If you want a decorative edge on your overhang, add decorative trim boards along the top edges of all exposed parts of the roof structure.
The next step is installing siding on both sides of your new roof structure. This will cover up any gaps between pieces and give it a finished look. You may want to install gutters along this new section of siding if water runoff will be an issue in bad weather conditions (such as during storms).
A roof overhang is a nice way to provide added protection for windows and doorways. If you’re building a house or other structure, it’s important to frame the roof so that it can support the weight of the overhang. There are several different methods of supporting an overhang, including metal brackets and metal posts called knee braces. You can also use wood beams and joists to support an overhang.
Before you begin building a roof overhang, make sure that you have all of the tools and materials necessary to complete the project. These include:
Hammer
Screwdriver
Level
Power drill with bits
Caulk gun
Wood screws (3-inch)
Here are some general steps to follow when framing a roof overhang.
1. Set the rafters along the wall plate and mark the outside edges of each rafter on the plate.
2. Cut the rafter tails to length with a circular saw or saber saw, then cut notches in the ends of them so they’ll fit against the wall plates.
3. Fasten the first rafter in place by driving nails through its top chord into the ceiling joist above it, then repeat this process for all remaining rafters.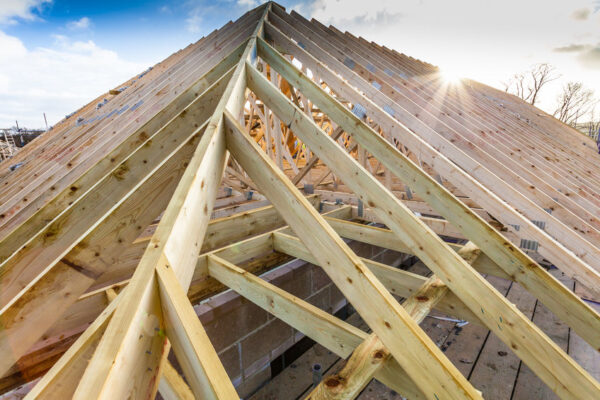
4. Cut two pieces of 2 x 4 lumber to length so that they’re longer than your desired overhang but shorter than your longest rafter tail (the one on top). Attach these boards to each end of your longest rafter tail with nails driven through pilot holes in their ends. This creates a “bearing surface” that prevents sagging at that point when you install these 2 x 4s between pairs of adjoining rafters (see Step 5).
5. Cut a 2 x 4 or 2 x 6 board to length so that it will fit snugly between adjoining sets of rafters
how to frame a gable roof
Gable framing is a common way to frame a gable roof. This type of framing is used in residential and commercial construction. The gable end wall is typically framed with 2x4s or 2x6s, while the rafters are 2x6s or larger. A truss is often installed in the center of the attic to support the weight of the roofing materials.
Trusses are often used as part of a flat roof system, but they can also be used on pitched roofs if they’re designed to carry the load of a sloped surface. Trusses are made from steel or wood and provide solid support for floors, walls and roofs when installed properly by professionals who understand how these systems work.
how to build a pitched roof frame
The easiest way to frame a roof is with a ledger board. The ledger board is the piece of lumber that sits on the ground and supports the bottom edge of the trusses.
The ledger board can be made from just about any kind of wood. If you are using 2″x12″ boards, then you can use an 8′ long piece for your ledger. This will give you plenty of room to attach the joists to it later on in the project.
You’ll need to cut a 45° angle on one end of each truss so that it fits against the side of your house. You’ll also have to cut these angles on each end of each rafter as well so that they fit into place on top of them.
Using this method works great if you are just building one or two gable roofs overhangs and don’t want to do much framing work yourself.