A deck covering is a structure for creating a roof over a deck. Building a deck covering is a very practical home improvement project for many homeowners, as it prevents you from having to build an entirely separate building for an outdoor room. Some advantages of having a covered deck include the following:
Learn how to build a deck cover roof with this step by step guide. This easy to follow, photo illustrated tutorial will show you how to build 3 different styles of decks that can be covered without having to cut into them. Deck covers are a good way to create an attractive floor surface over your existing deck, making it more user friendly especially in rainy weather.

how to build a deck cover
A deck cover is a roof that attaches to an existing deck to provide shade and protection while adding an attractive, finished appearance. A deck roof is usually made of aluminum or vinyl, but you can also make a wood deck cover as well. In this article we’ll show you how to build a deck cover using aluminum flashing. The same instructions apply for building a wooden deck cover, except you will use 1 x 4 planks rather than metal flashing.
Some people prefer to leave the underside of their decks exposed so they can store items beneath it. If that’s the case with your deck, you might want to consider building a shed instead of covering it with a roof.
:max_bytes(150000):strip_icc()/LevEco-5a44b5a8845b340037abe255.jpg)
Measure the length and width of your deck so you can determine how much metal flashing is needed for your project. Metal flashing comes in several different widths, including 18 inches (46 cm), 24 inches (61 cm), 36 inches (91 cm) and 48 inches (121 cm). If your measurements are within one of these widths, then you should be able to find a roll that will work for your project without any adjustments needed. If not, buy two smaller rolls instead of one larger roll so that there isn’t too
Use the best materials.
You can build a deck cover in a weekend, but you don’t want to use the cheapest materials available. That’s because they’ll be prone to rot, mildew and other problems. Use pressure-treated lumber, which is treated with chemicals that resist decay and insects. You can also use cedar or redwood instead of pressure treated wood if you want something even more durable and attractive.
Choose good hardware.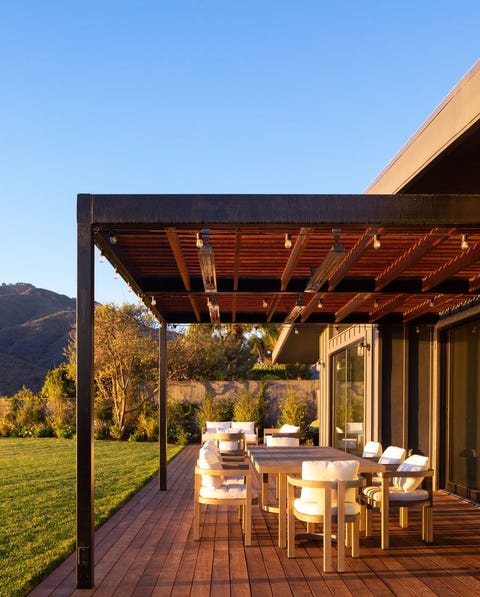
You don’t need to spend a lot on hardware but make sure it’s heavy duty enough for the job at hand. Look for galvanized fasteners that won’t rust when exposed to moisture and wood preservatives that will prevent rot as well as mold and mildew from forming on your new deck cover roof project.
The easiest way to build a deck cover is to use pre-manufactured plans. You can save time, money and effort by purchasing plans that are already drawn up for you. If you want something specific or unique, however, then you may have to draw your own plans before construction begins.
Building a deck cover from scratch means putting together all of the pieces yourself. To do so, you’ll need to know how to read blueprints and use various tools such as saws, hammers and screwdrivers. In addition, if you’re going to be working with wood, it’s important that you understand how each type of wood behaves under stress so that your finished product doesn’t collapse in on itself during high winds or extreme weather conditions.
The first step in drawing up your own plans is choosing which type of roofing material will be used on top of your deck cover. Options include wood shingles or metal panels that are designed specifically for this purpose (such as aluminum). Both materials come in different colors so that you can match them with the rest of your home’s exterior decoration scheme if desired.
If you want to make your deck last longer, it’s a good idea to cover it. If you have a wood or composite deck, the covering will protect it from moisture and insects that can cause damage over time. You don’t have to spend a lot of money on a custom-made cover; here’s how to build one yourself.
Build Deck Roof From Plywood
Step 1: Measure and cut the plywood sheets
Measure the length and width of your deck area. Cut two sheets of plywood that are slightly larger than each dimension. For example, if your deck is 10 feet long by 12 feet wide, cut two sheets of plywood 12 feet by 14 feet.
Step 2: Attach the sheets together
Lay one sheet flat on the ground with its smooth side facing up. Attach it to another sheet using 1-inch screws through predrilled holes in each sheet’s top edge into pilot holes in the bottom edge of the second sheet. Repeat this process until all four sides are joined together as one piece. This will create a rectangular box that covers your entire deck area with enough room around its edges for attaching gutter hangers later on.
Step 3: Attach gutter hangers to box
A deck cover is a great way to protect your deck and extend its life. If your deck has a roof, it’s probably already protected by the home’s structure and weatherproofing. But if it’s an uncovered deck, or if the current covering has worn out over time, you might be wondering what kind of material to use for a new one. There are several options:
Deck Covers: These are made from different materials, including vinyl, synthetic fabrics, wood and aluminum. They’re typically installed over existing decks as an aftermarket product that can be purchased at most home improvement stores or online retailers. The material can be stretched over the frame of the deck or attached to it using clips or Velcro strips.

Deck Enclosures: This type of covering completely encloses an existing deck and creates an indoor environment where people can gather even when it rains or snows outside. Enclosure kits are available through many manufacturers and typically include all the components needed for installation—including walls and doors—as well as hardware like hinges and locks so everything can be bolted together securely.
Building a deck cover is a great way to protect your outdoor living space from the elements. The best way to build a deck cover is to use metal roofing. By using metal, you can create a beautiful and durable structure that will last for years.
The first step is to measure your deck. Make sure that the measurements are precise so that you don’t end up with a cover that’s too small or too large for your deck.
Next, purchase an appropriate amount of metal roofing material. If you’re unsure how much material you need, contact someone at your local home improvement store who can recommend an appropriate size based on the size of your deck and your budget.
Once you have purchased enough metal roofing material and measured out enough wood planks (for attaching the metal roofing), it’s time to start building!
The first step is installing the wooden planks onto each side of your deck railing posts and attaching them securely with nails or screws (depending on what kind of post you have). Make sure that each plank fits snuggly against its neighbor so that there are no gaps between them when you are finished with this step. Also make sure not to leave any nail holes or screw heads visible through
How to build a deck covering:
A deck cover is an easy and affordable way to protect your deck and increase its value.
Step 1: Cut the plywood sheets
Cut 2-by-4 inch furring strips to length, using a circular saw or handsaw. The furring strips will serve as a base for attaching the plywood sheets. You will need two of these pieces per sheet of plywood. Use 3-inch screws to attach them to the plywood. Position them at least 1 inch away from each side of the plywood sheet and leave at least 2 inches between rows of fasteners.
Step 2: Attach the first layer of plywood
Attach the first layer of plywood with 3-inch screws through the top row of predrilled fasteners on each end panel. Make sure that you are not overdriving screws at all times because it can cause excessive splitting in your drywall. Leave about 1/8 inch between each board when installing panels so that they will not protrude beyond the edge of your deck by more than 1/4 inch after installation is complete.
A deck cover can be a great way to protect your deck from the elements. If you are tired of having to clean your deck after every rain, or if you have a wooden deck that is starting to rot, a deck cover will keep it looking new for years.
A deck cover can be built in many different ways, depending on what type of material you want to use and how much money you want to spend. The most basic way is to simply buy an expensive tarp and attach it to your deck with bungee cords or ropes. This will protect your wood from getting wet and rotting, but it will not look very good and may fall apart quickly.
Another option is to build up a frame around the perimeter of your deck and attach the tarp on top of this frame with hinges so that you can open it up when needed (like when it rains). You can also build this frame out of wood if you want something more substantial than plastic tarps.
A third option is to build an actual roof over your entire deck using materials like aluminum or steel sheeting and put a shingle roof on top of that so that water won’t get in through the cracks in between boards (this
Step 1: Get the right materials.
The first step in building a deck cover is to gather the materials you need. This includes wood and metal fasteners, hinges, screws, nails and other hardware. You’ll also need some tools such as hammers and screwdrivers.
Step 2: Measure the area where you want your deck cover to rest.
The measurements should be accurate so that your deck cover fits perfectly over your patio or deck. For example, if you want it to be 4 feet wide by 8 feet long, then you need to measure out 4 feet in each direction from the center point of your patio or deck in order to get an accurate measurement. This will make sure that your deck cover rests evenly on top of everything else without any gaps between it and your patio or deck surface underneath it.
Step 3: Build up supports for the ends of the roof so that they will hold up the weight of all that material on top of them when it rains or snows heavily outside during those months when you don’t want anyone walking on top of them because they are covered by snow or heavy rainfall from clouds above so that water doesn’t get
Building a deck over your existing deck is a great way to extend your living space while adding value to your home. The roofing materials used in this project are the same as those used on any other type of roof, so you can choose what works best for you.
The materials needed include:
A rafter plate (the piece that attaches to the bottom of the deck joists)
16-foot lengths of 2x8s or 2x10s (to frame out the deck cover)
3/8-inch plywood sheets (to cover the top surface)
Cedar shingles or shakes (for the roof)